How to Fix Leakage in Walls: A Practical Guide
Identify, locate, and repair leaks inside walls safely with a practical, step-by-step guide for homeowners and DIYers to prevent mold and water damage.

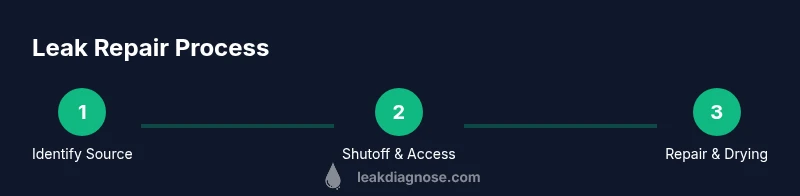
How to fix leakage in walls: identify the hidden source, shut off water safely, access the wall without causing unnecessary damage, repair the pipe or fixture, and seal the area to prevent future moisture. According to Leak Diagnosis, a careful, staged approach reduces mold risk and minimizes interior disruption while protecting your home.
What causes leakage in walls
Water can enter wall cavities from several routes, often long before you notice visible damage on the surface. The most common culprits are hidden plumbing leaks behind sinks, toilets, or laundry lines; loose or corroded fittings; and pipes that rub against studs or nails, creating tiny holes over time. Condensation is another frequent driver, especially in rooms with poor insulation or high humidity. Roof leaks or exterior wall penetrations (windows, siding, vents) can also allow water to travel downward and show up as staining on interior walls. In addition, HVAC condensate lines can drip into wall spaces if they aren’t properly routed or insulated. Understanding the source is essential because the repair approach and materials differ depending on whether the leak is a tube, a joint, a fixture, or a moisture problem in the wall assembly. According to Leak Diagnosis, many wall leaks start as concealed plumbing issues or moisture buildup that gradually penetrates drywall, insulation, and framing, often hiding behind cosmetic finishes until you see visible signs.
Signs of leakage behind walls
Early detection saves time and cost. Look for damp patches on paint, wallpaper, or plaster that don't dry within a day or two. Peeling or bubbling finishes around outlets or baseboards is another red flag, as is soft, crumbling drywall or warped sheetrock. Streaks or water stains on ceilings below can indicate a leak higher up that has traveled through wall cavities. A persistent musty odor is often linked to hidden moisture and potential mold growth. Unexplained mildew, black mold patches, or moldy insulation behind the wall also point to ongoing moisture problems. If you notice an unusual rise in humidity or a sudden drop in indoor air quality, test with a moisture meter. Water can travel along studs or within insulation, so damage may appear away from the actual source. Recognizing these signs early gives you more options for a controlled repair.
Planning and safety before you start
Before you cut into drywall or touch pipes, plan the project and protect everyone in the house. Start by turning off the water supply to the affected circuit and, if possible, the electrical circuit near the area to avoid shock. Wear personal protective equipment: gloves, goggles, and a mask to guard against mold spores and dust. Ventilate the space with fans or by opening doors and windows. If you discover mold growth beyond a small patch or suspect asbestos in an older home, pause and call a professional. Move pets and children away from the work zone. Make a simple plan that identifies access points, tools needed, and a sequence of steps. Keeping the area tidy reduces the risk of accidental damage and speeds up the repair.
Locating the leak behind the wall
Systematic locating is about confirming the path from source to surface. Start with a thorough visual check of visible plumbing, fixtures, and penetrations. Use a moisture meter to compare readings at the suspected wall against nearby dry sections; high readings indicate moisture intrusion. If accessible, an infrared camera or thermal imaging tool can reveal cooler areas where water collects even behind finished surfaces. For better inspection, remove a small section of drywall or an outlet cover to observe the cavity and note where moisture concentrates. Mark all hotspots with tape so you don’t lose track as you proceed. Remember that leaks may be hidden behind cabinets, inside ceiling voids, or within insulation.
Temporary measures to stop active leaks
When a leak is active, the first priority is to reduce damage while you plan the repair. Catch drips with towels or a basin and cover the area with plastic sheeting to minimize secondary damage. If the leak is from a fixture, turn the valve off slowly and reduce flow to avoid flooding the room. Do not use heat, as high temperatures can drive moisture deeper into porous materials. If you can access the source safely, apply a temporary sealant around a small pinhole or use plumber's tape to slow the flow while you prepare a proper repair. These quick actions buy time without risking further damage.
Step-by-step repair approach (overview)
The repair strategy depends on the source and the wall composition. For a pinhole or small crack in copper tubing, you may cut out the damaged section and replace it with the correct fittings using a tubing cutter and solder or compression fittings. For a failed fixture, reseat or replace washers, seals, or the valve. If a wall patch is necessary, remove the damaged drywall, install a replacement patch, and retexture to blend with the surrounding surface. After the repair, recheck all joints for leaks, then proceed to drying. If the leak was extensive, consider replacing sections of insulation and re-sealing the wall assembly to prevent future mold growth. Always verify that the water has fully stopped before finishing the wall.
Drying, sealing, and finishing the wall
A repaired leak is only as good as its drying phase. Use high-volume fans and a dehumidifier to thoroughly evaporate moisture from the wall cavity and surrounding studs. Recheck moisture levels with a meter; allow additional drying time if readings remain elevated. Once dry, apply joint compound to patches, sand smooth, prime, and repaint to restore the wall finish. Reinstall insulation if removed, and ensure any penetrations are sealed with silicone or appropriate caulk to prevent future moisture ingress. Reattach electrical covers, reinstall baseboards and trim, and dispose of contaminated materials properly. Finally, monitor the area for several weeks after completion to ensure the fix holds.
Prevention and maintenance
Preventing leaks from damaging walls requires proactive maintenance. Regularly inspect supply lines and fittings, especially in kitchens and bathrooms, and replace aging fixtures before they fail. Improve wall insulation and use vapor barriers where appropriate to minimize condensation. Ensure proper drainage away from the home exterior and repair exterior cracks promptly to prevent water intrusion. Keep attic or crawlspace insulation dry and well-ventilated. Finally, address any signs of moisture promptly by drying the area and performing small repairs early, which saves time and money in the long run.
When to call a professional
While many wall leaks can be diagnosed and repaired by a capable homeowner, some situations call for a licensed plumber or contractor. If the leak is large, if you encounter persistent mold growth, if you uncover structural damage or suspect asbestos, or if patching would require opening a large portion of the wall, seek professional help. A pro can accurately diagnose hidden issues, perform code-compliant repairs, and ensure proper drying and mold mitigation. If you're unsure about electrical hazards or the wall's structural integrity, stop and hire a pro.
Tools & Materials
- Moisture meter(Prefer a dual-depth meter to test wall studs and padding)
- Infrared camera or thermal imaging tool(Helpful for locating hidden moisture behind finishes)
- Flashlight(Bright, focused light for inspecting cavities)
- Screwdriver set(Flathead and Phillips for outlets and fasteners)
- Utility knife(For drywall scoring and trimming)
- Drywall saw / jab saw(To open wall sections for inspection)
- Drywall patch or replacement drywall(For repairing cut sections)
- Joint compound and drywall tape(To finish patches smoothly)
- Putty knife and sanding block(For applying compound and sanding edges)
- Caulk or silicone sealant(Seal penetrations and joints after repair)
- Caulking gun(Apply sealants neatly)
- Plastic sheeting and drop cloths(Contain work area and protect floors)
- Towels and buckets(Catch drips and keep area clean)
- Dehumidifier and fans(Dry the cavity thoroughly)
- Safety gear: gloves, goggles, mask(Protect against mold, dust, and debris)
- Replacement fittings or pipe (as needed)(Only if you’re repairing plumbing; match pipe size)
Steps
Estimated time: 4-8 hours
- 1
Shut off water and safeguard area
Locate the main shutoff or branch valve for the affected area. Turn it off fully to stop the leak, then open a faucet downstream to relieve pressure. Place towels to catch drips and protect floors, and remove nearby outlets for safer access.
Tip: Take a photo of the shutoff positions for future reference. - 2
Access the wall and protect wiring
Remove the outlet cover or cut a small drywall section to view the pipe or fixture behind the wall. If you see electrical wires, switch off power to that circuit before continuing. Use a flashlight to illuminate the cavity without disturbing wiring.
Tip: Label and store removed materials to ease reassembly. - 3
Dry the area and assess damage
Use towels, a fan, and a dehumidifier to dry the wall cavity. Inspect insulation and drywall for moisture damage; note soft spots or discoloration. Recheck moisture levels with a meter—pile drying time if readings stay elevated.
Tip: Document moisture readings with photos for records. - 4
Locate the leak source
Test suspected joints and fixtures with a flashlight and moisture meter. If needed, remove a larger drywall patch to view the pipe or fitting. Identify whether the issue is a pinhole, joint failure, or fixture seal.
Tip: Check above and around cabinets; leaks often travel before surface damage appears. - 5
Repair or replace the leaking component
For pinholes, replace the affected pipe section or reseal with appropriate fittings. For fixtures, replace washers or valves. If you’re patching drywall, cut clean edges and prepare the patch.
Tip: Always recheck water flow slowly after partial repairs to avoid a flood. - 6
Test the repair and re-dry
Turn water back on gradually and observe joints for drips. If leaks recur, re-tighten fittings or re-apply sealant as needed. Continue drying the cavity until moisture meters read baseline levels.
Tip: Don’t rush—moisture left in the wall invites mold growth. - 7
Patch, finish, and seal the wall
Cut and install drywall patch, apply joint compound, and sand smooth. Prime and paint to match the surrounding wall. Apply sealant around penetrations to prevent future moisture intrusion.
Tip: Contour patch edges for a seamless blend with existing texture. - 8
Restore area and monitor
Reinstall outlets, trim, and baseboards. Clean up work area and observe for several weeks to ensure the fix holds. Schedule a follow-up inspection if any recurring dampness appears.
Tip: Keep an eye on humidity levels during hot months when condensation is common.
Questions & Answers
What are common signs of leakage in walls?
Damp patches, stains, peeling finishes, and musty odors are typical signs. Soft or swollen drywall signals moisture damage, and mold growth indicates ongoing leakage that should be inspected and repaired promptly.
Look for damp spots, stains, and a musty smell. If you notice soft drywall or mold, investigate further.
Can I fix leaks in walls myself, or should I hire a professional?
Simple leaks from fixtures or pinholes in pipes can be repaired by a confident DIYer with proper safety gear. More complex leaks behind walls, large openings, or mold growth should be handled by a licensed plumber or contractor to ensure code compliance and proper drying.
DIY is possible for small issues, but call a pro if the leak is extensive or mold is involved.
What tools will I need to locate a leak behind a wall?
A moisture meter, flashlight, drywall knife, and possibly an infrared camera help locate hidden moisture. Access may require removing a small wall patch or an outlet cover.
Use a moisture meter and flashlight to find moisture; you may need to open a small patch.
How long does it take to fix leakage in walls?
Repair times vary with the leak size and wall type. Plan several hours for a small pinhole plus patching, drying, and finishing; larger repairs may take longer and require multiple visits.
Most repairs take a few hours, plus drying time; larger jobs may require more time.
What should I do if I find mold behind the wall?
Stop work and avoid disturbing the area. If mold is visible, isolate the space, ventilate, and contact a professional mold mitigation service. Do not seal it in or ignore it.
If you see mold, stop and call a professional mold mitigation service.
How can I prevent future leaks from damaging walls?
Inspect and replace aging pipes, insulate walls to reduce condensation, seal exterior penetrations, and ensure proper drainage away from the home. Regular maintenance and prompt repairs reduce long-term damage.
Regularly inspect pipes, insulate, and seal leaks early to prevent wall damage.
Watch Video
Main Points
- Identify and stop the leak safely before patching.
- Drying the cavity is essential to prevent mold.
- Seal and insulate to reduce future condensation.
- Know when to call a professional to avoid risky or code-violating work.