Leak How To Fix: A Practical DIY Home Leak Repair Guide
Learn how to identify, diagnose, and fix common household leaks safely. This step-by-step guide covers faucets, pipes, and appliances, helping homeowners save water and prevent damage with practical, do-it-yourself repair tips.

You will learn how to identify a leak, determine its source, and fix common household leaks safely and effectively. The guide covers basic tools, when to shut off water, how to seal small drips, and steps for more involved repairs. Follow our step-by-step method to save water, reduce damage, and avoid costly service calls.
Understanding Where Leaks Come From
Leaks in homes arise from a mix of aging hardware, installation errors, and changing water pressure. Common culprits include worn washer seals in faucets, loose supply line fittings, corroded copper or PVC joints, cracked hoses on appliances, and gaskets around toilets. Understanding the typical failure points helps you target your inspection and avoid unnecessary disassembly. According to Leak Diagnosis, most household leaks stem from deteriorating fittings and improper maintenance, not dramatic breaks in plumbing. That means with a careful check of connections and components, many leaks can be addressed with simple fixes rather than costly replacements. Start your diagnosis by focusing on the most accessible sources: kitchen and bathroom faucets, under-sink supply lines, toilet connections, and visible piping along walls. Keep a notepad for recording spots you inspect and signs you observe, so you can track changes as you work through the repair process.
How to Identify Your Leak Source
Look for telltale signs: damp patches on ceilings or walls, damp cabinets, or a continuous drip from a fixture even when it is turned off. A practical way to locate the source is to isolate areas one by one: start with faucets and valves, then inspect under sinks and behind appliances. You can also check your water meter: turn off all fixtures and observe the meter over an hour; any movement indicates a hidden leak. Toilet tanks are frequent culprits; add a drop of food coloring to the tank and wait 15-60 minutes. If colored water shows up in the bowl, the flapper or fill valve is leaking. If you suspect pipe leaks behind walls, listen for a consistent hissing or running sound, and look for warm spots if the leak is carrying hot water. Leak Diagnosis analysis notes that consistent signs over time are more reliable than single-day observations.
Essential Tools and Safety Prep
Before you begin, gather the right tools and prepare for safety. Essential items include an adjustable wrench, needle-nose pliers, a bucket, absorbent rags, and Teflon tape for threaded fittings. A tube of silicone sealant and epoxy putty can handle minor surface leaks temporarily. Keep replacement washers, O-rings, and (where applicable) new hoses handy. A flashlight is useful for dark cabinets, and gloves protect your hands from sharp edges and hot water. Safety first: shut off the water supply before touching pipes, and if electricity is near the leak (in basements, near water heaters, or around outlets), switch off the relevant circuit at the breaker. If the leak involves gas lines, do not attempt a repair yourself; evacuate and contact the gas utility. While DIY fixes are possible, remember that some repairs—especially in walls or at high pressure—are best left to professionals.
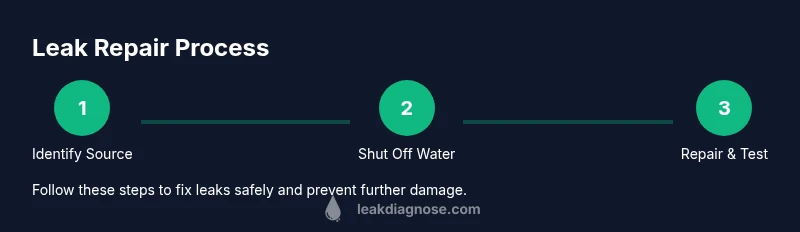
Step-by-Step Leak Repair Basics
Start with a quick plan: confirm source, stop water supply, and prepare temporary stoppage if needed. Then, select the appropriate repair method: tightening, replacing parts, or sealing. Step 1: Identify the source (covered in previous section). Step 2: Shut off the main water supply and drain the lines by opening a faucet at the lowest point. Step 3: Dry the area completely to see the actual leak clearly. Step 4: If the leak is slow and at a threaded joint, tighten the connection gently with the wrench; avoid over-tightening as that can crack fittings. Step 5: If the joint still leaks, disassemble, inspect the washer or O-ring, and replace with a new one, applying Teflon tape to male threads. Step 6: For pipe sections that are corroded or cracked, replace the affected piece and use push-fit connectors or solder/connections as appropriate. Step 7: Reassemble, turn water back on slowly, and test for a full minute or two. Step 8: If leaks persist or you see wet building materials, stop and call a pro. Pro tip: take photos at each stage to guide future maintenance.
Fixing Common Faucet and Shower Leaks
Most faucet leaks come from worn washers or cartridge seals. To fix, first shut off water, remove the handle, and inspect the stem. Replace worn washers or O-rings; for cartridge faucets, replace the cartridge. If a shower leaks around the valve, inspect the valve seat, seals, and washers, and replace any worn parts. Toilet leaks are often caused by malfunctioning flappers or fill valves; test by adding food coloring to the tank and watching the bowl. If color appears, replace the flapper or valve assembly. When reinstalling, ensure threads are clean and lightly lubricated with plumber’s tape on male threads; avoid overtightening. After repairs, run the tap for several minutes to confirm the fix. If leaks persist, consider upgrading to a modern faucet model with sealed cartridges to reduce future leaks.
Repairing Pipes and Joints: When to Sweat a Repair
Copper and PVC pipes are common in homes. Leaks at joints usually come from loose fittings or deteriorating gaskets. For small cracks on copper, you can use epoxy putty as a temporary measure, but permanent fixes require replacing the section or soldering new fittings. Push-fit systems offer a quicker alternative for non-soldered repairs, especially in tight spaces. If a leak is behind a wall or under a slab, the repair becomes more complex and may require professional assessment. Always depressurize the system before cutting or removing joints, and keep a bucket ready for any residual flow. After completing repairs, test the line incrementally, checking all joints for several minutes under normal pressure.
Appliance Leaks: Washer, Dishwasher, and Water Heaters
Appliance leaks often originate from hoses, clamps, and drain connections. For washers, inspect inlet hoses for bulges or kinks and replace damaged hoses; ensure clamps are tight. Dishwashers can leak at the door seal or drainage hose; check the door gasket and connection clamps. Water heaters may leak from relief valves, fittings, or tank corrosion; inspect the pressure relief valve and ensure the drain valve is closed properly. If you notice warm water from a pipe during a leak, suspect a hot-water line. When replacing hoses or seals, use manufacturer-recommended parts and avoid cheap alternatives that fail quickly. After any appliance repair, run a full cycle and monitor for several minutes to confirm there are no further drips.
Preventing Future Leaks: Maintenance and Checks
Establish a routine to inspect plumbing connections, seals, and hoses at least twice a year. Check for signs of corrosion, mineral buildup, or softened gaskets, especially in kitchens and bathrooms. Keep drain traps clean to prevent clogs that can redirect pressure and cause leaks. Consider upgrading older rubber hoses to reinforced stainless-steel hoses, which resist bursting. Maintain consistent water pressure by testing and, if needed, adjusting the pressure regulator. Promptly address any damp spots, and replace aging fixtures before major failures occur. By staying proactive, you reduce the chance of sudden leaks and the costly damage they cause. Leak Diagnosis emphasizes regular maintenance as the best long-term defense against hidden leaks.
When to Call a Pro vs DIY: Making the Right Call
Some leaks are straightforward and safe to fix yourself, but others require professional expertise. If a leak is behind walls, in ceilings, or under slabs, or if water damage has begun to appear, consult a licensed plumber. Gas line leaks, electrical hazards near water, or persistent leaks after a DIY fix are strong signals to seek professional help. If you lack the right tools, time, or confidence to safely shut off water and pressure, or if the repair involves soldering copper pipes, you should call a pro. Finally, remember that some situations—such as recurring leaks after multiple attempts—may indicate larger systemic issues that need a structural evaluation. The Leak Diagnosis team recommends erring on the side of safety and relying on licensed professionals when in doubt.
Tools & Materials
- Adjustable wrench(6-12 inch size is versatile for most fittings)
- Needle-nose pliers(For gripping small parts and clamps)
- Bucket(To catch water during repairs)
- Absorbent rags/towels(Dry surfaces and wipe spills)
- Teflon plumber's tape(Wrap clockwise around male threads)
- Silicone sealant(For exterior sealing; not for high-pressure joints)
- Epoxy putty(Temporary leak stop for non-pressurized areas)
- Pipe dope / thread sealant(Alternative to tape on larger joints)
- Replacement washers and O-rings(Keep a small assortment)
- Replacement hoses or supply lines(For washers, dishwashers, and toilets)
- Flashlight(Inspect dark cabinets and behind appliances)
- Safety gloves(Protect hands from sharp edges and heat)
- Utility knife(Cut insulation or tape as needed)
Steps
Estimated time: 60-180 minutes
- 1
Identify the leak source
Visually inspect fixtures, connections, and exposed pipes. Use a flashlight to expose hidden joints and check for moisture or dampness. Record signs you find to guide the repair.
Tip: Take photos from several angles to track changes. - 2
Shut off the main water supply
Locate the main shut-off valve near the street or at the point where water enters your home. Turn it clockwise until fully closed, then drain lines by opening a faucet at the lowest point.
Tip: If you can't find the main valve, contact your utility for guidance. - 3
Dry the area and confirm the source
Wipe all surfaces dry and re-check for moisture. Reproduce the conditions slowly (e.g., run a faucet) to confirm the exact leaking joint or component.
Tip: A clean, dry surface makes it easier to see leaks. - 4
Apply a temporary seal if appropriate
For small, non-pressurized drips, apply epoxy putty or wrap with plumber's tape. Do not rely on temporary fixes for high-pressure lines.
Tip: Temporary fixes buy time but plan a permanent repair. - 5
Repair or replace worn parts
Inspect washers, O-rings, and seals. Replace worn parts with matching items. For threaded joints, apply Teflon tape and reseal carefully.
Tip: Always separate joints fully before replacing parts to inspect seating surfaces. - 6
Secure pipes and joints
If replacing a pipe section, join with push-fit connectors or appropriate fittings. For copper, consider soldering or using approved couplings with proper flux.
Tip: Do not force-fit parts; misalignment causes future leaks. - 7
Restore water supply gradually
Slowly reopen the main valve and run water through the repaired line. Check all repaired joints for a full minute or two for leaks.
Tip: If leaks reappear, shut off again and reassess. - 8
Monitor and document results
Keep an eye on the repaired area for the next 24-72 hours and note any signs of moisture or dampness. Take notes to inform future maintenance.
Tip: Timely follow-up prevents hidden damage from becoming larger. - 9
Plan preventive maintenance
Schedule regular checks of fixtures, hoses, and pipe connections. Replace aging components before they fail to prevent future leaks.
Tip: Develop a simple maintenance routine to extend system life.
Questions & Answers
What are the most common sources of household leaks?
Worn washers, loose fittings, corroded joints, and faulty appliance connections top the list. Identifying these helps you target repairs efficiently.
Most leaks come from worn washers, loose fittings, or corroded joints. Start by checking those first.
Should I shut off the main water supply for every leak repair?
Yes. Shutting off the main line prevents further water damage while you work. If you can't access it, shut off the local valve closest to the leak when possible.
Yes. Turn off the main water line if you can; if not, use the closest local shut-off valve to contain the leak.
Can I DIY every leak repair?
Many small leaks are DIY-friendly, especially at faucets and obvious joints. Complex leaks behind walls or gas connections may require a licensed plumber.
Many leaks you can fix yourself, but if it’s behind a wall or involves gas, get a pro.
When is it time to call a professional?
Call a pro if you can’t locate the source, if the leak involves gas or electrical hazards, or if water damage is spreading.
Call a professional if you can't locate the leak or if gas and electrical hazards are involved.
What tools are essential for basic leak repairs?
Keep an adjustable wrench, Teflon tape, replacement washers, a bucket, and a flashlight handy for most DIY repairs.
Essential tools include a wrench, tape, washers, a bucket, and a flashlight.
How can I prevent leaks in the future?
Regular checks of hoses, fittings, and seals; replace aging parts; and maintain proper water pressure to reduce wear.
Regularly inspect hoses, fittings, and seals and keep water pressure steady to prevent leaks.
Watch Video
Main Points
- Identify leak sources early and accurately.
- Shut off water before starting any repair.
- Use correct parts and proper sealing techniques.
- Test repairs thoroughly before declaring victory.
- Know when to call a professional.