How to fix a leaky: A practical homeowner's guide to safe repairs
Learn a practical, step-by-step approach to diagnosing and repairing common household leaks safely. This guide covers faucets, pipes, appliances, safety, tools, and when to call a pro.

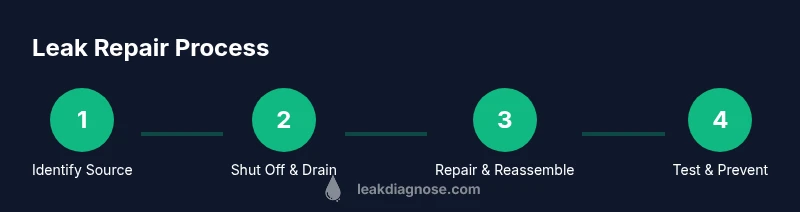
According to Leak Diagnosis, this guide shows you how to identify the source of a leak, safely shut off water, and perform common fixes for faucets, pipes, and appliances. It covers basic tools, safety steps, and when to seek professional help. By following these steps, you’ll reduce water waste and prevent secondary damage.
Understanding Common Leak Sources
Leaks originate from common spots in a typical home: faucets and fixtures, toilet flappers, supply lines, pipe joints, and appliance connections. In many cases, the smallest drips go unnoticed until staining, mildew, or a high water bill appears. By mapping potential sources in advance, you can narrow down the culprit quickly when you ask how to fix a leaky scenario. According to Leak Diagnosis, worn washers and routinely loose connections account for a large share of minor leaks. This section outlines where leaks typically start and what early signs to look for, so you can plan a safe, targeted repair rather than a random hunt. Common tells include damp spots under sinks, mineral deposits around joints, and a continuously running toilet. Recognizing these patterns helps you choose the right fix the first time and avoid unnecessary parts replacements. Remember, precise identification saves time and reduces water waste, making the repair safer and more durable.
Safety First: Shutoffs, PPE, and Risk
Safety is non-negotiable when fixing leaks. Water near electrical outlets or appliances creates shock hazards and can cause slipping on wet floors. Start by locating and closing the nearest shutoff valve for the affected line, or use the main water shutoff if the local valve isn’t accessible. Wear gloves and eye protection, and keep a bucket or towels handy to catch spills. After shutting off water, relieve pressure by opening a faucet to drain the line. These steps not only protect you but also prevent accidental sprays during disassembly. According to Leak Diagnosis, prioritizing safety reduces marathon repairs and minimizes the chance of secondary damage to walls, flooring, or electronics. Keep a clean workspace, label parts as you remove them, and work in good lighting so you don’t overlook a hidden leak behind cabinetry or drywall.
Detecting the Source: Visual Clues and Simple Tests
Quickly locating the leak source saves time and reduces the scope of the repair. Start with a visual sweep of kitchens, bathrooms, and laundry areas for damp patches, rust on metal fittings, or mineral buildup where pipes join. Use a tissue or dye tablet tests to trace water flow to its source—placing tissue along suspected joints helps identify minor drips. If you’re wondering how to fix a leaky faucet, check the handle, cartridge, and seating washer first, since many leaks originate there. For toilets, inspect the flapper, fill valve, and supply line. In some cases, leaks are hidden behind walls; in those scenarios, listen for a steady hissing sound or feel for seepage with a dry cloth pressed against the surface. Knowing where to test reduces guesswork and makes repairs more predictable.
Decide: Repair vs. Replace
Not every leak is worth repairing. If a fixture is heavily corroded, the supply line is cracked, or joints have repeatedly failed, replacement often provides a longer-lasting solution than multiple small fixes. Factor in the fixture’s age, cost of parts, and labor time when deciding whether to repair or replace. If you’re unsure, weigh the peace of mind and longevity of a new component against the cost of frequent band-aid fixes. Leak Diagnosis emphasizes that planning before you disassemble can prevent wasted effort and unnecessary parts purchases. If a repair is feasible and parts are readily available, a well-executed repair can restore reliability without major disruption.
Fixes for Faucets and Fixtures
A leaky faucet is one of the most common DIY targets. Start by turning off the water, then disassemble the handle to inspect the cartridge or washer. Worn washers, seals, and O-rings are frequent culprits and are usually inexpensive to replace. Clean the seat and threads before reassembling, and apply plumber’s tape to threaded connections to ensure a watertight seal. Be careful not to over-tighten fittings; overtightening can damage seats or threads and worsen leaks. For cartridge-type faucets, replacing the entire cartridge is often simpler than pursuing multiple minor fixes. After reassembly, test with the water on while observing for drips for several minutes. Safe fixes require accurate part matching and gentle handling of delicate components.
Fixes for Pipes and Supply Lines
Pipe leaks typically occur at joints or from damaged sections. For small pinhole leaks in copper or PEX, temporary repair kits or epoxy putty can offer a stop-gap while you plan a permanent fix, but a full replacement is usually the best long-term solution. When working with supply lines, ensure threads are clean and dry, then apply Teflon/plumber’s tape to male threads and snug the fitting without overtightening. If you suspect a pinhole in a metal pipe, consult a professional; some leaks at or near structural components may require wall access and code-compliant repairs. Always test after any fix by running water slowly and watching for drips for several minutes. This approach reduces the chance of a hidden leak resurfacing after the repair.
Appliances Leaks: Washing Machines and Dishwashers
Leaks from appliances require care, as water on electrical components can be hazardous. For washing machines, inspect inlet hoses, drain hoses, and the drum seal. Replace worn hoses and ensure clamps are tight but not overtightened. A leaking drum seal or pump gasket may require professional service. Dishwashers can leak from door gaskets, spray arms, or hoses; check door seals for wear and replace if needed. When working on appliances, unplug the unit from power and disconnect water supply before disassembly. If you are unsure about the appliance’s safety or warranty implications, consult the user manual and a licensed technician. Consistent checks help prevent recurring leaks and protect your home from water damage.
Preventive Maintenance to Reduce Future Leaks
Preventing leaks is easier than repairing them. Establish a routine of seasonal inspections for visible piping, joints, and appliance connections. Tighten fittings only to snug–not-microscopically tight–levels, and replace aging washers and seals proactively. Keep drain hoses clear of kinks, and use strainers to prevent debris from clogging pipes. Regularly test shutoffs to ensure they operate smoothly, and replace any rubber washers with compatible parts as they wear. According to Leak Diagnosis analysis, a brief preventive check every few months reduces the risk of major leaks and minimizes water waste over time. Document findings to track wear patterns and plan future replacements.
Aftercare: Cleanup, Documentation, and When to Call a Pro
Once the leak is controlled, clean up promptly to prevent mold growth and water damage. Dry the area thoroughly and monitor for dampness over the next 24–48 hours. Take notes on what was fixed, parts replaced, and dates for future reference; this helps with warranty claims and future maintenance. If you notice recurring drips after a repair, or if the leak is near electrical components, or if you cannot locate the source, it’s time to call a licensed plumber. The Leak Diagnosis team recommends consulting a professional when leaks involve structural walls, gas lines, or complex plumbing configurations that require building code expertise.
Quick-Check: Ready-to-Use Leak-Prevention Checklist
- Inspect fixtures for wear every 3–6 months and replace worn parts promptly.
- Use plumber’s tape on threaded connections and avoid overtightening.
- Test shutoffs regularly and replace faulty valves.
- Keep a maintenance log to monitor wear and anticipate replacements.
- If in doubt or if water is near electrical components, call a professional.
Final Thoughts
Leaking water can quietly cause extensive damage before you notice it. With a clear approach—identify the source, shut off safely, repair or replace with proper parts, and test thoroughly—you can fix a leaky system effectively. Remember that some leaks benefit from professional assessment, particularly where structural integrity or gas safety is involved. As you gain experience, your ability to diagnose and fix leaks will improve, saving water, money, and stress.
Tools & Materials
- Adjustable wrench(Useful for most faucet and pipe fittings; ensure jaws are clean to prevent rounding nuts)
- Screwdriver set(Flathead and Phillips; needed for faucet handles and appliance panels)
- Teflon tape (plumber's tape)(Wrap per standard direction on threaded joints to improve seal)
- Bucket(Catch water during disassembly; place on a towel to avoid spills)
- Rags or towels(Multiple layers; helps contain moisture and protect flooring)
- Replacement washers/seals kit(Match faucet model or fixture type; have spare sizes on hand)
- Pipe repair kit or epoxy putty (optional)(Temporary fix for small pinhole leaks; not a long-term solution)
- Replacement hoses (if applicable)(Use high-quality hoses rated for your appliance; inspect fittings)
Steps
Estimated time: 120-180 minutes
- 1
Identify the leak source
Begin with a visual inspection of the most common leak points: faucets, toilets, supply lines, and visible pipe joints. Look for damp spots, mineral deposits, and active drips. Document the area and note any patterns—drips that worsen with pressure typically come from connections rather than seals hidden behind walls.
Tip: Take photos before disassembly to help you reorder parts and verify reassembly orientation. - 2
Shut off water and relieve pressure
Locate the nearest shutoff valve to the affected area and turn it clockwise until snug. If a valve is hard to reach or inaccessible, shut off the main water supply. Open a faucet at the highest level in the home to relieve pressure and drain residual water from the lines.
Tip: Keep a bucket handy to catch any remaining water and avoid splashing. - 3
Gather tools and materials
Before you dive into disassembly, assemble your tools and spare parts so you don’t interrupt the repair. Lay towels to keep the area dry and organized. Confirm you have the correct replacement washers or cartridges for the fixture.
Tip: Always double-check part compatibility with your fixture model to prevent mismatched threads or seals. - 4
Disassemble and inspect the faulty area
Carefully remove the faucet handle or appliance panel cover and inspect the cartridge, washer, O-ring, or gasket. Clean seating surfaces and threads; replace worn components. If the part is corroded or cracked, replace it rather than trying to reseal.
Tip: Take photos of each step during disassembly to make reassembly easier. - 5
Replace worn parts or tighten connections
Install new washers, seals, or a replacement cartridge. Reattach components using the correct torque—snug but not overtightened. Apply plumber’s tape to threaded connections where applicable and reseal joints cleanly.
Tip: Avoid overtightening plastic fittings as it can crack or distort seats. - 6
Test the system and reassemble
Turn the main water back on and gradually restore pressure. Check the repaired area for drips; observe for several minutes. If leaks persist, re-check seals and ensure the cartridge or washer is seated correctly. Reassemble any panels or covers.
Tip: Test hot and cold lines separately to catch leaks that appear under different temperatures. - 7
Document and monitor
Note what was replaced and the date of the fix. Monitor the area over the next 24–48 hours for any signs of recurring moisture. If leaks reappear, consider a professional assessment to avoid hidden damage.
Tip: Keep a simple maintenance log for future reference and warranty needs.
Questions & Answers
Can I fix a leaky faucet myself?
Yes, minor faucet leaks are often solvable with basic tools and replacement washers or cartridges. If you’re unsure about the fixture model or the leak persists after a couple of attempts, seek professional help.
Yes. Most small faucet leaks can be fixed yourself, but if the problem continues, consider a professional.
What tools do I need for most fixes?
You’ll typically need an adjustable wrench, screwdriver set, Teflon tape, a bucket, and replacement washers or a cartridge kit. Having a rag and pliers handy helps with stubborn fittings.
Common tools are an adjustable wrench, screwdrivers, Teflon tape, a bucket, and replacement parts.
When should I replace rather than repair?
If parts are corroded, joints repeatedly fail, or the fixture is old, replacement is often more reliable and cost-effective in the long run.
If a fixture is very old or repeatedly leaks, replacement is usually best.
Is it safe to use store-bought sealants?
Sealants can help in some edge cases, but they’re not a universal fix. Use manufacturer guidance and avoid products that seal multiple materials they’re not designed for.
Sealants aren’t a universal fix; follow product guidelines and manufacturer advice.
How long will a DIY fix last?
Durability depends on the leak's cause and component quality. Some fixes last months, others years; ongoing maintenance improves longevity.
Durability varies, but proper parts and installation help ensure a longer-lasting fix.
When should I call a professional?
If the leak involves gas lines, structural walls, complex plumbing, or you can’t locate the source safely, contact a licensed plumber.
Call a professional if safety is at risk or the leak remains unresolved after basic fixes.
Main Points
- Turn off water before starting any repair.
- Accurately identify the leak source to choose the right fix.
- Use correct parts and proper sealing techniques.
- Test thoroughly and monitor after repairing.
- Call a pro for complex leaks or if safety risks exist.