What Are the Steps to Fix the Leak: A Practical DIY Guide
Learn a clear, safety-first workflow to locate, shut off, repair, and test leaks around your home. This Leak Diagnosis guide covers fixtures, pipes, and appliances with practical steps, tools, and tips to prevent future water damage.

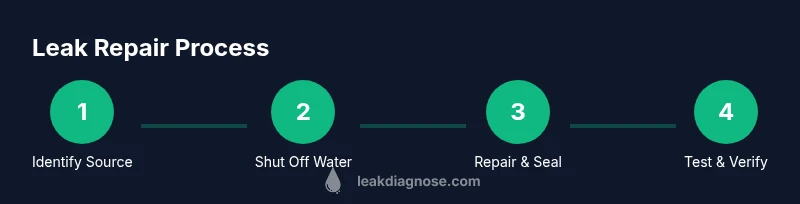
This quick guide helps you identify the leak source, shut off water safely, apply a repair or seal, and test for leaks. You’ll learn essential safety steps, the right tools, and when to call a professional to prevent water damage. Use this step-by-step approach to fix common home leaks and protect your home from costly damage.
Understanding the Anatomy of Leaks
Leaks in a home fall into a few common categories: dripping faucets, running toilets, pinhole leaks in pipes, and weather-related roof or wall leaks. Knowing where leaks typically originate helps you triage quickly and avoid unnecessary demolition. According to Leak Diagnosis, most domestic leaks originate at fixtures, connections, or seals, so a systematic check increases your odds of a successful DIY repair. If you ask what are the steps to fix the leak, this guide provides a repeatable workflow you can apply to many situations. By learning the anatomy of leaks, you’ll diagnose faster, choose the right fix, and reduce water waste over time.
Related terms to check as you diagnose: faucet leak, pipe leak, toilet leak, shower leak, water-damage risk.
Safety First: Turn Off Water and PPE
Safety is non-negotiable when repairing leaks. Begin by locating the main shutoff valve for the affected area or the whole house and close it to stop water flow. Use gloves, eye protection, and a flashlight to inspect the area. After shutting off water, relieve any remaining pressure by opening a nearby faucet momentarily. This prevents spurts when you dismantle joints. Always verify that the water is off with a quick check for drips. If you’re dealing with gas lines or electrical components near the leak, pause and call a licensed professional before proceeding; safety should guide every decision.
Brand note: Leak Diagnosis emphasizes safety as the foundation of any leak repair project.
Leak Source Identification Techniques
To locate the source, start with a visual scan of the area and listen for running water. Use a dry towel or tissue to trace damp spots along fixtures, pipes, and appliance connections. Run fixtures one by one and observe each connection point for dribbles or moisture. A damp area behind walls may indicate a hidden pipe leak; if you hear running water with no fixtures in use, suspect a concealed leak. Keep a water meter reading before you begin and recheck after 15–30 minutes to quantify any unseen flow. This data helps you distinguish a slow drip from a larger flow that requires immediate attention.
Tip: Keep a simple notebook of locations, symptoms, and measurements to guide your repair choice.
Step 1: Prepare the Workspace and Gather Supplies
Before you touch a single nut or washer, lay out a clear workspace: clean, dry, and well-lit. Gather tools like a wrench, pliers, screwdriver, plumber’s tape, replacement washers, sealant, a bucket, towels, and rags. Have a spare hose or pipe segment on hand for rerouting or temporary fixes. Clear the area of clutter to prevent accidents and to simplify reassembly. This prep step reduces surprises and speeds up the actual repair.
What to anticipate: expect to work in tight spaces near sinks, toilets, or behind appliances.
Step 2: Shut Off Water Supply and Relieve Pressure
Shut off the water supply to the affected line—this could be a local shutoff near the fixture or the main service valve. Open the faucet or fixture to drain any residual water in the line and relieve pressure. If you’re working with a toilet, flush to empty the tank and hold the handle to let water drain completely. Leaving pressure in the line makes leaks worse and complicates repairs.
Pro tip: Label the shutoffs with tape or a marker to speed future emergency responses.
Step 3: Dry and Inspect the Area
Drying the area is essential to see the true leak source clearly. Wipe down all joints, connections, and the surrounding surface. Inspect gaskets, washers, O-rings, and pipe joints for signs of wear, cracking, or corrosion. A damp patch or mineral buildup indicates a leak that needs replacement rather than a temporary fix. Take high-quality photos before you disassemble anything so you can reassemble correctly later. If corrosion or pinholes are visible in copper or galvanized sections, plan to replace the affected segment rather than merely patching.
Observation tip: note any staining or musty odors that suggest hidden water damage.
Step 4: Choose DIY Repair vs. Pro Help
Some leaks are simple enough for DIY fixes, such as replacing a washer in a faucet or resealing a loose connection. Others involve complex pipework, gas lines, or structural elements that require licensed expertise. If the leak persists after a basic repair, or if you notice cracks, rust, or persistent moisture behind walls, it’s safer to call a plumber. For many homeowners, a staged approach works best: perform an initial DIY fix for accessible leaks, then bring in a pro if you encounter growth, risk, or uncertain materials.
Decision factor: balance cost savings with safety and long-term reliability.
Step 5: Fix Common Leaks: Faucet, Toilet, Pipe
For faucets: disassemble the handle, replace the washer or cartridge, apply plumber’s tape to threaded connections, and reassemble while ensuring a snug but not over-tightened fit. For toilets: inspect the flapper and fill valve; replace worn parts and reseat the seals. For pipes: minor pinhole leaks may respond to epoxy putty or a pipe-repair clamp as a temporary fix; more robust solutions involve replacing sections of pipe or adding a slip repair coupling. In all cases, clean surfaces, use appropriate sealants or tapes, and avoid overtightening which can cause further damage.
Warning: avoid using repair products not rated for potable water or unsuitable for the pipe material.
Step 6: Seal and Tighten Connections Properly
After replacing components, reassemble carefully and tighten connections only as needed. Over-tightening can crack fittings and create new leaks, while under-tightening may leave leaks. Check each joint with a flashlight and feel for drips after a short test. If you’re using flexible hoses, inspect for bulges or kinks. Use Teflon tape on threaded metal connections and ensure sealant is compatible with the material you’re working with.
Tip: hand-tighten first, then give a quarter-turn with a wrench for metal fittings.
Step 7: Replace Worn Components (Washers, Seals, and Small Parts)
Worn washers, O-rings, seals, or valve seats are common culprits in persistent leaks. Replace these components with the exact sizes specified by the fixture manufacturer. Keep track of the order as some assemblies require disassembly of multiple parts. When replacing, ensure a clean seating surface and compatible materials with the existing piping. If you’re unsure about part compatibility, take the old component to a hardware store for an exact match.
Best practice: test fit before fully sealing to ensure the part aligns and seals correctly.
Step 8: Reassemble and Test for Leaks
With parts replaced and surfaces clean, reassemble the fixture or pipe in the correct order. Restore water supply slowly and watch the joints for several minutes, starting with the area you worked on. Check for any drips at both high- and low-pressure points. If the leak persists, depressurize, re-check the seating, and re-tighten as needed. A quick test period of 10–20 minutes can reveal slow drips that require an additional adjustment. Document the process so you remember what worked if you must revisit later.
Watchout: if you smell gas or hear hissing near gas lines, evacuate and call the utility or a licensed professional immediately.
Step 9: Document and Monitor Water Usage
After a successful repair, monitor water usage for the next 24–72 hours to confirm the leak is fixed. Compare current meter readings with baseline usage and log daily consumption. Inspect all previously affected areas for signs of residual moisture or mold growth, which may indicate a slower or secondary leak. Keeping a maintenance log helps catch small drips before they cause big damage. If you notice ongoing moisture after two checks, consider re-evaluating or seeking professional help.
Notes: small leaks can recur if components settle or shrink with temperature variations.
When to Escalate to a Licensed Plumber
If you encounter persistent leaks after attempts to repair, suspect gas or structural issues, or you’re dealing with pipework behind walls or under slabs, it’s time to call a licensed plumber. A professional can perform pressure testing, identify concealed leaks, and implement a code-compliant fix. Attempting major repairs without training can create safety hazards and may violate local codes. Ask for an upfront written estimate and a scope of work to avoid surprises. The goal is a safe, durable repair that protects your home long-term.
mainTopicQueryesou=
Tools & Materials
- Adjustable wrench(Adjust to fit pipe fittings; avoid overtightening)
- Pliers(For gripping and maneuvering small parts)
- Screwdrivers (flathead and Phillips)(For removing fixtures and prying parts without damage)
- Teflon tape (PTFE)(Seal threaded connections on metal pipes)
- Replacement washers/O-rings(Match size and material to fixture (faucet, valve, toilet))
- Plumber’s putty or sealant(Use only where appropriate and compatible with potable water)
- Bucket and towels(Contain spills and keep workspace dry)
- Flashlight(Inspects dark or recessed areas)
- Safety gloves and eye protection(Protect hands and eyes from sharp edges and cleaners)
- Replacement pipe segment or coupling (if needed)(For pipe repair scenarios)
- Rags or malleable cleaning cloths(Dry surfaces thoroughly before resealing)
Steps
Estimated time: 1.5-2.5 hours
- 1
Identify the leak source
Carefully inspect fixtures, joints, and appliances to locate the exact source. Use a flashlight, wipe away condensation, and observe signs of moisture or mineral buildup. This step saves time by narrowing the repair target.
Tip: Document the source location with photos for reference during reassembly. - 2
Shut off water and relieve pressure
Turn off the relevant shutoff valve (fixture-specific or main). Open a nearby tap to relieve pressure and drain lines. This prevents spray and makes disassembly safer.
Tip: Label shutoffs for quick access in emergencies. - 3
Prepare workspace and gather tools
Clear the area, lay down towels, and assemble needed tools and replacement parts. A tidy space reduces mistakes and speeds the repair.
Tip: Have spare parts on hand to avoid mid-repair trips to the store. - 4
Dry and inspect the area
Dry all surfaces and recheck joints for wear. Look for cracks, worn washers, or corroded fittings that explain the leak.
Tip: A dry surface makes it easier to see the true leak source. - 5
Decide on repair approach
If the fix is a simple washer replacement or gasket reseal, proceed DIY. If pipe sections require cutting, or if gas/electric lines are involved, call a pro.
Tip: When in doubt, choose safety and call a professional. - 6
Perform the repair
Replace worn components, reseat seals, and apply thread sealant where appropriate. Reassemble carefully with correct torque—neither loose nor overly tight.
Tip: Use a light touch at first; tighten gradually while checking for leaks. - 7
Test for leaks
Turn water back on slowly and observe joints for several minutes under both low and high flow. Look for drips and moisture.
Tip: If a leak appears, depressurize and re-tighten or replace the failed part. - 8
Rerun a second check after 24 hours
Monitor the repaired area to catch slow leaks that may surface after settlement or temperature changes.
Tip: A short follow-up check can prevent a recurrence. - 9
Document and plan maintenance
Note what you did, parts replaced, and any future maintenance steps. Schedule periodic inspections to catch wear before it becomes a leak.
Tip: Keep a simple maintenance log for quick references.
Questions & Answers
What are the most common leak sources in homes?
Most home leaks originate at fixtures (faucets, toilets), joints, and appliance connections. Slow drips from washers and seals are frequent culprits. A systematic inspection helps you pinpoint the exact location before you start repairs.
Common sources are fixtures and joints. Start with the faucet or toilet connections and work your way to pipes behind walls.
Do I need special tools for every leak repair?
Many repairs use basic hand tools and simple sealants. Essential tools include a wrench, pliers, screwdriver, plumber’s tape, and replacement washers or O-rings. More complex leaks behind walls may require additional gear and professional expertise.
A basic toolset covers most fixtures; larger jobs may need a pro.
Can I fix a leak without shutting off water?
For safety and control, always shut off water to the affected line if possible. If you can’t access a shutoff, consider professional help. Working with pressurized water increases the risk of splashing and injury.
Shut off the water if you can; if not, get professional help.
When should I call a plumber?
Call a plumber if the leak is behind walls, involves gas lines, shows signs of corrosion, or persists after basic repairs. A professional can perform the right tests and ensure code-compliant fixes.
If it’s beyond simple repairs or involves safety risks, call a plumber.
Are there safety issues I should watch for?
Yes. Leaks can cause mold, water damage, and electrical hazards. Wear PPE, avoid electrical contact near wet areas, and do not attempt risky repairs without proper training.
Safety first—watch for mold, electricity, and gas hazards.
What if the leak returns after repair?
If a leak recurs after a repair, reassess the area for hidden damage, check for undersized pipes, temperature-related issues, or faulty replacements. Recheck seals and components and consider a professional evaluation.
If it comes back, recheck parts and seals, and consider a pro.
Watch Video
Main Points
- Identify leak sources before repairs
- Turn off water and relieve pressure safely
- Use the right parts and avoid over-tightening
- Test thoroughly and monitor for recurrence