Water Leak Fix: A Practical Home Guide to Detecting and Repairing Leaks
Learn a practical water leak fix at home with a clear, step-by-step guide to locate, repair, and prevent leaks, saving water and avoiding costly damage.

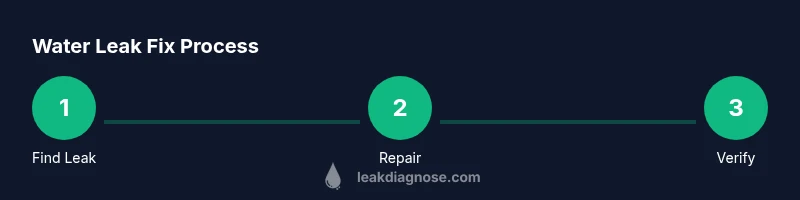
This water leak fix guide provides a practical at-home approach to locate and repair leaks, from shutting off water to testing the fix. You’ll learn safe, step-by-step actions, essential tools, and maintenance tips to prevent future leaks. Start by turning off the main water supply, then inspect pipes, fixtures, and appliances for moisture and signs of wear. Follow these steps for reliable, long-lasting results.
Why Water Leak Fix Matters
According to Leak Diagnosis, a timely water leak fix protects your home from water damage and saves water. Even small drips can cause mold growth, wood rot, warped floors, and higher utility costs over time. When you address leaks early, you preserve structural integrity and property value. In this section, we explore common leak causes, how quickly problems escalate, and practical approaches homeowners can use to mitigate damage, with real‑world examples from typical houses.
Assessing the Source: Quick Leak Detection Tactics
To locate a hidden leak, start with the obvious: sinks, toilets, and appliances. Inspect under cabinets, behind walls, and around the foundation for damp patches. A simple method is to read your water meter before and after a 2–3 hour interval with no water usage; a rising meter indicates a leak. Use a flashlight to inspect joints and watch for slow drips at fittings. For toilets, a dye test can reveal silent leaks: add colored water to the tank and observe the bowl.
DIY vs Professional: When to Call a Pro
Many residential leaks can be addressed by homeowners with basic tools, knowledge, and patience. Simple fixes—replacing a worn washer, tightening a loose fitting, or resealing a faucet—are common and economical. However, leaks behind walls, in ceilings, or around gas meters require professional expertise and licensed plumbers. Structural leaks or persistent intrusions into insulation demand advanced diagnostics and sometimes permits. If you notice sudden water damage, exposed wiring near water, or a suspected gas-leak risk, stop and call a pro immediately.
Common Water Leak Scenarios and Fixes
Leads for leaks often show up in predictable places. Faucet leaks typically originate from worn washers or O-rings and are the easiest to fix with basic tools. Toilet leaks usually come from a faulty flapper or fill valve and may require replacement parts. Supply-line leaks involve hoses or copper piping and often need tightening or replacement of worn fittings. Dishwasher leaks can stem from door seals or inlet hoses, while pipe leaks point to corrosion or loose joints. Each scenario has a practical repair path: tighten, reseal, or replace components as needed, while avoiding invasive wall damage when possible.
Step-By-Step: How to Check for Leaks in Faucets and Pipes
- Shut off the water and dry the area so you can see moisture clearly. 2) Inspect the faucet and connections; look for limescale buildup or corrosion. 3) Check supply lines under sinks and behind appliances for dampness or corrosion. 4) Inspect the P-trap and joints for slow seepage; tighten fittings if needed. 5) If a joint is cracked, replace the fitting or apply PTFE tape ahead of reassembly. 6) Restore water supply slowly and watch for drips to verify the repair. 7) Clean and document the repair area so you can notice changes over time.
Fixing Leaks Safely: Tools, Materials, and Safety Practices
Gather a basic plumbing toolkit and the essential repair materials before you start. Ensure you turn off power to nearby outlets if water is present to prevent electrical hazards. Use PTFE tape on threaded connections to seal leaks, replace worn washers, and use epoxy putty or silicone sealant for small non-structural cracks. Wear eye protection and gloves to protect against sharp edges and clean up spills promptly to avoid slips. Keep a bucket and towels handy to catch water during the process.
Temporary Patches and Permanent Repairs
Temporary patches—such as epoxy putty or silicone sealant—buy you time when you cannot immediately replace a failed part. They are not a substitute for a permanent repair. For long-term results, identify the underlying cause (corrosion, worn hoses, or failing valves) and replace the affected component. After a permanent repair, re-check all nearby joints to ensure the system remains watertight and re-check after 24 hours to confirm the repair held.
Preventive Maintenance to Stop Future Leaks
Preventive maintenance is the most effective defense against recurring leaks. Schedule regular inspections of under-sink pipes, hose connections to appliances, and toilet seals. Replace aging washers, hoses, and fittings before they fail. Keep a small repair kit on hand with PTFE tape, washers, and seam sealant. Consider installing leak detectors near vulnerable areas such as basements, kitchens, and laundry rooms for early alerts. Regularly reviewing water usage patterns can also help identify leaks early.
Troubleshooting: What to Do if Repairs Fail
If a fix fails, reassess the source, check for hidden damage, and re-tighten connections carefully. Look for secondary leaks elsewhere that may have developed as a result of the repair. If the leak persists after a second repair attempt, consider a professional assessment to avoid further water damage and costly repairs. In the meantime, document symptoms and keep a log of water usage to help a professional diagnose the issue quickly.
Tools & Materials
- Adjustable wrench(For fittings up to 1 inch; adjust size to fit nuts)
- Screwdriver set(Phillips and flat-head)
- Pliers (channel-lock or slip-joint)(Useful for gripping and turning)
- PTFE plumber's tape(Wrap clockwise around male threads)
- Epoxy putty or leak sealant(For temporary sealing on small cracks)
- Silicone sealant (bathroom-grade)(Non-wet areas; allow cure time)
- Rubber washers and gaskets(Keep replacements on hand)
- Bucket and towels(Catch and dry water spills)
- Replacement hose or pipe coupling(Only if you identify worn parts)
- Dye tester kit or food coloring(For dye tests to locate leaks)
- Flashlight(Bright light for dark spaces)
- Leak-detection detector (optional)(Alerts on moisture near fixtures)
Steps
Estimated time: 1-2 hours
- 1
Shut off the water
Find the main shut-off valve and turn it clockwise until it stops. Verify there is no active water flow by opening a faucet on a lower level to check for residual pressure. This prevents further flooding while you inspect the leak.
Tip: Keep the valve tool nearby for stubborn valves. - 2
Locate the leak source
Inspect common trouble spots: sinks, toilets, appliances, and visible pipes. Use a dye test on toilets and a flashlight for dark corners to spot dampness or mineral residue that signals a leak.
Tip: Mark the suspected area with tape to guide your repair. - 3
Prepare the area
Clear the area, lay towels, and dry surfaces before applying a repair. Removing moisture helps you see the leak clearly and prevents accidental bonding of sealants to wet surfaces.
Tip: Have a bucket ready to catch any water during initial checks. - 4
Apply a temporary fix if needed
For small cracks or slow drips, apply epoxy putty or silicone sealant following the product directions. Allow the patch to cure before restoring water flow to test its efficacy.
Tip: Temporary patches are for buying time, not long-term solutions. - 5
Implement the permanent repair
Replace worn washers, tighten fittings with PTFE tape on threads, or swap out damaged hoses. Ensure proper alignment and avoid overtightening to prevent cracking.
Tip: Take photos of old configurations to replicate fittings if needed. - 6
Test the repair and monitor
Slowly turn the water back on and inspect all repaired joints for leaks. Run water through fixtures for several minutes and observe surrounding areas for moisture over the next 24 hours.
Tip: Keep a log of observations for future reference.
Questions & Answers
What is the first step in fixing a water leak?
The first step is to shut off the main water supply to prevent further flooding while you locate the source. Then proceed with a careful inspection.
First, shut off the water, then inspect the area for the leak source.
Can I fix a water leak myself or should I hire a pro?
Many household leaks can be fixed by homeowners with the right tools and instructions. Leaks behind walls, near gas lines, or involving electrical components should be handled by a licensed professional.
Small leaks can be DIY, but complex ones may require a pro.
What tools do I need for a basic faucet leak repair?
At minimum, you’ll want an adjustable wrench, PTFE tape, screwdrivers, pliers, replacement washers, and a towel or bucket to catch water.
You’ll need a wrench, PTFE tape, screwdrivers, pliers, washers, and a bucket.
How do I know if a leak is small or severe?
Look for persistent damp spots, mold, pooling water, and unusual increases in your water bill. Even small drips can cause long-term damage if left unattended.
Small drips can still cause big problems over time.
How long should a typical faucet leak repair take?
A simple faucet leak can often be fixed in under an hour; more complex repairs may take 1–2 hours depending on access and parts availability.
Most simple leaks take under an hour; complex ones may take longer.
What maintenance can prevent leaks?
Regularly inspect joints, replace aging washers and hoses, and check appliance connections. Consider installing leak detectors in vulnerable areas for early alerts.
Regular checks and updates prevent many leaks.
Watch Video
Main Points
- Identify the leak source early to limit damage.
- Shut off water before inspecting to prevent flooding.
- Use proper tools and accurate material selections.
- Permanent repairs require replacing worn parts and verifying with a test.
- Regular maintenance reduces recurrence and extends system life.