Leak Repair Water: DIY Guide for Homeowners
A practical, actionable guide to locating, planning, and fixing common water leaks at home. Learn safety tips, essential tools, and step-by-step methods to protect your home from water damage.

Learn how to locate, assess, and fix common water leaks in fixtures, pipes, and appliances. This step-by-step guide to leak repair water covers safety precautions, essential tools, and practical repairs you can perform DIY, plus guidance on when to call a professional to avoid water damage. That means protecting your home from mold, structural damage, and wasted water bills.
Understanding Leak Repair Water: Why It Matters
Water leaks are often more than a nuisance; they are a warning sign that your home's plumbing is stressed. In the context of leak repair water, small drips can lead to substantial moisture intrusion, mold growth, and higher utility bills if ignored. According to Leak Diagnosis, addressing leaks early saves water, protects structural integrity, and lowers long-term repair costs. This section explains why prompt attention matters and sets the stage for safe, practical fixes every homeowner can perform when feasible.
Assessing the Source: How to Locate Water Leaks
Locating a leak quickly is the first step toward an effective repair. Start with obvious areas: kitchens, bathrooms, under sinks, and around appliances. Look for damp spots, staining on walls or ceilings, and unusual musty smells. A running or stuck meter is another red flag. Use a moisture meter on suspected walls and baseboards, and listen for running water sounds behind walls where visible signs are scarce. Once you identify a likely source, document its position and note any recent changes in water pressure or usage, which can help narrow down the fault. Early detection reduces damage and simplifies the fix.
Safety First: Protecting Yourself and Your Home
Working with water and plumbing carries safety risks. Before you start, locate and switch off the appropriate water shutoff valve; if you cannot find it, shut off the main supply. Keep electrical devices away from any wet areas, and wear gloves and eye protection. If you need to drain a line, use a bucket and towels to catch drips and avoid spills on floors. Ventilate damp spaces to minimize mold growth. If you suspect compromised structural elements or mold, pause work and consult a professional—safety comes first, even if you want to DIY.
Tools and Materials You'll Need for Leak Repair Water
Having the right tools reduces frustration and speeds up the repair. Essential items include an adjustable wrench, slip-joint pliers, and PTFE pipe tape for threaded connections. A bucket, rags, and a flashlight help manage drips and illuminate hidden areas. For sealing leaks, silicone sealant or epoxy putty can work in a pinch, but choose products compatible with the material you’re repairing (copper, PVC, or steel). Keep safety gear like gloves and eye protection within reach, and consider a moisture meter for ongoing monitoring. Prepare your workspace by laying towels to catch water and placing a container under the repair area.
Understanding Common Leak Scenarios and Approaches
Leaks show up in many forms, and the repair approach depends on the scenario. A dripping faucet usually needs a worn washer or cartridge replacement, while a leaking supply line behind a wall may require tightening fittings or replacing a section of pipe. Toilet leaks often stem from flapper wear or faulty seals, and appliance hoses can degrade over time. For each case, assess the source, control the water flow, then select a repair method that matches the fixture material and accessibility. In all situations, plan for a dry, well-lit workspace and steady containment of any standing water.
Common Pitfalls and How to Avoid Them
Common mistakes include overtightening fittings, using the wrong tape or sealant on certain materials, and starting work without fully shutting off water. Avoid patching a leak with temporary fixes that don’t address the root cause, as they can lead to recurring damage. Don’t ignore hidden leaks behind walls; moisture can spread quickly and cause wood rot or mold. Always inspect for proper drainage after any repair and test for leaks under normal pressure. If you’re uncertain, pause and re-check your approach before proceeding.
Maintenance to Prevent Future Leaks
Prevention is cheaper than repair. Schedule regular inspections of valves, hoses, and appliances for signs of wear. Replace aging supply lines proactively, and use water-saving fixtures to reduce overall pressure on the system. Maintain a clean, dry environment around plumbing access points to spot leaks early. When possible, insulate exposed pipes to reduce condensation in cold months. A simple moisture log can help detect gradual changes in your water usage that signal slow leaks before they become big problems.
When to Call a Pro vs DIY
Not every leak is a good DIY candidate. If you encounter gas lines, complex pressure systems, or water damage that extends into ceilings or structural elements, it’s wise to consult a licensed plumber. Similarly, if you disconnect a major line and cannot safely restore water flow or if there is persistent mold growth, professional help is warranted. As a rule of thumb, start with low-risk fixtures (like faucets) and escalate only when necessary. The goal is a safe, durable repair that protects your home long-term.
Quick Reference: Safety Reminders and Ready Checklist
Before you start, shut off the water supply and ensure power safety in the work area. Gather essential tools and a bucket, towels, and a flashlight. Check for signs of moisture on walls, ceilings, and floors, and test the area after repairs. Keep a simple log of what was fixed and when, so you can monitor future performance and plan maintenance.
Tools & Materials
- Adjustable wrench(Sizes suitable for 1/4" to 1" pipe fittings)
- Slip-joint pliers(Wide grip range for stubborn fittings)
- PTFE tape (Teflon tape)(Use on threaded plastic or metal connections)
- Bucket(Catch drips during repairs)
- Rags or towels(Mop up spills and dry surfaces)
- Flashlight(Inspect dark corners and behind fixtures)
- Gloves(Protect hands during sharp-edged fittings)
- Silicone sealant or epoxy putty(For quick fixes on non-pressurized joints)
- Plumber's tape and thread sealant compound(For added sealing on metal threads)
- Tubing cutter or plastic pipe cutter(Needed for cutting and replacing sections)
- Replacement components ( washers, valves, hoses)(Choose compatible sizes/materials)
- Moisture meter (optional)(Helps detect hidden leaks)
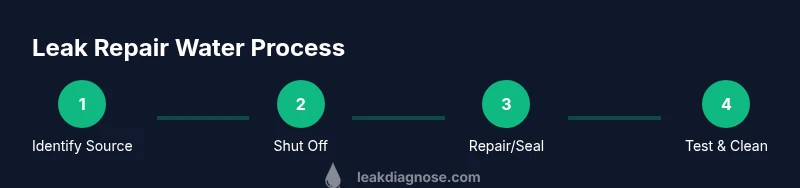
Steps
Estimated time: 60-90 minutes
- 1
Shut Off the Water Supply
Locate the nearest shutoff valve to the area of work and turn it clockwise until snug. If uncertain, shut off the main household supply and verify there is no further flow by opening a nearby faucet. Reason: Prevents sudden water bursts and makes the repair safer.
Tip: Label the shutoff valve so you can find it quickly if another leak pops up. - 2
Identify the Leak Source
Visually inspect the suspected area for obvious drips, staining, or corrosion. If the leak isn’t visible, gently press on surrounding joints and fittings with your wrench to feel for looseness. Reason: Accurate source identification prevents unnecessary disassembly and helps choose the right fix.
Tip: Check behind cabinets or drywall for hidden drips—use a moisture meter if available. - 3
Prepare the Work Area
Clear the area of debris, place a bucket under the leak, and lay down towels to catch spills. Ensure good lighting and ventilation. Remove any obstructing cabinetry if needed to access the joint safely. Reason: A clean, organized workspace reduces mistakes and keeps you safe.
Tip: Keep a trash-free zone around tools to avoid accidents. - 4
Disassemble or Access the Leak Point
Carefully loosen fittings with the appropriate wrench, keeping track of washers and seals. If a section of pipe must be cut, use a cutter and prepare a replacement piece of matching material. Reason: Accessing the fault is essential before applying a repair.
Tip: Do not force fittings; apply even pressure to avoid thread damage. - 5
Apply Repair Method
Reassemble the joint with fresh washers or seals. Apply PTFE tape to threaded joints and use silicone sealant only where appropriate. If replacing a section, fit the new piece snugly and ensure alignment before tightening. Reason: Proper sealing prevents future leaks and ensures durable performance.
Tip: Avoid overtightening, which can crush fittings and create new leaks. - 6
Test for Leaks
Restore the water supply slowly and observe the repaired joint under steady pressure. Check for drips from joints and around seals for several minutes. If leaks persist, re-tighten gently or reapply sealant as needed. Reason: A thorough test confirms the fix and prevents a call-back.
Tip: Test with a dry paper towel to catch any emerging drips quickly.
Questions & Answers
What is the first step I should take when I discover a water leak at home?
Shut off the relevant water supply to stop the flow, then assess the area and gather your tools. If the leak is severe or involves gas lines, evacuate and call a professional.
First, shut off the water, assess the area, and gather tools. If it involves gas lines or is severe, call a pro.
Can I fix every leak myself or are some better left to a plumber?
Many residential leaks are DIY-friendly, especially faucet and small pipe leaks. Complex pressure systems, structural damage, or gas lines should be handled by a licensed professional.
Many leaks are DIY-friendly, but complex issues or gas lines should be done by a plumber.
How can I tell if a leak is hidden within a wall?
Look for damp spots, musty odors, discoloration, or peeling paint. A moisture meter can help confirm hidden leaks behind drywall or cabinetry.
Look for damp spots and odors; use a moisture meter to confirm hidden leaks.
What tools are essential for a basic leak repair?
An adjustable wrench, slip-joint pliers, PTFE tape, a bucket, towels, a flashlight, and appropriate sealants are typically enough for common DIY repairs.
You'll want a wrench set, tape, bucket, towels, and a flashlight for most repairs.
How long should I expect a simple DIY leak repair to take?
For straightforward fixes, plan for about 30 minutes to 2 hours depending on accessibility and the complexity of the leak.
Most simple leaks take about half an hour to two hours depending on access.
What maintenance helps prevent future water leaks?
Regularly inspect hoses and valves, replace aging components, and install moisture sensors where feasible to catch leaks early.
Inspect and replace aging parts, and use moisture sensors where possible.
Watch Video
Main Points
- Know your shutoffs and how to access them quickly
- Identify the leak source before disassembly
- Use correct tools and sealing methods for your material
- Test under normal pressure and document the repair
- Prevent future leaks with proactive maintenance