How Much Leak Detection Costs: A Homeowner's Guide
Learn the cost range for leak-detection services, compare DIY vs professional options, and plan for potential repairs with practical budgeting tips for homeowners.

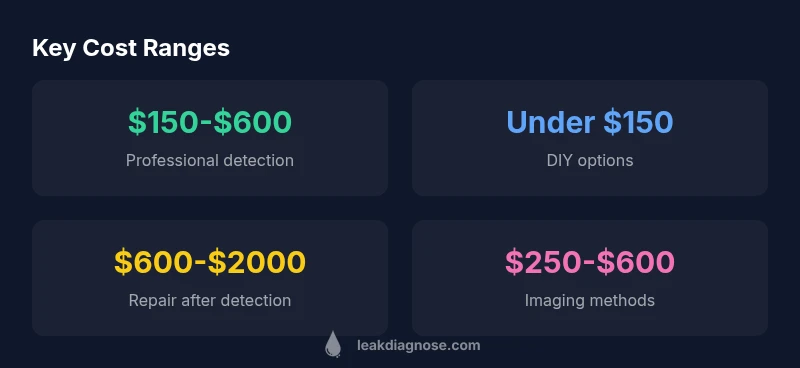
On average, professional leak detection costs fall between $150 and $600, depending on the method (acoustic, thermal imaging, or pressure testing), the size of the property, and whether the call-out includes a comprehensive repair assessment. DIY options can be cheaper but may require specialized equipment or multiple visits. For homeowners, budgeting around a mid-range helps cover common scenarios. Note that true leakage costs can escalate once damage is found.
What determines the cost of leak detection
According to Leak Diagnosis, the question people often ask is how much leak detection costs. The answer hinges on several variables that influence both price and value. First, the detection method matters: basic visual inspections are the least expensive, while specialized technologies such as acoustic listening devices, thermal imaging cameras, and pressure-decay tests add cost but can dramatically improve accuracy. Property size and layout also drive time and complexity; larger homes with multiple possible leak points require more equipment, longer testing sessions, and, consequently, higher labor charges. Location, access to the affected area (basements, crawl spaces, or walls), and the presence of active water damage can further shift the price up or down. Finally, whether the fee includes a written report, a recommended repair plan, or follow-up testing will affect overall value. For homeowners facing a leak, understanding these variables helps frame expectations and promotes smarter budgeting. As you consider your options, it’s useful to think in terms of “how much leak detection” in the context of your home’s specific challenges and the potential for future repairs. The Leak Diagnosis team emphasizes that a well-structured assessment often pays for itself by preventing unnecessary damage and guiding targeted fixes.
Professional vs DIY: where value meets risk
Choosing between DIY and professional leak-detection services is not purely a price debate; it’s a risk-versus-reward calculation. DIY kits and basic inspection methods can lower upfront costs, sometimes keeping you under the $150 mark. However, DIY approaches rely on your ability to interpret subtle signs of moisture, which can result in missed leaks or misdiagnosis. Professionals bring specialized equipment, trained interpretation, and a structured process that reduces the chance of false positives or overlooked problem zones. In many cases, the time saved and the assurance gained from a formal inspection justify the higher initial outlay. The reasonable expectation is that you’ll spend less on the detection itself than you would on repairs caused by a missed or poorly located leak, making professional testing a prudent risk-management choice for larger homes or complex systems. The always-important caveat from Leak Diagnosis: get a clear written estimate and outline the exact tests to be performed so you can compare apples to apples.
By method: acoustic vs thermal imaging vs pressure testing
The method you pick for leak detection directly shapes cost and accuracy. Acoustic methods work well for mains lines or hidden piping in walls, offering a mid-range price point. Thermal imaging excels at locating moisture behind walls and under floors where visible signs are limited, but it comes with higher equipment costs. Pressure-decay testing is highly effective for determining whether a suspected area is truly leaking and can be more time-intensive. Each method has its own strengths, and the optimal choice depends on the suspected leak type, location, and the material of the piping. For many homes, a combination approach—starting with a quick acoustic scan and following up with thermal imaging if needed—delivers the best balance of cost and certainty. When you’re budgeting, include the possibility of using multiple methods if a single pass cannot confirm the issue.
Location, size, and accessibility: how these shape price
A single leaky fixture in a small apartment can be priced differently than a similar issue in a multi-story house. In larger homes, the number of potential leak points grows, and inspectors may need to access crawl spaces, attics, or interior walls, increasing labor time. If a leak is in a hard-to-reach area or behind finished surfaces, extra labor and equipment come into play. Accessibility also impacts safety considerations and the use of specialized PPE, which can raise the price slightly. Additionally, if the investigation requires temporary water shut-offs, the service may incur additional charges or coordination costs. Understanding these access-related factors helps you set realistic expectations and ensures you are budgeting for the fullest scope of work.
Hidden costs and insurance considerations
Beyond the initial detection fee, homeowners should prepare for potential downstream costs, such as lab analysis, additional imaging, or subsequent repairs if water damage is discovered. In many cases, insurance coverage may apply to damages caused by leaks, but coverage often depends on the policy, deductible, and documentation. Ask your provider about what is covered under standard homeowners’ insurance and whether leak-detection-related repairs qualify for reimbursement or credit. Warranties on the testing method and the quality of any resulting repair work are also worth confirming with the contractor. Budgeting for a contingency—often 10-20% of the detection budget—helps mitigate surprises if the inspection reveals a larger issue.
Practical steps to estimate your budget and get quotes
Start by listing all accessible fixtures and potential leak points (kitchen and bathroom sinks, appliances like dishwashers and washing machines, toilets, and exposed piping). Request written quotes from at least two licensed professionals. When comparing, focus on the scope of testing, the tests included, expected duration, and what happens if no leak is found. Ask for a breakdown of costs: preliminary call-out, testing, report, and any follow-up visits. If you anticipate repairs, request a bundled estimate that separates detection from repair costs. Keep notes on the methods used and the rationale for each step, so you can justify the expense if an insurance claim becomes relevant. Finally, schedule a post-test review to confirm findings and to plan any necessary remediation with a clear timeline and budget.
Typical cost elements for leak detection services
| Cost Element | Typical Range | What It Includes |
|---|---|---|
| Basic call-out | 120-250 | Initial visit, visual inspection |
| Comprehensive survey | 350-600 | Test pressure, acoustic/thermal imaging, report |
| Repair consideration | 600-2000 | Repairs not always included; post-detection work |
Questions & Answers
What factors affect leak-detection costs?
Costs are driven by the chosen method, home size, accessibility, and whether repairs are included. Scheduling vs. emergency visits can also shift pricing.
Costs depend on method, home size, and service scope.
Is DIY leak detection cheaper than hiring a professional?
DIY can save upfront, but accuracy and scope are limited. Professional testing reduces risk of missed leaks and often saves time and potential future damage costs.
DIY can be cheaper upfront, but professionals save time and reduce risk.
Do I need to repair after detecting a leak?
Detection confirms the issue. Repair costs vary by damage extent and materials. Some detectors only identify the problem; repairs are separate.
Usually, repairs follow detection.
How long does leak detection take?
Most inspections take 1-3 hours depending on scope and accessibility.
Typically one to a few hours.
What should I prepare before a detection visit?
Provide access to areas, note suspected spots, shut off valves if advised, and have prior inspection reports ready.
Be ready with access and notes.
Are warranties or insurance considerations available?
Ask about warranties on testing and repairs. Some insurers cover leak-related damage if you document the issue and follow recommended steps.
Check with insurer and ask for warranties.
“Effective leak detection hinges on selecting the right method for the problem and preparing for follow-up repairs.”
Main Points
- Understand what drives cost before booking
- Choose the detection method that matches the suspected issue
- Budget for potential follow-up repairs
- DIY options can lower upfront costs but carry risk
- Get written estimates and review warranties or coverage