Ducting Leak Test: Detect and Fix Leaks at Home Fast
Learn how to perform a ducting leak test to locate and seal leaks in HVAC ducts. This guide covers methods, safety, tools, and interpreting results for repairs.

Perform a ducting leak test to locate air leaks in HVAC ductwork and guide sealing. Gather basic safety gear, a smoke source or tracer, a manometer, and access to joints. This test helps improve energy efficiency, comfort, and indoor air quality by identifying where leaks waste conditioned air. You’ll then locate leaks, tag them, and plan sealing steps to restore system performance.
What is a ducting leak test and why it matters
A ducting leak test is a diagnostic procedure used to identify where conditioned air escapes from HVAC ductwork before reaching living spaces. By pressurizing the system and inspecting joints, connections, and dampers, you can map the exact locations of leaks and estimate their impact on performance. According to Leak Diagnosis, most homes have at least a few leaks that quietly undermine comfort and energy efficiency, especially in older or poorly insulated ducts. The test provides a practical basis for sealing decisions rather than guessing. It also establishes a baseline so you can measure the effectiveness of repairs after sealing. In retrofit projects, locating leaks early reduces the amount of time you’ll spend chasing air paths and helps you plan where to apply sealant, mastic, or metal tape for durable results. This section sets the foundation for a methodical approach rather than haphazard patching.
How air leaks in ducts affect efficiency and comfort
Air leaks in ducts waste energy by allowing conditioned air to escape into unconditioned spaces or return air paths. This not only raises energy bills but also reduces comfort, as some rooms stay warm in winter or chilly in summer while the thermostat reads correctly. The effect compounds in houses with long duct runs, many bends, or attic installations where leaks near the envelope are common. A ducting leak test helps you visualize the air paths that should be sealed and shows why simply replacing a furnace or thermostat won’t fix the comfort problem if the duct network is leaky. Leak Diagnosis’s analysis notes that many homes have leaks in accessibility points such as joints, transitions, and dispersed runs, making the test a practical first step before any sealing work.
Common testing methods for duct leaks
There are several practical ways to reveal leaks in duct systems, each with tradeoffs. The smoke pencil or fog machine method relies on visible smoke to highlight air paths as you operate the system. A pressure-based approach uses a manometer or digital gauge to compare pressures inside the duct with the room, helping you locate the largest losses. For accessible joints, a soapy water test can reveal tiny leaks as bubbles form at the connection. In more complex networks, tracer gas methods or ultrasonic detectors can identify leaks without large surface disruption, though these require specialized equipment and, often, professional oversight. When choosing a method, consider your tool availability, the size of your duct network, and whether you’re seeking a quick, rough map or a precise measurement of leakage rate.
Preparing your space before testing
Preparation matters as much as the test itself. Start by turning off or bypassing any fans you don’t intend to test, then shut down HVAC zones that are not part of the test. Close doors to rooms that should not influence the reading, and mark accessible joints with tape or a marker. Ensure you have safe access to the duct runs, ideally with a stable ladder and appropriate PPE—gloves and eye protection. Clear the area of clutter and pets. If you’ll be using a smoke pencil, have a well-ventilated but not drafty space to avoid false readings. Finally, review the manufacturer’s guidance for your duct system and plan for a sealant material you’ll apply after the test.
Testing workflow overview
Most thorough duct leak testing follows a logical workflow: identify the test scope, establish a baseline, expose the target segments, perform the test, document leaks, and plan repairs. A baseline reading helps you compare before and after sealing. Exposing target segments means labeling dampers and access panels so you know where to seal later. During the test, observe the indicators (smoke color, pressure changes, or detector readings) and mark leaks with a per- manent marker or tape. After completing the test, compile a list of leaks by location and severity, and prioritize sealing actions based on impact on airflow and energy waste. Finally, re-test to verify that the fixes reduced leakage as intended.
Safety considerations and common mistakes
Safety first: avoid operating electrical components with damp conditions, and wear PPE when handling sealants or cleaning solvents. A common mistake is sealing every crack without re-testing, which can disturb airflow balance and humidity control. Another pitfall is ignoring joints behind drywall or in inaccessible crawl spaces; such leaks still sap efficiency. Always re-test after each repair to confirm improvements and avoid chasing minor leaks endlessly. If you’re unsure about the material compatibility or the required curing time for sealants, consult the product guidelines or a professional.
Interpreting results and planning repairs
Once you’ve mapped leaks, categorize them by location and presumed impact on airflow. Prioritize large, persistent leaks in main runs or bends, as they typically have the biggest effect on efficiency. For many DIYers, sealing methods such as mastic sealant on sheet metal joints or approved duct tape provide durable results. Replace severely damaged sections or loose fittings when sealing minor leaks is not enough. After sealing, re-run the test to confirm reductions in leakage and to adjust any zone balancing if needed.
DIY vs professional evaluation: when to call a pro
Small residential duct leaks are often manageable for a confident DIYer with basic tools and a clear plan. Complex networks, gas-rated or climate-sensitive systems, or leaks behind walls may require professional equipment and building science expertise. If the data show large pressure drops, if you’re dealing with sealed attic spaces, or if you’re unsure about handling bonding or insulation materials, consult a licensed HVAC contractor. A pro can also perform a calibrated test that yields quantified leakage rates and provide a longer-lasting repair strategy.
Authority sources and further reading
Consult trusted sources such as the U.S. Department of Energy guidance, EPA indoor air quality resources, and university extension publications for deeper understanding and updated testing protocols. Links below provide additional context and credible best practices for duct leakage testing and remediation.
Common mistakes and troubleshooting tips
To maximize success, avoid over-tightening seals, which can collapse flexible ducts or restrict airflow; use approved sealants suitable for ductwork and follow product directions. Double-check that all supply and return branches are included in testing, and re-test after every repair. If readings remain inconsistent, re-check test setup for closed zones or obstructed sensors and revisit the baseline conditions.
Tools & Materials
- Smoke pencil or fog machine(Visualize leaks; inert fog is safer for occupied spaces.)
- Digital manometer or pressure gauge(Measures pressure differential across the duct network.)
- Leak detector (ultrasonic or thermal camera)(Helpful for hard-to-see leaks or large systems.)
- Aluminum foil tape or duct mastic(Seal leaks after detection; avoid ineffective masking tapes for long-term repair.)
- Duct tape (industrial grade)(Temporary sealing during testing; not a substitute for proper sealant.)
- Tracer gas kit (optional)(For advanced testing in complex networks.)
- Screwdrivers, pliers, utility knife(Access panels and joints; have a variety of sizes.)
- Personal protective equipment (gloves, safety glasses)(Protect hands and eyes during testing and sealing.)
- Ladder or stable stool(Access high ducts; ensure safe setup.)
- Marker or tape(Label leaks for repair planning.)
Steps
Estimated time: 60-120 minutes
- 1
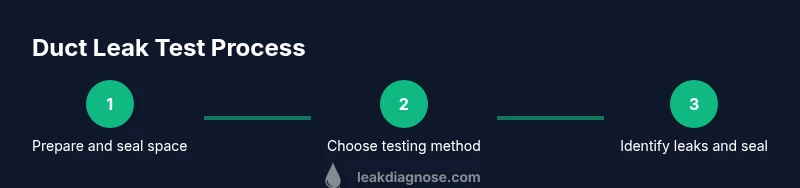
Prepare the space
Identify the zones to test and clear the area. Turn off unnecessary fans, shut doors, and remove pets from the workspace. Gather PPE and test tools so you can operate without interruptions.
Tip: Label the rooms you’re testing so you can compare before/after results later. - 2
Seal off non-target areas
Close vents and dampers outside the test scope to prevent external airflow from skewing readings. Mark the ducts you plan to seal later and ensure access panels are reachable.
Tip: Use tape on vibration sections to avoid creating new leaks during testing. - 3
Choose and set up the testing method
Select an approach (smoke pencil, pressure-based, or tracer gas). Install the test equipment per manufacturer guidance and calibrate the gauge to baseline ambient pressure.
Tip: Start with a basic smoke test to quickly map obvious leaks before deeper measurements. - 4
Conduct the test and observe
Run the system at typical operating speed. Watch for smoke movement, gauge readings, or detector signals; mark leaks with tape or markers as you go.
Tip: Move slowly around joints and transitions—leaks are often at corners and elbows. - 5
Document leaks and plan sealing
Create a leak map with location notes and rough severity. Prioritize large or frequent leakage points for sealing with mastic or foil tape.
Tip: Take photos for reference during repair and re-testing. - 6
Seal and re-test
Apply the chosen sealant to the identified leaks, then re-run the test to confirm improvements. Adjust balancing if needed after re-sealing.
Tip: Re-test each major area after sealing to ensure no sneaky leaks were missed.
Questions & Answers
What is a ducting leak test and what does it measure?
A ducting leak test uses pressure, smoke, or tracer methods to reveal where air escapes from ductwork. It helps quantify leakage paths and guides targeted sealing.
A ducting leak test uses pressure and smoke methods to reveal where air escapes and guides sealing decisions.
Can I test my ducts myself, or should I hire a pro?
Basic testing can be done by a confident homeowner using accessible tools. Complex networks or high-risk systems may require a licensed HVAC contractor with calibrated equipment.
Home testing is possible if you’re comfortable with the tools; for complex systems, hire a pro.
What tools do I need for a ducting leak test?
Key tools include a smoke source or fog machine, a manometer or digital gauge, sealants, tape, marking tools, and PPE. Have ladders or steps for attic access if needed.
You’ll need a smoke source, a pressure gauge, sealants, tape, and protective gear.
How do I tell if a leak is major or minor?
Leaks near large duct runs or at key joints usually have bigger impacts. Prioritize those; smaller leaks at secondary joints can be sealed after the major leaks are controlled.
Leaks near main runs usually matter more; fix those first and then handle smaller ones.
Is testing safe around electrical components?
Yes, but always follow safety guidelines. Power down zones you’re testing, avoid open flames, and wear PPE to prevent injuries.
Be safe: power down, follow guidelines, and wear PPE.
How often should I test and seal my ducts?
Test whenever you notice uneven temperatures, high energy bills, or after major renovation. Re-test after sealing to confirm improvements.
Test when you notice issues or after renovations, and re-test after sealing.
Watch Video
Main Points
- Identify major leak points first
- Use safe, approved sealants for ducts
- Re-test after each repair
- Balance airflow after sealing to maintain comfort