Toilet Leak in Bowl: Troubleshooting Guide
Urgent, practical guide to diagnosing and fixing a toilet leak in bowl. Learn causes, tests, and step-by-step repairs to stop water waste and protect your home.

Most toilet bowl leaks come from a worn wax ring or a faulty flapper. Quick fix steps: shut off the water, flush and sponge to clear the bowl, inspect the base for moisture, and replace the wax ring or flapper if needed. If the leak persists after a straightforward fix, seek professional help from Leak Diagnosis.
Understanding the Problem: Toilet Leak in Bowl
A toilet leak in the bowl is not just a nuisance—it’s a sign that one of the toilet’s seals is compromised or that the base connection isn’t seated correctly. The impact can range from a damp bathroom floor to significant water waste over time. According to Leak Diagnosis, catching a leak early helps minimize water damage and bills. In many homes, a small bowl leak points to a worn wax ring or a failing flush valve. By understanding the anatomy of a toilet—the bowl, the wax ring, the flange, and the flush valve—you can better diagnose the source and plan a safe, effective fix. This guide emphasizes practical, do-it-yourself checks while noting when professional help is wise.
Common Causes Behind a Toilet Leak in Bowl
- Worn wax ring at the base of the toilet, allowing water to seep between the toilet and floor.
- Faulty or stretched flush valve seal or flapper that doesn’t seal properly after a flush.
- Loose or corroded bolts between the toilet and the floor causing lateral movement and gaps.
- Cracked porcelain bowl or damaged flange that creates an ongoing leak path.
- Condensation or improper sealing around plumbing connections that misleads identification of the leak source.
Understanding these causes helps you prioritize fixes. In many cases, the first fix is to replace the wax ring or the flapper. The Leak Diagnosis team notes that these are the most common culprits in residential settings. If you notice water pooling around the base after flushing or see a continuous moisture trail, start your assessment there. Always be mindful of safety and electrical hazards in damp bathrooms.
Immediate Safety Steps When You Discover a Leak
First, don’t panic. Water leaks near electrical outlets or on damp floors can pose slip hazards and potential electrical risk. Immediately shut off the supply valve on the toilet line, usually located behind or beside the toilet. If you can’t locate the valve, turn off the home’s main water supply. Remove standing water with towels or a mop to prevent damage. Do not use the toilet or press the flush lever while the leak source is being investigated, as this can worsen the problem. If you’re uncomfortable with any step, contact a plumber. Leak Diagnosis recommends documenting the scene with photos for reference.
Next, check for obvious signs: moisture at the base, water around the wax ring, or a running toilet. Note whether the leak appears on the base only or also around the tank connections. This initial triage helps you decide whether you can perform a wax ring replacement or flapper replacement yourself, or if a professional repair is needed.
How We Diagnose a Leak: Quick Tests You Can Do
Start with a dye test: put a few drops of food coloring in the tank and wait 15-30 minutes without flushing. If colored water appears at the base or on the floor, the leak is likely from the base seal or flange. Inspect the flush valve and the fill valve for moisture or seepage. Listen for a continuous hiss or running water; this often indicates a faulty flapper or fill valve. Check for movement of the toilet when someone flushes—any rocking could indicate loose bolts or a warped flange. If you cannot identify the source after these tests, it’s time to call a professional. The Leak Diagnosis team emphasizes that thorough inspection often reveals whether the issue is a wax ring, seal, or structural flaw.
Repair Options: When to Replace Wax Ring vs Flapper
A wax ring replacement addresses base leaks where the toilet meets the floor. If the leak stops after replacing the wax ring, you’ve likely resolved the issue. A faulty flapper or flush valve is the second most common cause and can be fixed by replacing the valve seal or the entire fill valve assembly. Some leaks can stem from a cracked toilet bowl or flange, which may require more extensive work or toilet replacement. For most DIYers, starting with a wax ring and a new flush valve seal is the safest path. The key is to turn off water, drain the tank and bowl, and work methodically to avoid introducing new leaks. Always check that the toilet is firmly anchored after repairs.
Prevention and Maintenance to Avoid Future Leaks
Regular inspection of seals and bolts can prevent many leaks. Check for wobble, tighten bolts gradually in a star pattern, and replace any worn gaskets or O-rings. Avoid over-tightening, which can crack the porcelain. Use a flange gasket and wax ring of appropriate size when reseating the toilet. Consider using dye tests annually to confirm the integrity of seals. Finally, address any floor moisture promptly to prevent wood rot or mold growth. Consistent maintenance keeps a toilet leak in bowl from turning into a bigger problem.
Steps
Estimated time: 60-120 minutes
- 1
Shut off water and drain
Locate the shut-off valve behind the toilet and turn it clockwise until snug. Flush the toilet to drain as much water as possible, then use a sponge to remove residual water from the tank and bowl. This prepares the area for inspection or removal. Safety tip: wear gloves and keep a bucket handy for messy water.
Tip: Take a photo of bolt positions before removal to aid reassembly. - 2
Inspect for obvious signs
With water off, look for water pooling at the base, moisture around the wax ring, or visible cracks in porcelain. Check the bolts securing the toilet to the floor for looseness. If the base is dry but still leaking after flushing, the issue may be with the wax ring or flange.
Tip: Use a flashlight to see under the toilet and around the flange area. - 3
Decide whether to remove the toilet
If you suspect the wax ring, you’ll need to remove the toilet to replace it. If the leak is at the flush valve area, you may be able to replace the flapper or gasket without removing the toilet. Follow manufacturer instructions for bolting patterns and safe lifting.
Tip: Ask a buddy to help lift the toilet evenly to avoid cracking the bowl. - 4
Replace the wax ring or seal
Carefully disconnect water lines, remove the toilet, and scrape away the old wax ring from the flange. Install a new wax ring, ensuring alignment with the flange. Reinstall the toilet, tightening bolts evenly to prevent rocking. Reconnect water line slowly and avoid overtightening.
Tip: Do not reuse old wax rings; they compress and fail over time. - 5
Replace the flush valve or flapper if needed
If the leak originates from the tank, replace the flapper seal and inspect the fill valve. Clean the valve seat and install a new gasket if the old one is worn. Refill the tank and test the flush for leaks.
Tip: Dry-fit parts before applying sealant to ensure proper seating. - 6
Test and verify
Turn the water back on and slowly flush several times. Check around the base and the tank for any sign of leakage. If there’s no moisture, run the dye test by adding color to the tank and watching the bowl edge for any color seeping through.
Tip: Keep the area under the toilet dry during testing to avoid slip hazards.
Diagnosis: Toilet bowl leaks water around the base or continuously drips from the bowl after flushing
Possible Causes
- highWorn wax ring or damaged flange seal
- mediumFaulty flush valve seal or flapper
- lowLoose bolts or cracked bowl/flange
Fixes
- easyReplace wax ring and inspect flange; reseat toilet firmly
- easyReplace flapper or flush valve seal and adjust fill valve if needed
- hardRepair or replace cracked bowl or flange; call a professional if needed
Questions & Answers
What is the most common cause of a toilet leak in bowl?
The most common cause is a worn wax ring or a faulty flush valve seal. Replacing these components resolves many base and tank leaks. If the leak persists, there may be a flange problem or a cracked component requiring professional attention.
The most common cause is a worn wax ring or faulty flush valve seal. Replacing these usually stops the leak, but if it continues, consider a flange issue or professional help.
How can I tell if the leak is from the base or the tank?
Leaking at the base typically indicates a seal or flange issue, while a leak around the tank connectionspoints to the flush valve or fill valve. A dye test helps confirm the base leak, and inspecting the valve seals will pinpoint tank leaks.
Base leaks point to seals or flange; tank leaks point to the flush or fill valves. A dye test helps confirm which area is leaking.
Can I fix a wax ring leak myself, or do I need a plumber?
Many homeowners can replace a wax ring with careful prep and the right tools. If you encounter persistent wobble, a damaged flange, or suspect a cracked toilet, professional help is recommended. Always ensure you can safely lift and reinstall the toilet.
You can often replace a wax ring yourself, but call a plumber if the flange is damaged or the toilet cracks.
Is a running toilet a sign of a leak?
Yes. A running toilet often indicates a faulty flapper or fill valve, which can cause a continuous leak into the bowl area. Replacing these components usually stops the run-on and reduces water waste.
A running toilet usually means a bad flapper or fill valve. Replacing those fixes the leak and saves water.
How long should a DIY leak repair take?
A typical wax ring or flapper replacement takes about 60-120 minutes, depending on bathroom access and experience. More complex repairs or damaged flanges may take longer and might require a professional.
Most DIY fixes take about one to two hours, depending on access and problem complexity.
What safety precautions should I follow?
Wear gloves, ventilate the bathroom, and avoid contact with sewer gases. If you must drain multiple fixtures or handle sewage, use appropriate PPE and follow local codes.
Wear gloves and keep the area well ventilated. If you’re handling sewage, use proper PPE and follow code guidelines.
Watch Video
Main Points
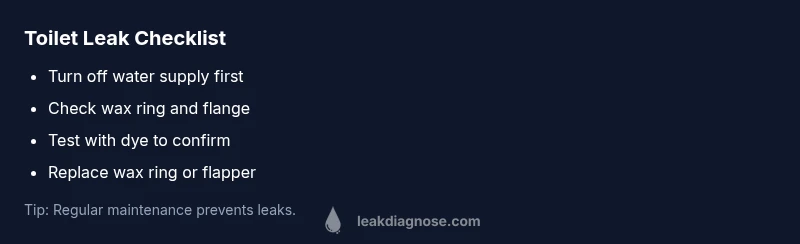
- Turn off water and drain before work.
- Wax ring failure is the most common leak source.
- Use a dye test to confirm the leak.
- Tighten bolts evenly to prevent wobble.
- Consider professional help for cracked bowls or flanges.