Toilet Wax Ring Leak Symptoms: Diagnosis & Safe Fixes
Discover toilet wax ring leak symptoms, identify base leaks, and follow a safe, step-by-step repair to stop seepage and protect your bathroom from water damage.

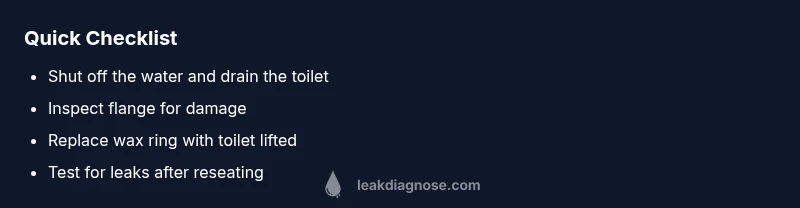
Most toilet leaks at the base are caused by a deteriorated wax ring. The fastest fix is to shut off the water, flush to empty the bowl, loosen and remove the toilet, replace the wax ring, reseal the flange, and re-seat the toilet with new bolts. If the flange is damaged, or the drain line is damaged, call a professional.
What is a toilet wax ring and how leaks happen
The toilet wax ring is a soft, gasket-like seal located between the toilet flange and the bottom of the toilet. Its job is to create a watertight barrier that keeps sewer gases out and prevents water from seeping at the base. Over time, wears and shifting caused by routine use can degrade the wax, leading to gaps that allow water to escape during flushes or when the toilet rocks. According to Leak Diagnosis, many base leaks start small and worsen if ignored, so early detection matters. Factors such as uneven flooring, improper flange height, and repeated tightening or over-tightening of bolts can accelerate wax ring failure. In the home plumbing ecosystem, the wax ring is a single-use part; once compromised, it must be replaced to restore a proper seal.
Understanding the wax ring helps homeowners distinguish base leaks from other plumbing issues. A typical wax ring sits on the flange (the pipe fitting connection to the floor) and forms a seal when the toilet is bolted tightly onto the floor. If the toilet moves, or if the flange is damaged, that seal can break. Proactive checks during bathroom renovations or floor replacements reduce future risk. The Leak Diagnosis team emphasizes that DIYers can handle a wax ring replacement with patience and the right tools, but not all flange problems are user-serviceable.
Common toilet wax ring leak symptoms to watch for
Recognizing the signs of a wax ring leak is critical for fast resolution. Look for water pooling around the toilet base, a damp floor near the toilet, and a musty smell that persists after cleaning. You may notice white mineral deposits or mildew growth on the floor near the bolts. In some cases, the toilet may rock slightly, indicating a loosened seal. The phrase you should search for is 'toilet wax ring leak symptoms' to learn more about identification and next steps. Early detection saves flooring and helps prevent mold growth, which is especially important in damp bathrooms.
Signs can appear gradually or after a heavy flush. If you routinely see moisture after each use, or if the moisture seems to appear after flushing or running water nearby, it’s a strong indicator of a compromised seal. It’s important to distinguish between a wax ring leak and a supply-line leak; the latter usually shows dampness on the shutoff valve or supply line itself rather than around the base. A careful inspection of the floor, bolts, and flange will point you toward the wax ring as the culprit.
Why leaks happen: installation, wear, and movement
Leaks usually begin when the wax ring loses its compressive grip. Improper installation, such as not seating the toilet evenly or failing to center the toilet over the flange, creates uneven pressure that can crack or compress the wax. Wear over years of use also degrades the wax’s elasticity, especially in climates with temperature swings that cause the toilet to shift. Movement from foot traffic or a slight floor sag can exacerbate the problem, as can a damaged or corroded flange. Even small gaps permit water and sewer gases to escape, leading to staining and odors. Regular inspection during bathroom remodels helps catch these issues early.
Tools and materials you'll need for a wax ring replacement
Before starting, gather what you’ll need: new wax ring kit (with gaskets if needed), a flange extension if the flange is low, a wax ring with a bead of plumber’s putty or silicone sealant, adjustable wrench, screwdrivers, a scavenger tray or towels to catch spills, rubber gloves, a putty knife, and a level. A spare toilet bolt set and new washers can prevent loosening after reseating. If you anticipate flange repair, have a flange repair kit on hand. Having a helper can make lifting the toilet safer and faster. Safety glasses are optional but recommended when working with plumbing components that may crack or crack under pressure.
Step-by-step planning before you start
Plan the repair by evaluating the flange condition, toilet weight, and any ceiling or floor damage around the base. If the floor is uneven, you may need to shim the toilet slightly to ensure a stable base. Check the water supply valve to ensure you can shut it off completely, and prepare the room with towels or a secondary basin in case of spills. Label bolts and nuts to avoid mixing hardware, and confirm that you have the correct wax ring size for your toilet model. Finally, confirm that you have a clear path to move the toilet safely without damaging surrounding floor tiles.
Diagnostic considerations: base leaks vs plumbing issues
When diagnosing a base leak, start by drying the area and performing a quick water test after a normal flush. If water reappears around the base, but the supply line remains dry, the wax ring is a likely culprit. Look for seepage at the bolts or a damp ring around the base—these are classic indicators. If you observe water streaks or corrosion along the flange itself, the problem may be flange damage rather than the wax ring. In some cases, the toilet can be misaligned due to slight foundation shifts or improper reseating; reseating with proper alignment may solve the issue without wax replacement. When in doubt, a professional can confirm flange integrity and help with any structural concerns.
Safe repair steps and best practices
Safe repair starts with turning off the water supply and draining the toilet. Lift the toilet straight up, keeping the waste line clear of the floor. Remove the old wax ring and clean the flange surface thoroughly. Place the new wax ring onto the toilet or onto the flange, depending on your kit’s instructions, and lower the toilet back into place with even pressure. Bolt the toilet evenly, then reattach the supply line and turn the water back on slowly to test for leaks. Use a faucet to flush and check for any seepage. Do not overtighten bolts, as this can crack the porcelain or damage the flange. After the leak test, wipe dry and monitor for several hours.
Prevention tips to avoid future toilet leaks
Preventive maintenance saves time and money. Ensure the toilet sits squarely over the flange, and avoid overtightening bolts. Periodically inspect the flange for corrosion or cracks, especially after foundation work or renovations. Use a quality wax ring and, if you anticipate frequent floor movement, consider a flange extender or reinforcement. Maintain a dry area around the base and promptly address any signs of moisture. If you notice recurring issues, schedule a professional inspection to assess flange alignment and floor integrity. Routine checks during bathroom remodels can prevent costly repairs later.
Steps
Estimated time: 60-90 minutes
- 1
Turn off water and drain the toilet
Shut off the shutoff valve behind the toilet and flush to empty the tank and bowl. Soak up any remaining water with towels to keep the workspace clean.
Tip: Keep a bucket handy for any residual water in the bowl. - 2
Disconnect water supply and remove toilet bolts
Carefully disconnect the water line and remove the nuts from the bolts securing the toilet to the floor. Wiggle the toilet gently to break the seal before lifting straight up.
Tip: Have a helper hold the toilet to avoid cracks or slips. - 3
Lift toilet and inspect the flange area
Lift the toilet and inspect the flange for cracks, rust, or misalignment. Clean old wax from the flange and bowl surfaces so the new wax ring can seal properly.
Tip: Take a photo of the flange before removing it if you plan any repairs. - 4
Replace the wax ring and reseat the toilet
Install a new wax ring on the flange or on the toilet base per kit instructions. Lower the toilet evenly and apply consistent downward pressure to set the seal. Reconnect bolts loosely first, then snug them.
Tip: Avoid tilting the toilet; ensure even seating to prevent rocking. - 5
Tighten bolts and connect the water supply
Carefully tighten the lower bolts, then reconnect the water line. Turn the valve gently to avoid water hammer.
Tip: Do not overtighten; porcelain cracks can require costly repairs. - 6
Test for leaks
Turn on the water and flush several times. Check around the base and the flange area for any sign of water seepage.
Tip: Use a paper towel to detect tiny drips that may be hard to see. - 7
Seal and clean up
If no leaks are detected, reseal the area around the base with a light bead of silicone and wipe away excess. Return the toilet to normal use.
Tip: Keep the area dry for 24–48 hours to ensure no slow leaks. - 8
Evaluate flange condition if leaks persist
If leaks persist after replacement, inspect or replace the flange or seek professional help to avoid ongoing damage.
Tip: Persistent leaks often indicate flange damage or foundation issues.
Diagnosis: Water pooling around the toilet base after flushing or use, with a damp floor near the toilet.
Possible Causes
- highDamaged or worn wax ring seal
- mediumLoose or over-tightened toilet bolts causing movement
- lowDamaged flange or misaligned flange height
Fixes
- easyReplace the wax ring and reseal the toilet to the flange
- mediumLift toilet, clean flange, and install a new wax ring with proper seating
- mediumInspect/repair flange or flange bolts if leakage persists after wax ring replacement
- hardEvaluate flange integrity and consider professional flange repair
Questions & Answers
What causes a toilet wax ring leak?
A wax ring leak is usually caused by wax wear or improper seating. Over time, movement or floor settling can compromise the seal, leading to water pooling at the base. Replacing the wax ring and reseating the toilet typically resolves the issue.
A wax ring leak happens when the seal wears or the toilet isn’t seated properly. Replacing the ring and reseating usually fixes it.
How can I tell if the leak is the wax ring and not the supply line?
If water appears at the base but the supply line and shutoff valve stay dry, the wax ring is the likely culprit. Check for dampness around the bolts and under the tank to confirm.
If the base is wet but the supply line is dry, it’s usually the wax ring. Check the base area to be sure.
Can I replace a wax ring myself or should I call a plumber?
Many homeowners can replace a wax ring with basic tools, following proper steps. If you encounter flange damage, persistent leaks, or you’re uncomfortable crawling under the toilet, hire a professional.
You can usually DIY a wax ring replacement, but call a plumber if you find flange damage or big leaks.
How long does a wax ring replacement take?
Plan for about an hour to disassemble, replace the ring, reseat, and test for leaks. More complex flange work or floor damage can take longer.
Most replacements take about an hour; longer if the flange or floor needs work.
What are the signs of a damaged flange?
Wobbling, visible cracks at the flange, or persistent seepage around the base after reseating suggest flange damage. Rust or misalignment are also red flags that a professional should evaluate.
If you see wobble or cracks around the flange, get a pro to check it.
How can I prevent future toilet leaks?
Install toilets correctly, avoid overtightening, and replace wax rings at signs of wear. Regularly inspect the base and flange for corrosion or movement, especially after renovations.
Prevent leaks by proper installation and regular checks.
Watch Video
Main Points
- Inspect flange integrity if leaks persist
- Replace wax ring for most base leaks
- Reseat toilet with even pressure to avoid rocking
- Prevent future leaks with proper installation and regular checks