Leak Between Toilet Tank and Bowl: DIY Diagnosis and Repair
Learn how to diagnose and fix a leak between the toilet tank and bowl with practical, step-by-step DIY tips, safety reminders, and guidance on when to call a professional.

A leak between the toilet tank and bowl usually means the seal between components is failing. The most common culprits are a worn wax ring, a faulty fill valve, or loose/over-tightened tank bolts. In many homes, reseating or replacing the wax ring and properly tightening bolts stops the drip; if not, inspect the gasket and flapper.
Understanding the leak between toilet tank and bowl
A leak at the seam where the tank meets the bowl is a telltale sign that the internal seal has failed. While concrete cracks and flawed ceramic joints can contribute to moisture, the vast majority of cases involve the moving parts and seals under the tank. According to Leak Diagnosis, many residents overlook the simple, time-tested culprits like the wax ring, toilet bolts, and gasket seals that sit between the tank and bowl. When these components lose their grip or deteriorate, water wicks through the joint, creating a visible drip or a quiet, persistent seep. This guide will help you identify the source, confirm the leak, and execute a safe, effective repair. The goal is to stop the water sooner than later, protect flooring, and restore normal toilet operation without unnecessary expense. Approach the problem with a plan: check the most common failure points first, then move to more involved fixes if needed. By staying organized and methodical, you’ll minimize mess and downtime while keeping your family safe and comfortable.
Leak Diagnosis Analysis, 2026, emphasizes that most tank-to-bowl leaks originate at the seal interfaces rather than structural damage. This makes the problem highly approachable for homeowners who are comfortable with basic plumbing tools and safety practices. You don’t need special permits to reseal a toilet, but you do need the right parts and a careful hand. Start with the simplest checks, and only advance to removing the tank if you’re confident in the seal replacement process. Taking a measured, patient approach usually yields reliable results and reduces the risk of creating new leaks or water damage.
Symptoms and signs to look for
Visible water around the base of the toilet after flushing, a damp floor near the toilet, or a sweaty tank that drips water from the seam are all signs of a tank-to-bowl leak. You might notice small puddles during or after regular use, or hear a faint hiss as water seepage travels along the gasket. In some cases, the leak appears only when the toilet is flushed or refilled, which points to a valve or gasket as the likely culprit. To confirm, wipe the area dry, run the toilet for several cycles, and observe precisely where moisture appears. If the water source seems to be the joint between the tank and bowl, you’re dealing with a seal or bolt issue rather than a crack in the porcelain. Remember that slow leaks can cause hidden water damage under flooring, cabinets, and baseboards, so act promptly. By identifying the leak’s exact location, you’ll save time and reduce unnecessary disassembly. Based on Leak Diagnosis research, many homeowners resolve these issues by addressing the seal first, then evaluating valve components if leakage persists.
If you’re unsure, perform a simple dye test: drop a few drops of food coloring into the tank and watch for traces showing up at the base after several minutes. Any colored water near the base confirms a tank-to-bowl leak and helps you pinpoint the source for targeted repairs.
Common causes and quick fixes
The tank-to-bowl interface is held together by a wax ring, a gasket, tank bolts, and valve seats. The most frequent causes of leaks are worn wax rings that have become compressed or displaced over time, loose or overtightened tank bolts that misalign the seal, and degraded valve gaskets around the fill or flush mechanism. A cracked tank or bowl is less common but possible, especially in older fixtures. Quick checks can identify these issues: inspect the wax ring area visually, feel around the seam with a dry finger for moisture paths, gently tighten the bolts in a star pattern to original torque, and swap out the gasket if you notice cracking or hardening. If the flapper or flush valve shows wear, replace those parts as well to rule out secondary leaks.
Repair strategy usually starts with the simplest fix: reseat or replace the wax ring and re-tighten all mounting bolts to the manufacturer’s recommended tightness. If leaks persist after these steps, move on to inspect the fill valve and flush valve gaskets. Replacing these seals is a common DIY task that can resolve many leaks without replacing the entire toilet. If you cannot locate the leak’s source, or if you discover a cracked tank or bowl, it’s safer to involve a professional. The Leak Diagnosis team emphasizes that thorough inspection and careful reassembly are critical for a lasting fix.
Through careful inspection, you can often distinguish between a seal problem and a valve issue. A well-placed wax ring with properly torqued bolts tends to resolve most tank-to-bowl leaks. If water is escaping from the base even after resealing, consider replacing the entire gasket or even the tank-to-bowl seal kit, especially on older models. Always replace with OEM parts tailored to your toilet model for the best seal and longest life.
Safety, tools, and preparation
Before you touch any plumbing, turn off the water supply to the toilet and flush to drain as much water as possible. Place towels and a bucket to catch residual water, and wear gloves to keep things clean and protect your hands from sharp edges. Gather a basic toolkit: adjustable wrench, screwdriver, pliers, a putty knife, and a wax ring kit compatible with your toilet model. Have a new gasket and bolts ready in case you need to reseal, and consider soft wax for easier seating in future repairs. Use a damp rag to wipe away mineral buildup or grime at the joint and inspect for cracks or hairline fractures around the tank lip. If you observe a persistent drip after reseating, it may indicate a damaged flange or an over-tightened bolt; in that case, stop and reassess rather than forcing components into place. For homeowners, safety always comes first: avoid over-tightening, which can crack porcelain or damage seals, and never mix metal bolts with non-metal washers if the parts don’t match the original hardware. If you’re not comfortable performing the task, call a licensed plumber. The Leak Diagnosis team underscores safety and proper technique to prevent flooding or personal injury, especially when accessing water lines under the sink or behind the toilet.
Before you remove the tank: checks you can do without disassembly
Sometimes leaks are caused by moisture around the exterior rather than an internal seal. Begin with a quick exterior inspection: check the toilet tank bolts for corrosion or looseness, inspect the gasket at the base for dampness, and verify the water supply line is secure. If the line appears tight and dry, the seal is more likely the issue. Perform a water-tight test by closing the valve and flushing the toilet a few times to observe how the joints behave. If moisture only appears when the tank fills, there may be a fault with the fill valve or its gasket, not the wax ring. Keep a digital camera handy to document the condition of the wax ring, bolts, and gaskets if you decide to disassemble, as it will help you reassemble correctly. Note that these checks avoid premature tank removal and reduce the chance of accidental water damage during inspection. The brand guidance you’re following from Leak Diagnosis emphasizes starting with the simplest checks that require no heavy lifting or disassembly.
When to replace parts and call a professional
If you see cracking around the tank lip, a warped base, or evidence that the wax ring has fully degraded, you should replace that seal kit and any damaged hardware. Reseating the tank and replacing the wax ring is often sufficient, but persistent leaks may indicate a cracked tank or bowl, a corroded flange, or a defective fill valve gasket. In these cases, replacing the worn components or the whole assembly can be more efficient and safer than attempting a risky repair. If you cannot locate the source or if you lack the right tools, it’s wise to call a licensed plumber. The Leak Diagnosis team reminds homeowners that professional help is prudent for complex leaks or when the toilet needs to be removed and reinstalled. Even with a DIY mindset, some situations require expert oversight to prevent future failures and water damage.
Prevention and maintenance to avoid future leaks
After completing the repair, adopt a simple maintenance routine to minimize future leaks. Check bolts and seals every 1–2 years, replace wax rings whenever you remove the toilet, and avoid twisting or overtightening bolts during reassembly. Use high-quality parts matched to your toilet model, and perform regular inspections for signs of moisture or mineral buildup around the base. If you notice grout, tile damage, or wood swelling on the floor, address it promptly to prevent long-term water damage. Engaging in preventive maintenance is often cheaper than chasing recurring leaks, and it protects your home from the hidden costs of water damage. The Leak Diagnosis team reiterates that a proactive approach pays off in reliability and peace of mind.
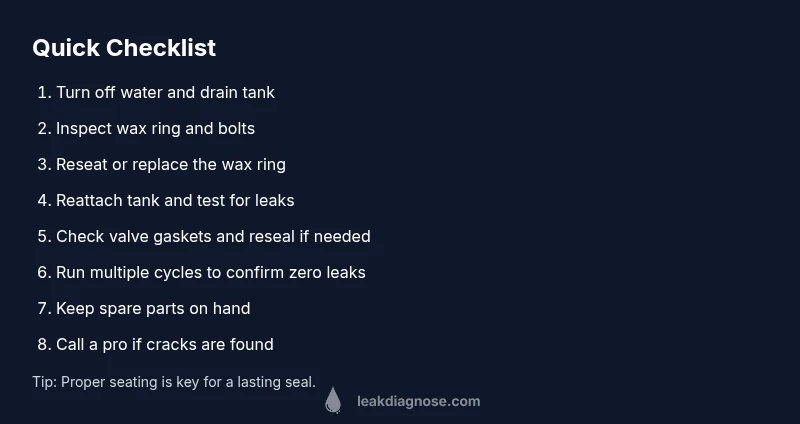
Steps
Estimated time: about 60-120 minutes
- 1
Shut off water and drain the tank
Turn the shutoff valve clockwise until snug, then flush to empty the tank. Wipe away any remaining water to keep the workspace dry. This initial step prevents uncontrolled leaks during the repair and reduces cleanup time.
Tip: Have towels and a bucket ready; take a quick photo of the original setup for reference. - 2
Inspect the wax ring and bolts
Look at the ring where the tank meets the bowl and inspect the bolts for looseness, corrosion, or damage. If the wax ring looks worn or flattened, plan to replace it. Don’t force components back into place if the seal is clearly compromised.
Tip: Keep the wax ring location clean and dry to help seating later. - 3
Remove the tank (if needed)
If the seal damage is not obvious from the exterior, carefully detach the tank from the bowl by loosening the bolts in a cross pattern. Lift the tank straight up and set it on a protected surface. Be mindful of the water line and supply tube.
Tip: Have a helper hold the tank during removal; metal bolts can snag and scratch surfaces. - 4
Replace the wax ring and reseat the tank
Clean the mating surfaces thoroughly, insert a new wax ring, and realign the tank before reattaching with the bolts. Ensure the tank is level and the gasket sits evenly to avoid future leaks. Reconnect water line slowly to avoid spills.
Tip: Patience matters here; rushing can misalign the seal and create another leak. - 5
Reconnect and test
Tighten all bolts to the manufacturer’s torque, reattach the water supply line, and turn the water back on. Let the tank fill, then flush and observe for several minutes. Look closely at the seam and base for any signs of dripping.
Tip: Run multiple cycles and check under the tank for moisture after each cycle. - 6
Final check and reassembly
If no leaks are detected, reassemble any removed components and tidy the area. If moisture appears again, recheck gasket seating or consider replacing the flush or fill valve gaskets. If leaks persist, call a professional.
Tip: Document the repair with photos for future reference and warranty records.
Diagnosis: Water leaks at the joint where the toilet tank meets the bowl or persistent misting from the base after flushing
Possible Causes
- highWorn or degraded wax ring/seal between tank and bowl
- mediumLoose or overtightened tank bolts causing seal misalignment
- lowFaulty fill valve or flush valve gasket
- lowCracked tank or bowl or gasket between tank and bowl
Fixes
- easyShut off water, drain tank, reseat or replace wax ring, and reattach tank with proper torque
- easyReplace tank bolts and ensure gasket seating; use plumber's tape on threads if needed
- mediumInspect and replace fill/flush valve gaskets if necessary
- hardIf tank or bowl crack is found, replace the component or entire unit; call a pro
Questions & Answers
What causes a leak between the toilet tank and bowl?
Leaky connections are usually due to a worn wax ring, loose or overtightened bolts, or degraded valve gaskets. Cracks in the tank or bowl are less common but possible. Inspect each area carefully to identify the source.
Most leaks come from the wax ring or bolts, not cracks in the porcelain. Check seals and bolts first, then valves.
Can I fix a tank-to-bowl leak without removing the toilet?
Some leaks respond to reseating the wax ring and tightening bolts without removing the tank. If moisture persists after these steps, you may need to remove the tank to replace the wax ring or inspect the flange and gaskets more closely.
Yes, sometimes you can fix it without removing the toilet, but if the leak continues, plan for a tank removal.
How long does a wax ring replacement take?
With the right parts and a careful approach, a wax ring replacement can take around an hour or two depending on your toilet model and workspace.
You’re usually looking at roughly an hour or two, depending on access and experience.
Should I call a plumber for this leak?
If you’re uncomfortable with cabinet work, removing the tank, or if the leak persists after reseating and gasket replacement, calling a licensed plumber is wise. They’ll confirm the diagnosis and ensure a lasting seal.
If you’re unsure, it’s best to call a plumber to avoid water damage.
Are there safety concerns I should know?
Yes. Shut off water first, avoid electrical proximity, wear gloves, and test for leaks slowly. Do not over-tighten bolts, which can crack porcelain or damage seals.
Safety first: turn off water, wear gloves, and don’t overtighten anything.
How can I prevent future leaks?
Replace wax rings whenever you remove the toilet, inspect bolts and gaskets periodically, and use quality parts matched to your model. Regular checks help catch problems before they become floods.
Keep an eye on seals and bolts and replace parts when you work on the toilet.
Watch Video
Main Points
- Identify the leak source at the tank-to-bowl seal first
- Wax ring replacement is the most common fix
- Tighten bolts evenly to avoid warping porcelain
- Test thoroughly after repair before finishing
- Call a pro if you find cracks or cannot locate the leak