Repair Toilet Tank Leak: Step-by-Step Guide
This step-by-step guide helps homeowners diagnose and repair a toilet tank leak safely. Identify sources, replace worn parts, and test for a lasting fix without costly service calls.

You will diagnose and repair a toilet tank leak by inspecting the flapper, fill valve, and tank bolts, then replace worn parts and test. You’ll need basic plumbing tools and replacement parts, plus a small bucket and towels to catch spills. This step-by-step guide helps DIY homeowners save water and avoid costly service calls.
Assessing the Source of the Leak
To fix a toilet tank leak, you first need to identify where water is escaping. Leaks can originate inside the tank—such as a worn flapper, faulty flush valve, or a mis-set fill valve—or at the tank-to-bowl junction where the wax ring or bolts may be compromised. Many homeowners notice a rising water bill or a damp area around the base without a dramatic flood. According to Leak Diagnosis, slow drips from the flapper account for a large share of indoor toilet leaks, while degraded supply lines can produce quiet running sounds. Start by turning off the shut-off valve behind the toilet and flushing to drain the tank. Inspect for dripping around the flush valve, fill valve, and base gasket. A simple dye test (a few drops of food coloring in the tank) helps distinguish leaks from normal condensation. If the color appears in the bowl after several minutes but you see no active inside-tank water, the leak may be upstream of the flush valve. Re-run the test if needed to confirm the source.
Tools & Materials
- Adjustable wrench(Loosen/tighten supply line nuts and mounting hardware)
- Screwdrivers (flathead and Phillips)(For flapper and valve screws)
- Replacement flapper kit(Compatible with 2- or 3-inch valves)
- Replacement fill valve kit(Adjustable height to fit the tank)
- Wax ring or gasket kit(New gasket for tank-to-bowl seal)
- Tank bolts and washers(Corrosion-free metal or brass)
- Bucket(Catch water when draining the tank)
- Towels/rags(Protect floor and absorb spills)
- Sponge(Clean up condensation and spills)
- Food coloring/dye tablets(Test for leaks after repair)
- Flashlight(Inspect in dark corners)
- Gloves(Keep hands clean and dry)
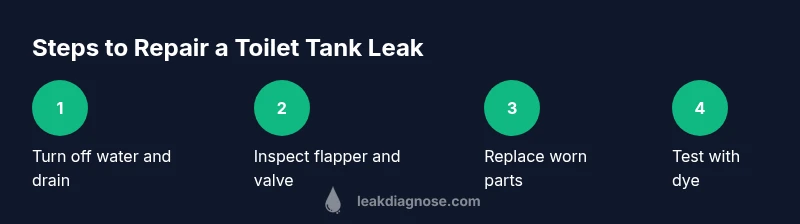
Steps
Estimated time: 60-90 minutes
- 1
Turn off water and drain tank
Shut the water supply off at the shut-off valve, usually behind the toilet. Flush to drain as much water as possible, then sponge remaining water from the bottom of the tank to keep the area dry.
Tip: Have towels ready; a dry tank makes component removal clearer. - 2
Inspect the flapper and flush valve
Look for brittleness, warping, or mineral buildup on the flapper and around the flush valve seal. Replace if you notice any wear or if the seal is compromised.
Tip: Take a photo before removal to ensure correct reassembly. - 3
Check the fill valve and float
Examine the fill valve for cracks and test if the float height is correct. If the float is set too high, the tank may overflow and leak into the overflow tube.
Tip: Adjust the float so the water stops a little below the overflow tube. - 4
Inspect tank bolts and gasket
Remove the tank lid, then check the bolts and washers at the base for corrosion or looseness. Replace washers or bolts as needed to seal the tank securely.
Tip: Tighten bolts gradually in a star pattern to avoid cracking. - 5
Replace worn parts
Install the new flapper and/or fill valve according to manufacturer instructions. If using a wax gasket, replace it now.
Tip: Don't over-tighten threaded connections; porcelain cracks easily. - 6
Perform a dye test
Add a few drops of food coloring to the tank and watch the bowl for coloring within 10–15 minutes to confirm the leak has stopped.
Tip: If color appears in the bowl again, re-check the valve seals. - 7
Reassemble and reconnect
Place the tank lid back, reconnect the water line, and turn the supply valve back on slowly to fill the tank.
Tip: Check that the fill valve stops filling when the float reaches the correct level. - 8
Final leak test over 24 hours
Flush a few times and observe for any signs of leaking at the base or inside the tank over the next day.
Tip: Keep an eye on the area; early signs of leaks save costly repairs.
Questions & Answers
What causes a toilet tank leak?
Common causes are a worn flapper, degraded flush valve, or faulty fill valve. Mineral buildup and corroded bolts can also create leaks at the base. Inspect these parts during the repair.
Common causes include a worn flapper, a bad fill valve, or a degraded flush valve. Inspect these parts during the repair.
How can I tell if the leak is within the tank or at the base?
If water is visible inside the tank but not around the base, the leak is inside the tank. A constant drop around the base with no internal water often indicates a wax seal or bolt issue.
If water is inside the tank but not around the base, the leak is inside the tank. Water around the base usually means the seal or bolts need attention.
Is it safe to DIY toilet tank leaks, or should I hire a pro?
Many tank leaks can be repaired with common tools and replacement parts. If you encounter a cracked tank or multiple failed seals, consider a professional.
Many leaks can be fixed yourself, but a cracked tank means professional help.
Can I use dye to test for leaks?
Yes. A few drops of food coloring in the tank will reveal leaks that would otherwise be hard to detect. Do not use dark dyes that stain the bowl.
Yes, a dye test helps you see leaks more clearly.
How long should a toilet tank repair take?
Most repairs take about 60 to 90 minutes, depending on part availability and whether multiple seals need replacement.
Most repairs take around an hour to an hour and a half.
Watch Video
Main Points
- Identify leak source before replacing parts
- Replace worn flapper and fill valve as needed
- Do a dye test to confirm repair success
- Tighten bolts evenly to prevent cracks
- Monitor for 24 hours after repair