How to Fix a Leaking Toilet: A Step-by-Step Guide
A comprehensive, step-by-step guide to diagnose and repair common toilet leaks—from base leaks to fill-valve issues—with safety tips, a tools list, and prevention tactics to keep toilets leak-free.

By following this how-to, you'll identify the source of a toilet leak, safely shut off water, and complete a repair or replacement of common components without unnecessary risk. You’ll work with the tank components, wax ring, and supply line. Basic tools, replacement parts, and a patient approach are essential for a successful DIY fix.
Understanding Toilet Leaks: Causes and Consequences
According to Leak Diagnosis, many toilet leaks are slow and invisible, wasting water for weeks or months. A leaking toilet can be signaled by a continuously running fill sound, a damp floor, or a background drip that you notice only after wiping the rim or base. Understanding the typical failure points—flapper seals, fill-valve seals, wax rings, and cracked toilet bowls or tanks—helps homeowners target repairs safely. In this guide we explain how leaks happen, why they matter, and how a methodical approach reduces wasted water, higher utility bills, and potential water damage in living spaces. By approaching the problem with a plan, you increase the odds of a durable fix rather than a quick, temporary patch. This article is designed for homeowners and DIY enthusiasts who want clear, practical steps they can follow, with safety and efficiency in mind. The goal is to empower you to fix uncomplicated leaks yourself or know when it’s time to call a professional.
Common Causes of Leaking Toilets
Toilets can leak from several places, and each source suggests a different fix. A worn or warped wax ring between the toilet base and the flange is a classic culprit for base leaks and floor staining. A cracked tank or porcelain exterior can also leak, though this is rarer. Inside the tank, a failing flapper or canister flush valve may allow water to seep into the bowl or overflow into the overflow tube. The supply line and shut-off valve can develop loose connections or mineral buildup that cause persistent drips. Finally, loose or corroded toilet bolts can make the entire unit wobble, stressing seals and leading to leaks after flushing. Identifying the exact location is essential before purchasing parts. If you notice staining around the base during a flush, it’s often a wax-ring issue; if water continues after a flush, the tank components deserve scrutiny.
How to Diagnose the Source of a Toilet Leak
Start by observing where water appears: at the base, around the tank, or along the supply line. A base leak often indicates a wax ring or flange issue; a tank leak usually points to the flapper, gasket, or fill valve. A leak around the water supply line suggests a loose connection or worn nut. A quick dye test can help: add food coloring to the tank and watch for colored water escaping into the bowl to identify the valve, while a blue dye in the tank with a base leak can indicate a flange problem. Listen for running-water sounds after flushing, which can indicate an overflow or internal leak. Finally, check for cracks in the porcelain; any visible fracture requires replacement. If you’re unsure after testing, mark the area and revisit after a short drying period to re-check seals when dry.
Safety First: When to DIY and When to Call a Pro
DIY toilet leak repairs can save money when you have basic plumbing skills and the right tools. However, some situations require professional help: a damaged flange with wobble, a corroded or cracked tank, or repeated leaks after a repair may indicate hidden damage or structural issues. If you smell gas, hear hissing noises near the supply line, or notice significant water on the floor after a flush, shut off the main water valve and contact a licensed plumber. Always wear gloves and eye protection, and disconnect power to nearby outlets if you’re working near metal pipes. When in doubt, err on the side of safety and consult a pro. If you see recurring leaks after two or more attempts, stop and call a plumber to avoid causing more damage or voiding warranties.
Tools and Materials You’ll Need (Overview)
Before you begin, gather the essential tools and replacement parts. An adjustable wrench, a pair of pliers, and a screwdriver (Phillips and flat-head) make disassembly and reassembly straightforward. You’ll also need a wax ring with flange, a replacement flush valve or a new flapper, and a replacement fill valve if the existing one is worn. Have new base bolts, a spare gasket, and extra washers on hand. Towels, a bucket, and rags are essential to manage water and keep the surrounding area clean. If you plan to remove the toilet, a second person to help lift is highly recommended. Optional items include silicone sealant for minor sealing and plumber’s putty to secure fittings. Always test the water supply off and fully drained before starting work, and keep a towel handy to wipe spills.
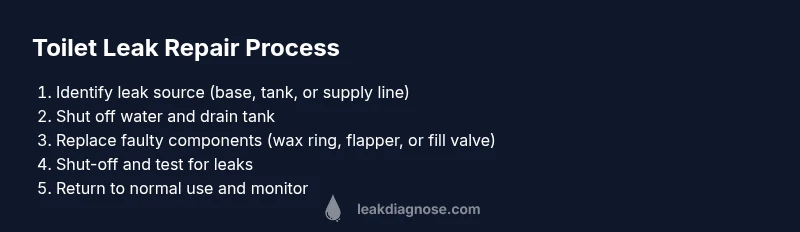
Step-by-Step Overview of the Most Common Fixes
Most leaks come from the wax ring, flapper, or fill valve. The following overview shows how to address each scenario safely and efficiently. Start by turning off the water and draining the tank, then inspect the base for wobble. If the base is loose or damaged, you will likely need to remove the toilet, replace the wax ring and flange hardware, and reseat the toilet squarely with bolts tightened evenly. If the leak is from the tank, replace the flapper or flush valve and inspect the fill valve for wear; sometimes the overflow tube is involved and must be replaced. Reconnect the water line, turn the supply back on slowly, and watch for any continuing drips during the first flush. This overview helps you prioritize parts and avoid repeating work and ensures proper seal.
Maintenance and Prevention to Avoid Future Leaks
Regular checks extend the life of a toilet installation. Inspect the supply line for corroded fittings every 6–12 months, and replace frayed hoses promptly. Maintain proper bolt tension to prevent rocking; a toilet that sits unevenly is more likely to leak. Use the right wax ring type for your flange height and never reuse old rings. If you notice slow leaks, address them promptly rather than waiting for a puddle to form. Consider adding a small splash guard or mat to protect floors in high-traffic bathrooms. Finally, practice a quick annual test: add a little food coloring to the tank and re-check the seal for leaks after a few days of normal use.
Common Pitfalls and Troubleshooting Tips
Avoid over-tightening nuts, which can crack porcelain or strip threads. Do not use excessive force to remove stubborn bolts; apply penetrating oil if needed and allow time. If a replacement part doesn’t stop the leak, re-check the source; the issue may be a cracked tank or a hidden flange problem. Always dry the area after a repair and re-test; a residual leak can take hours to become visible. Keep a spare flush valve seal on hand for quick replacements. If you’re uncertain about the flange height or wax-ring compatibility, pause and double-check measurements before buying parts. A small mistake here leads to costly fixes later.
Quick-Reference Troubleshooting Checklist
- Is the leak at the base? Inspect the wax ring and flange. - Is there water around the supply line? Check connections. - Is the tank leaking? Inspect the flapper and fill valve. - Have you tested with dye? Look for dye in the bowl after flushing. - Is the toilet rock solid? Tighten bolts evenly. - Has the water been reconnected and tested after install? Verify with multiple flushes. - Do you hear running water after a flush? This may indicate a faulty fill valve or crack in the tank. - Do you feel confident performing each step? If not, consult a professional and avoid risking flood.
Tools & Materials
- Adjustable wrench(6-8 inch range for toilet nuts)
- Screwdriver set (Phillips & flat-head)(Flat- and Phillips-head screwdrivers)
- Toilet wax ring with flange(Choose height-compatible wax ring)
- Replacement flush valve or flapper(New seal for tank)
- Replacement fill valve(If current valve shows wear)
- Toilet bolts and washers(New bolts for base)
- Bucket(At least 1-2 gallons)
- Towels/Rags(For spills and cleaning)
- Gloves(Rubber gloves for protection)
- Putty knife or wax ring remover(Optional for easier wax ring removal)
Steps
Estimated time: 60-120 minutes
- 1
Turn off the water and drain the tank
Locate the shut-off valve behind the toilet and turn it clockwise to close. Flush the toilet to drain as much water as possible, then sponge or rag out any remaining water from the tank and bowl. This prevents splashing and makes the repair safer.
Tip: Keep towels handy and wear gloves to protect skin from grime. - 2
Disconnect the water supply line
Place a bucket under the supply line, then use an adjustable wrench to loosen the nut that attaches the line to the fill valve. Gently pull the line away and let any residual water drain into the bucket. Have rags ready for spills.
Tip: Cap the line so it won’t drip onto the floor while you work. - 3
Remove the toilet (if base leak requires wax ring replacement)
If you determine the base leak is likely from a worn wax ring, unbolt the toilet from the floor by loosening the nuts on the bolts. Gently lift the toilet straight up and set it on a towel or old sheet to protect the floor. Inspect the flange for damage.
Tip: Ask a helper to assist with lifting to avoid injury. - 4
Replace the wax ring
Scrape away the old wax from the flange and the bottom of the toilet base. Install a new wax ring with flange, ensuring it seats evenly. Lower the toilet onto the flange, aligning bolts with holes, and press gently to create a seal. Tighten bolts gradually in a cross pattern.
Tip: Do not overtighten; over-tightening can crack porcelain. - 5
Replace the tank seals (flapper/valve) if needed
If the leak involves the tank, remove the old flapper or fill valve and install a new one following the manufacturer’s instructions. Check seals around the flush valve and inlet valve for signs of wear. Reconnect any hoses or connections.
Tip: Handle new parts gently; small tears in seals cause leaks. - 6
Reconnect water and test for leaks
Reconnect the supply line, slowly turn the shut-off valve to supply water, and let the tank fill. Flush several times and inspect the base, supply line, and tank connections for drips. If leaks appear, re-tighten fittings a quarter-turn at a time and re-test.
Tip: If you still see leaks after adjustments, re-check the flange and wax ring alignment. - 7
Final check and clean-up
Wipe down the area, dry the floor, and re-check for any remaining moisture over the next 24 hours. Keep a spare wax ring and a small selection of seals on hand for future maintenance.
Tip: Document any part numbers and ensure you have the correct flange height for future repairs.
Questions & Answers
Why is my toilet leaking at the base?
Base leaks are most often caused by a worn wax ring or flange deterioration. Replacing the wax ring and inspecting the flange typically resolves base leaks. If the toilet rocks, secure the flange and bolts before testing.
Base leaks usually come from the wax ring or flange—replace those parts and re-test.
How can I tell if the leak is from the fill valve or the flapper?
Dye tests and inspection of the tank internals help differentiate leaks. If water disappears after a flush but there’s moisture around the base, the tank components may be the culprit. Replace the faulty valve or flapper.
A dye test helps identify whether it’s the fill valve or flapper.
Is a wax ring replacement always necessary?
Not always. If the leak is from the tank, you may fix it without removing the toilet, but persistent base leaks usually require a wax ring replacement and possibly flange work.
Wax rings are often needed for base leaks, but not for every leak.
Can I use silicone sealant instead of a wax ring?
Silicone sealant is not a guaranteed replacement for a wax ring at the base. For a durable seal, use a proper wax ring with flange or a compatible alternative as per manufacturer guidance.
Sealant alone isn’t a reliable substitute for a wax ring.
How long does repair usually take?
A typical DIY repair takes about one hour to two hours depending on whether the toilet must be removed and flange components replaced.
Most fixes take about an hour or two.
When should I call a professional?
If you notice a damaged flange, a cracked tank, persistent leaks after two attempts, or gas smells, call a licensed plumber to prevent further damage.
Call a pro if the leak persists or you detect damage.
Main Points
- Turn off water before touching the toilet components
- Identify leak source before replacing parts
- Replace wax ring for base leaks and reseat toilet properly
- Test thoroughly after any repair and monitor for leaks