How to Check Leak in Toilet: DIY Toilet Leak Diagnosis
Learn how to check for toilet leaks safely with step-by-step DIY tests. Identify signs, perform a dye test, inspect tank seals, and decide when to repair or call a pro. Leak Diagnosis guides practical, homeowner-friendly leak checks.

Goal: learn how to check for toilet leaks and identify where they originate. This quick guide uses safe, tool-light checks you can perform at home: observe signs, run dye tests, and inspect common failure points like the flapper, fill valve, and wax ring. You’ll understand what each result means for repair decisions, with no pro necessary for initial steps.
Why Toilet Leaks Matter
According to Leak Diagnosis, even small toilet leaks can waste water and cause longer-term issues, from higher utility bills to hidden structural damage. A leak left unchecked can occur slowly at the base, around seals, or inside the tank. Homeowners who perform regular checks often prevent escalation and save money over time. Toilets are the single largest water-waster in many homes when leaks go unnoticed, so proactive checks are a smart part of routine maintenance. This section explains why leaks matter, how they show up in daily life, and what you can gain by catching them early.
Key takeaway: early detection minimizes waste, protects flooring, and reduces the risk of more costly repairs later on.
Signs of a Toilet Leak
Leaks don’t always announce themselves with loud clangs; many signs are subtle and easy to miss. A running toilet is the most obvious indicator, but you might notice a damp spot around the base, more frequent refill noises, or unexplained spikes in your water bill. Look for water stains on flooring, warped tiles, or sound cues like continuous dripping after a flush. A failed wax ring often manifests as a fountain-like spray during flushing or a persistent pool of water at the toilet’s base after events. Dye tests can help confirm leaks that aren’t immediately visible.
Common signs to watch for include: a constantly running tank, water on the floor around the toilet, and an unusually greenish-blue ring around the base after dye testing.
Safety and Quick Checks Before You Start
Before you begin, wear gloves to protect your hands and keep towels or a small bucket nearby for spills. Never force components’ bolts or seals; porcelain is brittle and can crack if over-torqued. If you’re unsure about the toilet’s shut-off valve location, take a quick walk-through of the bathroom layout to avoid surprises. Clear the area around the toilet to have space for inspecting the tank, base, and supply lines. Finally, if you have pets or small children, ensure the area is secure to prevent accidental contact with cleaning dyes.
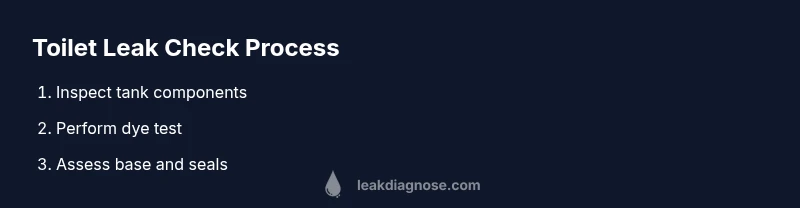
Step-by-Step: How to Check Leak in Toilet (High-Level Overview)
This section provides a concise overview of the checks you’ll perform. Start with a visual inspection of the tank’s internal components (flapper, fill valve) and the base seal. Perform a dye test by placing a few blue drops into the tank and watching the bowl after a flush. If dye appears in the bowl without flushing, the leak is likely between the tank and bowl. If water drips from the base, the wax ring or base bolts may be compromised. Finally, observe the fill valve area for gradual leaks around connections.
What to Do If You Find a Leak
If a leak is confirmed, decide between a DIY repair or professional service based on your comfort level and the leak’s location. For flappers and fill valves, replacement parts are affordable and straightforward for many DIYers. Wax ring leaks, broken bolts, or cracked tanks demand careful work and sometimes professional help. Always shut off the water supply before replacing parts and test the system again after reassembly to confirm the repair worked. If you’re unsure, consult a licensed plumber to prevent further damage.
Preventive Maintenance to Avoid Future Leaks
Preventive measures save time and money by reducing the likelihood of future leaks. Regularly inspect seals and bolts, replace worn washers, and consider upgrading to modern fill valves with adjustable float systems. Keep a routine to check for damp spots, inspect caulking around the base, and monitor your water bill for sudden increases. A small, proactive maintenance habit today can prevent a costly renovation tomorrow.
Tools & Materials
- Blue food coloring (or dye tablets)(2–3 drops in the tank to color the water for the dye test.)
- Gloves(Protect hands from grime and cleaning chemicals.)
- Flashlight(Shine light under the tank and along base for visibility.)
- Paper towels or clean rag(Wipe spills and dry surfaces after tests.)
- Bucket or cup(Catch water when removing the tank lid or during tests.)
- Adjustable wrench or pliers(Only if you need to tighten fittings; use gently to avoid damage.)
Steps
Estimated time: 25-45 minutes
- 1
Shut off the toilet’s water supply
Locate the small shut-off valve near the floor behind the toilet. Turn it perpendicular to the pipe to stop water flow to the tank. This prevents water from entering the tank during inspection and reduces mess.
Tip: Know the valve’s direction before you start; you’ll work faster if you can turn it smoothly. - 2
Empty the tank
Flush the toilet to drain as much water as possible from the tank. If needed, hold the flush lever down to force more water out. You’re aiming for a dry interior so you can inspect seals without interference.
Tip: A dry tank makes it easier to see leaks around seals and the flapper. - 3
Remove the tank lid and inspect seals
Carefully lift the lid and set it aside. Check the flapper for cracks or warping, inspect the flush valve seat, and verify that the fill valve is seated correctly. Look for mineral deposits that could hinder sealing.
Tip: Take a quick photo of any worn parts to reference when shopping for replacements. - 4
Test the fill valve and flapper
With the tank empty, turn the water back on briefly to observe the fill valve’s operation and watch for any seepage around the flapper when the tank refills. If the flapper won’t seat properly or the fill valve leaks, you’ll likely need replacements.
Tip: Make sure you hear a distinct click as the fill valve fills; a soft hiss may indicate a loose seal. - 5
Perform a dye test
Add 2–3 drops of blue dye into the tank and let the tank refill. Do not flush for several minutes, then inspect the bowl for colored water after a flush. If you see blue water in the bowl without a new flush, the leak is from the tank-to-bowl area or the flapper.
Tip: If you can’t see the color, wait 10–15 minutes and recheck. - 6
Check for base leaks
With the dye test complete, observe the base and floor area for dampness or staining after the tank refills. A persistent leak at the base often indicates a wax ring or base-bolts issue that requires resealing or replacement.
Tip: If you notice moisture at the base, plan for a potential wax ring replacement.
Questions & Answers
What are the most common toilet leaks?
Most leaks originate from the flapper seal, fill valve, or wax ring. They can cause running water, damp spots, or higher water use.
Most leaks come from the flapper, fill valve, or wax ring, causing running water or damp spots.
Can a toilet leak go undetected?
Yes, some leaks are slow or hidden. You may notice increased bills or damp spots around the base.
Yes, some leaks are slow or hidden and may show up as higher water bills or damp spots.
Is a dye test safe for septic systems?
For most residential septic systems, small amounts of food-grade dye in the tank are safe. Avoid large volumes.
In most homes, a small amount of safe dye is fine, but avoid large quantities.
When should I call a plumber?
Call a plumber if you detect persistent leaks after tests, see cracks in porcelain, or if you’re unsure how to repair.
Call a plumber if leaks persist after testing or if you see cracks or are unsure how to fix.
How can a leak affect water bills?
Even small leaks can waste water over time, increasing utility costs. Replacing worn parts often reduces waste.
Even small leaks can waste water over time, which raises your bills.
Watch Video
Main Points
- Identify common leak points (flapper, fill valve, wax ring) before repairs
- Dye tests help visualize slow leaks without specialized equipment
- Address leaks promptly to minimize water waste and damage
- Document worn parts and plan DIY repairs safely
- Know when to call a licensed plumber for complex fixes