Fixing Toilet Tank Leak: A Practical DIY Guide
Learn how to diagnose and fix a toilet tank leak with a clear, step-by-step approach. From common causes to safe testing and prevention, this guide helps homeowners repair leaks confidently.

You're going to learn how to fix a toilet tank leak with a safe, step-by-step approach. By the end, you'll know common causes (flapper wear, fill valve issues, or a loose flush valve), the essential tools, and how to test the repair to prevent future leaks. Follow the guidance to perform a targeted fix and reduce wasted water.
Common causes of fixing toilet tank leak
According to Leak Diagnosis, most toilet tank leaks originate from wear in the flapper or issues with the fill valve. A failing flapper can allow water to seep into the overflow tube even when the tank seems still, while a worn fill valve can produce a slow drip that constantly keeps the tank refilling. Other common culprits include a loose or cracked flush valve gasket, a misadjusted flapper chain, and hairline cracks in the tank itself or in the tank bolts. Before you order parts, observe the leak pattern: a continuous trickle into the bowl indicates fill valve or flush valve issues; a damp floor near the base suggests a tank-to-bowl connection or gasket problem; a silent, slow leak may be a worn flapper. The dye test—adding a few drops of food coloring to the tank and watching the bowl—can help identify which component is leaking. This knowledge forms the foundation for a targeted repair plan rather than random part replacement.
Tools and materials you’ll need
A well-prepared toolbox reduces frustration and speeds up repairs. You’ll want: gloves to protect your hands, a bucket and towels for cleanup, a sponge for absorbing residual water, and a flashlight to inspect hard-to-see parts. Replacement parts are often the best way to finish a fix: a new flapper kit (with chain and gasket), a replacement fill valve kit, and an optional gasket seal for the flush valve. Keep a wrench (adjustable is ideal), a screwdriver (Phillips and flat-head), and pliers handy for stubborn connections. If your toilet uses a sugar-white or ivory finish, verify that the replacement parts match your model. Finally, a small amount of plumbers tape can help seal threaded connections. Prepare your space by removing any rugs or mats near the toilet so you can work cleanly.
Diagnosing the source of a toilet tank leak
Accurate diagnosis saves parts and reduces mess. Start by turning off the water at the shutoff valve and flushing the tank to empty it. Observe where water escapes—if water drips into the bowl during refilling, the fill valve or flush valve could be the culprit; if water pools around the base, the issue may be the gasket or tank-to-bowl connection, or even a crack in the porcelain. A dye test can provide a clear visual cue: add a few drops of blue food coloring to the tank and wait 10-15 minutes; if the color appears in the bowl, you’ve found the leak source. Inspect the flapper seat, the flush valve gasket, and the fill valve bay for cracks, warping, or mineral buildup. Keep notes of findings to guide targeted repairs and avoid unnecessary replacements.
Replacing a faulty toilet flapper
The flapper is a common failure point because it sits under constant pressure and can degrade with time. Start by draining the tank, then disconnect the chain from the old flapper and remove the flapper from the valve seat. Install a new flapper that matches your model, ensuring the chain has enough slack to open fully but not so much that it catches on the flush handle. Inspect the flush valve seat for mineral deposits and clean it if needed. Reassemble the tank lid, then briefly turn on the water to watch for leaks around the flapper and flush valve. If you notice continued seepage, consider adjusting the chain length or replacing the entire flush valve assembly.
Replacing the fill valve or flush valve
A worn fill valve can cause persistent leaking during the refill cycle. Remove the old unit by unscrewing its mounting nut from beneath the tank and lift it out. Compare the new valve to the old one to ensure compatibility. Install the new fill valve according to the manufacturer’s instructions, tightening the mounting nut from underneath until snug without overtightening. Reattach the refill tube correctly and ensure it’s not inserted too far into the overflow tube. If the leak persists after replacement, inspect the flush valve and gasket; sometimes a combination of worn components is the culprit. Test by flushing and allowing the tank to refill several times, watching closely for any dripping.
Testing the repair and preventing future leaks
Testing is essential to confirm a successful repair. After completing the repairs, turn the water supply back on and let the tank fill; observe for at least three fill cycles. Look for any dampness around seals and fittings, especially where the tank joins the bowl and around the valve seats. A successful repair will show a dry base, no running water into the bowl, and no steady mist of moisture on the tank interior. To prevent future leaks, keep mineral buildup in check with periodic cleaning of the flush valve seat and fill valve, and replace parts proactively if you notice wear or performance decline. A regular inspection routine—from the flapper to the fill valve—helps catch issues before they become floods.
Safety considerations and maintenance tips
Safety comes first when performing any home repair. Always shut off the water supply before beginning, and ensure the area is dry to prevent slips. Wear gloves to protect skin from sharp edges and potential splinters when handling bolts. Use tools with non-slip grips, and never over-tighten plastic fittings, which can crack the threads. If your toilet is near an electrical outlet or other water-sensitive equipment, maintain a dry perimeter and avoid using metal tools that could cause sparks or shorts. After completing the repair, keep the work area clean and dry to prevent mold growth and slipping hazards. Finally, schedule routine inspections to address wear before leaks occur, extending the life of your toilet and protecting your home’s water bill.
Tools & Materials
- Adjustable wrench(To tighten/loosen tank bolts and valve fittings)
- Screwdrivers (Phillips and flat-head)(For removal and attachment of screws on valve seats)
- Bucket(Catch water during drainage)
- Towels or rags(Dry surfaces; clean up spills)
- Gloves(Protect hands from sharp edges and cleaners)
- Toilet flapper replacement kit(Includes flap, chain, and gasket)
- Replacement fill valve kit(Only if the fill valve shows wear or leaks)
- Plumbers tape(Seal threaded connections as needed)
- Flashlight(Inspections in tight spaces under tank)
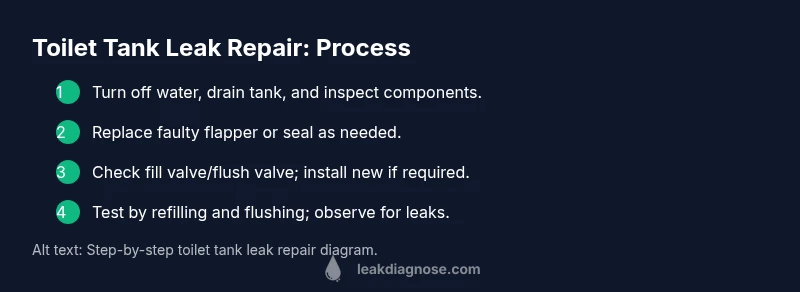
Steps
Estimated time: 30-60 minutes
- 1
Turn off the water supply
Locate the shutoff valve near the toilet and turn it clockwise until it stops. This stops fresh water from entering the tank and prevents accidental flooding while you work. Turn the handle slowly to avoid a sudden rush when you re-open it.
Tip: Take a quick photo of the valve position before you start in case you forget the orientation. - 2
Drain the tank and dry the area
Flush the toilet to empty the tank, and use towels to soak up any remaining water. If the bowl still contains water, hold it down with the flapper to prevent backflow. A dry surface makes inspection and part replacement cleaner and safer.
Tip: Keep a small sponge handy to soak moisture from hard-to-reach corners. - 3
Inspect the flapper and chain
Look at the flapper for cracks, warping, or mineral buildup. Check the chain length; it should have a little slack but not be taut. Replace the flapper if it shows wear, and adjust the chain so the flapper fully seals when closed.
Tip: If you’re unsure about fit, bring the old flapper to the parts store to match the model. - 4
Install the new flapper
Install the new flapper on the overflow valve seat and connect the replacement chain. Gently set the flapper so it sits evenly and seals the opening. Reattach the tank lid loosely to observe if the seal holds during the next refill.
Tip: Avoid overtightening the flush valve components to prevent cracking. - 5
Check the fill valve
If the leak persists after the flapper replacement, inspect the fill valve. Remove the old unit and compare sizes; install the new one if compatible. Attach the refill tube to the correct outlet and ensure it’s positioned away from the overflow tube.
Tip: Use plumber’s tape on threaded connections to prevent minor leaks after reassembly. - 6
Test the repair
Turn the water back on and let the tank fill. Watch for drips and verify that the water level is correct. Flush several times to confirm the leak is gone and the tank refills normally.
Tip: If you see a new leak, retrace steps and check gasket seating and valve tightness. - 7
Finalize and maintain
Replace the tank lid and wipe the area dry. Note any wear you observed for future maintenance. Schedule periodic checks of flapper seats, seals, and valve assemblies to catch issues early and avoid future leaks.
Tip: Create a simple maintenance calendar to remind you to inspect the tank every 6–12 months.
Questions & Answers
What usually causes a toilet tank leak?
Most leaks originate from a worn flapper, a faulty fill valve, or a bad flush valve. Cracks in the tank are rare but possible. A dye test can help confirm the source.
Most leaks come from the flapper, fill valve, or flush valve; dye testing helps identify the culprit.
Can I fix this myself?
Yes. Many tank leaks are solvable with part replacements like the flapper or fill valve. If the tank is cracked or the fixture is very old, consider professional help for safety and reliability.
Yes, many leaks can be fixed yourself with common parts.
How long does a typical repair take?
Most repairs on a standard toilet tank take under an hour, depending on how easily you access the components and whether valve replacements are needed.
Most repairs take under an hour.
Should I replace the whole toilet or just parts?
Usually you can fix the leak by replacing the flapper or fill valve. A full toilet replacement is only necessary if the tank or bowl is cracked or the system fails to seal after multiple attempts.
Often a full replacement isn’t necessary; parts are usually sufficient.
Are chemical sealants safe to use inside the tank?
No. Avoid chemical sealants inside the tank; focus on mechanical replacements like flappers and valves for a reliable fix.
Usually not safe to use chemical sealants in the tank; replace parts instead.
What safety steps should I follow?
Shut off the water, dry the area, wear gloves, and avoid working near electrical outlets. If you’re unsure, pause and seek guidance from a professional.
Safety first: shut off water, dry the area, and wear gloves.
Watch Video
Main Points
- Identify the leak source before replacing parts.
- The flapper and fill valve are the most common failure points.
- Test after each repair to confirm success.
- Maintain the tank to prevent future leaks.