Stop a Radiator Leak: A Practical DIY Guide
Learn how to safely stop a radiator leak with practical steps, temporary fixes, and permanent repair tips. A homeowners guide by Leak Diagnosis to help you act quickly and avoid engine damage.

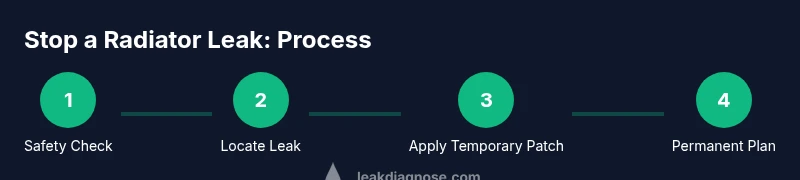
To stop a radiator leak, first shut off the engine and let the radiator cool. Locate the leak, then drain enough coolant to access the damaged area. Apply a temporary sealant or patch if appropriate, and replace any cracked hose or valve as soon as possible. This quick answer sets you up for a safer, staged repair.
What Causes Radiator Leaks and Common Signs
Radiator leaks usually start from worn hoses, loose or damaged clamps, cracked radiator tanks, or corroded seals. Over time, vibration, heat cycling, and poor maintenance can speed up wear and lead to small drips or sudden sprays under pressure. The Leak Diagnosis team notes that leaks often appear first at hose connections or where hoses meet the radiator core. Common signs include visible coolant dampness, a sweet odor from the coolant, blue-green stains on the engine bay, and, in severe cases, frequent need to top up coolant. If you notice overheating or a sudden loss of coolant, treat it as a high-priority issue.
- Look for damp spots along hoses and near clamps.
- Check the radiator cap for a poor seal or crusty residue.
- Inspect for rust or white crust around the core seams.
Identifying the exact location helps you choose the safest and most effective response, whether a temporary patch or a permanent repair will be needed later.
According to Leak Diagnosis, addressing leaks early reduces the risk of overheating and engine damage, and improves the odds of a successful DIY fix when you follow proper safety steps and manufacturer instructions.
note”: null},
Tools & Materials
- Safety glasses(Protect eyes from hot coolant and splashes)
- Mechanic gloves(Heat-resistant if possible)
- Drain pan(Catch coolant to prevent spills)
- Rags or towels(Clean spills and wipe hands)
- Wrench set or pliers(For hose clamps and fittings)
- Screwdrivers(For hose clamps and radiator components)
- Radiator sealant or epoxy putty(Temporary patch following product instructions)
- Coolant (pre-mixed)(Ensure correct type for your vehicle)
- Funnel(Pour coolant without spills)
- Replacement hose or clamps (optional)(For a more permanent fix if a hose is damaged)
Steps
Estimated time: 60-90 minutes
- 1
Power off and let the engine cool
Turn off the engine, engage the parking brake, and wait until the radiator is cool to the touch. Do not crack the radiator cap while it’s hot, as pressurized steam can cause burns. Once cool, open the hood and prepare your work area.
Tip: Cooling time varies by ambient temperature; don’t rush this step. - 2
Locate the leak precisely
Inspect hoses, clamps, radiator seams, and the heater core connections. Wipe the area clean to reveal active drips and avoid misleading damp spots. A flashlight helps illuminate dark corners and you can then mark the exact source.
Tip: Use a clean rag to wipe away residue so you can clearly see the leak direction. - 3
Prepare area and relieve pressure
Place a drain pan underneath. Loosen clamps carefully to relieve residual pressure and to minimize spray. If you must, slightly loosen the radiator cap only after cooling, to vent air and reduce pressure.
Tip: Keep towels handy to catch any splashes and work slowly to control coolant flow. - 4
Apply temporary sealant or patch
Follow the product instructions for your chosen temporary fix. Apply evenly around the leak or place a patch on exposed cores, ensuring the area is dry before application. Let it cure according to the manufacturer’s timing before testing.
Tip: Temporary fixes are best for buying time until a permanent repair can be completed. - 5
Refill and test for leaks
Reconnect any clamps, refill with the correct coolant using a funnel, and start the engine. Allow it to reach operating temperature while watching the patched area for renewed leaks. If you see seepage, tighten clamps or reapply as necessary.
Tip: Bleed air from the cooling system if your vehicle requires it to prevent air pockets. - 6
Plan for a permanent repair
If the leak persists or involves the radiator core, hoses, or heater core, schedule a permanent repair or replacement. Keep records of parts and costs for future maintenance and warranty considerations.
Tip: Keep a log of dates and part numbers for future service.
Questions & Answers
What is the safest first step to stop a radiator leak?
Shut off the engine and let the radiator cool before you touch it. Then open the hood carefully and inspect for the leak. This minimizes burn risk and eye injuries.
First, turn off the engine and let the radiator cool to avoid burns, then inspect the leak safely.
Can radiator sealants fix a major leak permanently?
Sealants are usually temporary fixes meant to slow or stop small leaks. Major leaks or a cracked radiator generally require hose replacement or radiator repair.
Sealants are typically temporary; major leaks require proper repairs.
Is it safe to drive a car with a radiator leak?
No. Driving with a leak risks overheating and severe engine damage. If in doubt, stop driving and arrange towing or professional service.
Avoid driving if the radiator leaks; overheating can cause big engine damage.
What maintenance helps prevent radiator leaks?
Regular coolant flushes, inspecting hoses and clamps, and replacing worn components before they fail reduce the chance of leaks.
Regular coolant maintenance and hose checks help prevent leaks.
When should I seek professional help?
If the leak persists after a temporary fix or involves the heater core or radiator core, seek professional service promptly.
If it keeps leaking after a temporary fix, get a pro to assess.
Watch Video
Main Points
- Shutdown and cool before inspection.
- Identify the leak location accurately for safe fixes.
- Use temporary patches only as a stopgap, not a cure.
- Plan and execute a permanent repair for lasting results.