Repairing a Pool Leak: A Complete DIY Guide
A practical, homeowner-friendly guide to repairing a pool leak—locate the source, patch or seal, and verify results with safe testing and prevention tips from Leak Diagnosis.

You will learn to locate and repair a pool leak and verify the fix. This guide covers dye testing, patching, sealants, and safe plumbing checks. Start by inspecting fittings, joints, and the liner, use a dye test to pinpoint the source, then choose an appropriate patch or sealant and re-test for leaks.
Understanding Pool Leaks: Causes and Symptoms
Pool leaks can hide in plain sight, especially when you assume evaporation is to blame. In many climates, hot weather and heavy use can cause water loss that looks dramatic but isn’t a real leak; persistent symptoms require closer inspection. According to Leak Diagnosis, a leak is indicated when water level drops faster than evaporation, and there is no splash-out explanation. Leaks can originate from several sources: cracks or punctures in the shell or deck, liner leaks, worn gaskets and fittings, or plumbing connections that carry water away from the system. The key is to separate leak symptoms from routine water loss by using simple tests and careful observation. When you begin the process of repairing, focus on non-destructive checks first, then move to patching or replacement as needed. This approach keeps you safe, minimizes water waste, and helps you decide whether a DIY repair is appropriate or if you should call a professional. This matters when you’re undertaking repairing a pool leak and want a durable, long-lasting fix.
Tools & Materials
- Dye testing kit (UV or food-grade dye)(Use to pinpoint leaks. Follow the manufacturer’s instructions.)
- Pool patch kit (vinyl patch or epoxy patch)(For small liner or shell punctures.)
- Silicone sealant or epoxy sealant compatible with pool surfaces(Waterproof sealant suitable for concrete, plaster, or vinyl.)
- Waterproof epoxy or fiberglass repair kit(Optional for larger cracks or structural issues.)
- Caulking gun(Helpful for squeeze-tube sealants.)
- Gloves and eye protection(Protect skin and eyes from chemicals.)
- Cleaning rags, bucket, soft brush(Prepare and clean the surface before patching.)
- PVC plumbing clamps or fittings repair kit(Use if leaks are at joints or fittings.)
- Safety gear for pool testing(Keep children and pets away during dye testing.)
Steps
Estimated time: 4-6 hours
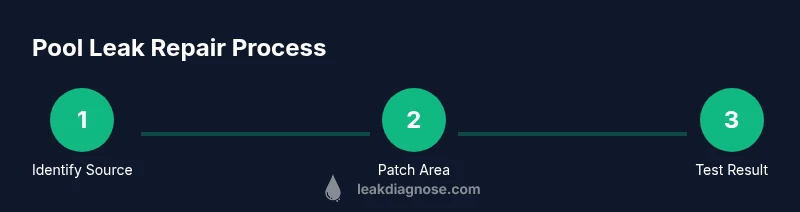
- 1
Identify the leak source
Start with a careful visual inspection of the pool surface, liner edges, and surrounding deck. Use a dye test to localize the source by watching dye movement in the water. Document any patterns you notice, as leaks often originate at fittings, joints, or liner punctures.
Tip: Take photos from multiple angles and note date/time of dye tests for future comparison. - 2
Isolate the area and reduce water loss
Shut off or isolate the suspected area if possible (e.g., close valves or patch a small section temporarily) to minimize ongoing water loss while you work. If the leak is near the equipment pad, inspect pump seals and connections first. Ensure the pool is safe to work around and that electrical components are de-energized as needed.
Tip: Avoid patching while the water level is too high near the patch site; wait for the area to be dry. - 3
Prepare patch materials and surface
Clean and dry the repair area thoroughly. Remove loose plaster or vinyl edges, then roughen the surface slightly to improve adhesive grip. Apply the patch or sealant according to product directions, ensuring full contact and smooth edges.
Tip: Use alcohol or cleaners that do not leave a film; a dry, dust-free surface improves adhesion. - 4
Apply patch or sealant to the leak
Press the patch firmly in place, then overfill slightly to account for expansion as it cures. If using sealant, apply a consistent bead and tool it into the surface for a seamless finish. Avoid air pockets and ensure the patch sits flush with the surrounding material.
Tip: Work in small sections to maintain control and avoid premature curing of materials. - 5
Re-test for leaks
Fill or re-fill to normal water level and allow patch material to cure as directed. Use the dye test again or a bucket test to confirm that the leak source is addressed. Monitor for several hours and then check again after 24 hours.
Tip: Record test results and water level changes to compare against baseline measurements. - 6
Document and plan for prevention
Document the repair details, including materials used and exact location. Plan maintenance routines to monitor potential leak sources, such as fittings and ladders. Consider routine visual inspections and periodic dye tests to catch issues early.
Tip: Schedule a seasonal check and align with your pool maintenance calendar.
Questions & Answers
Can pool leaks be repaired without draining the pool?
Some leaks can be fixed without draining, especially small liner or fitting leaks. Larger shell cracks or significant water loss may require partial draining or professional intervention.
Yes, some leaks can be patched without draining, but others may require partial draining or professional help.
What are the most common causes of pool leaks?
Common sources include fittings and gaskets, liner punctures, deck cracks, and plumbing connections. Pinpointing the exact source is essential before choosing a repair method.
Fittings, liners, and plumbing connections are frequent leak sources; locating the source is essential for a proper fix.
Do I need a professional for pool leak repairs?
For large cracks, structural issues, persistent leaks, or if patching isn’t holding, consider a licensed pool technician. DIY repairs are feasible for minor leaks with proper precautions.
For big cracks or persistent leaks, it’s wise to consult a licensed pool professional; small leaks can be DIY with care.
How long does it take to patch a pool leak?
Time varies with leak size and surface type, from a few hours for simple patches to a full day for complex repairs. Always allow cure time per product instructions.
Repair time depends on leak size and material; plan for a few hours to a full day, plus cure time.
Is dye testing safe for vinyl liners?
Dye testing is generally safe when using approved, non-toxic dye. Follow the product directions and rinse thoroughly after testing to minimize chemical exposure.
Yes, when you use approved non-toxic dye and follow directions carefully.
Watch Video
Main Points
- Identify root cause before patching.
- Choose materials compatible with your pool surface.
- Dry and clean the repair area thoroughly.
- Test the repair after application.
- Adopt a simple maintenance plan to prevent future leaks.