How to Find Pool Leak: Step-by-Step Guide
Learn a practical, step-by-step method to locate a pool leak safely. This guide covers bucket tests, dye tests, shell and equipment checks, and when to involve a professional.

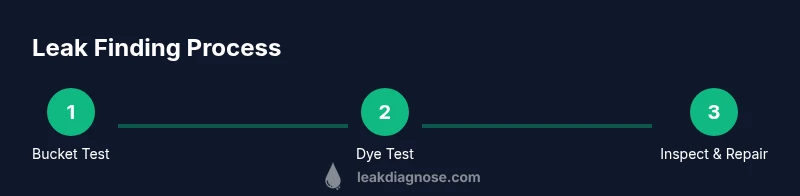
By following a structured diagnostic process, you can identify and locate a pool leak without immediately calling a pro. Start by ruling out evaporation, then run a bucket test, inspect the pool shell, liner, and equipment, and use dye or food coloring to confirm the leak’s source before deciding on repairs. With the right steps, you’ll know where the leak is and whether a DIY fix is feasible or if professional help is needed.
Understanding Pool Leaks: Signs and Why They Happen
Pool leaks can quietly drain water, increase chemical use, and drive up costs. According to Leak Diagnosis, many leaks begin as small drips around fittings, joints, or the shell and grow if ignored. Before you start hunting, differentiate normal water loss from a leak. Evaporation is real, especially on warm days, but a leak will show up as a continuing decline that is hard to attribute to weather alone. Look for signs beyond simple evaporation: damp spots around equipment, wet decking that doesn’t dry after a sunny day, and patches of crust or mineral staining where water collects. A high water bill or unexpected pool level changes during calm weather are red flags that deserve a closer look. This section frames the problem so you can proceed with controlled tests, tests that are described in detail in subsequent sections. By mapping symptoms to likely sources—shell, liner, fittings, or plumbing—you’ll know where to focus your search.
The Evaporation vs. Leak Challenge: Simple Tests You Can Do
Distinguishing evaporation from a leak is the first, simplest step in pool leak detection. Start with the bucket test: fill a sturdy plastic bucket with pool water to about the same depth as the pool water, place the bucket on a level surface away from direct sun, and mark both water levels. After 24 hours, compare the pool water level to the water in the bucket. If the pool level drops more than the bucket, you have a leak; if both drop the same amount, evaporation is the likely cause. Keep the test free of splashes and avoid using the pool during the test. Repeat if weather changes (rainfall can distort results). In addition to the bucket test, monitor daily usage: backwashing schedules, fountain features, and heavy splashing can mimic leaks. This test is quick, inexpensive, and often eliminates a lot of false positives, helping you lock in on the next targeted checks.
Dye Tests: Pinpointing the Source in Shell, Liner, or Equipment
Dye testing is a precise way to confirm suspected leak sites. Start near the most accessible areas: the skimmer, return lines, and inlet fittings. Turn off the pump and gently release a small amount of dye into the water near the suspected seam or joint. If dye is drawn toward a gap or visible crack, you’ve located the source. Move to adjacent joints to verify. Use a flashlight or headlamp to illuminate dark corners and behind equipment where leaks hide. Be careful not to stain the liner excessively; use small amounts and test in stages. If the dye remains stagnant, you may be testing the wrong area—return to the bucket test and inspect additional joints. Dye testing works best when combined with a visible sign of moisture, like damp soil or crusty mineral deposits around a joint.
Inspecting the Plumbing and Equipment for Hidden Leaks
Hidden leaks often live behind walls, under decks, or inside equipment housings. Begin with the most accessible components: pump seal area, lid O-ring, filter cartridges, clamps, and pressure valves. Look for dampness, crust, or greenish mineral deposits that signal a leak. Check all connections: the threaded fittings, union joints, and return-line elbows. If you find a suspected section that looks suspect but not obvious, isolate it by closing nearby valves and observe whether the leak persists. An infrared camera or moisture meter can help you identify wet spots behind walls or under decking without demolition. Documenting these observations with photos makes it much easier to plan repairs or justify a professional visit.
How to Document and Verify Your Findings
A systematic record keeps repairs targeted and affordable. Create a simple log that includes the date of each test, pool water level readings, bucket readings, and the results of any dye tests. Photograph suspected leak points from multiple angles and annotate the images. If you suspect a particular fixture, note its model and installation date. A simple house-plan overlay showing the pool's features and locations of suspect leaks helps you and any contractor understand the situation quickly. Finally, summarize your conclusions in a one-page brief: the suspected source, the level of confidence, and recommended next steps. This documentation can prevent misdiagnosis and support warranty claims if applicable.
When DIY Is Appropriate and When to Call a Pro
DIY repairs are often feasible for small leaks around fittings, minor liner tears, or simple cracked joints that are clearly accessible. If you are comfortable with basic tools, sealants, or replacing O-rings, you can address many cosmetic or minor structural issues. However, some leaks require professional skills: structural cracks in concrete shells, persistent leaks behind walls, or leaks in high-pressure lines near the equipment pad. Gas lines or electrical components associated with pool equipment require licensed professionals per safety codes. If you are uncertain about the source, or if the leak involves the shell or deck, err on the side of professional help. Timely decisions can prevent water damage, mold growth, and higher repair costs later.
Maintenance and Prevention: Reducing Future Leaks
Prevention is easier than repair. Regular visual inspections, winterizing, and using a quality pool cover can minimize stress on joints and liners. Maintain balanced water chemistry to reduce chemical wear that can corrode fittings. Schedule routine checks of seals, O-rings, and gaskets, especially after seasonal changes or heavy use. If you’re not sure how to fix a leak that you’ve found, consult the manufacturer guidelines or Leak Diagnosis resources for safe, approved repair methods. Close attention to these preventive steps will help you catch problems early and extend the life of your pool.
Final Thoughts and Quick Troubleshooting Checklist
- Confirm water loss with a bucket test and 24-hour observation.
- Inspect shell, liner, and equipment for obvious signs of leakage.
- Use dye tests to confirm suspected leak sites.
- Document findings with photos and measurements.
- Decide on DIY repairs or professional help based on source and safety.
Tools & Materials
- Bucket (at least 4 liters)(Clear plastic bucket with a flat bottom)
- Dye or non-toxic coloring(Food coloring or pool-safe dye)
- Tape measure(For consistent level references)
- Marker or tape(To mark water levels on the pool edge and bucket)
- Flashlight(Shallow corners and behind equipment)
- Drip-free container for dye(To avoid staining surfaces)
- Partner/helper(Assists with measurements and observation)
- Camera or smartphone(Document findings with photos)
Steps
Estimated time: 60-90 minutes
- 1
Gather supplies
Collect the bucket, dye, measuring tools, a flashlight, a marker, and a partner to help with measurements. Having everything ready minimizes interruptions and keeps tests accurate.
Tip: Have your helper hold the bucket while you compare pool water levels to ensure accuracy. - 2
Check baseline water level
Mark the current water level at a consistent point on the pool wall. Note the weather and recent use that might affect evaporation before starting tests.
Tip: Use a permanent marker to keep the reference point clear across tests. - 3
Perform bucket test
Fill a bucket with pool water to the same depth as the pool water, then place it on a level surface away from direct sun. After 24 hours, compare level changes between the pool and bucket.
Tip: Record exact times and levels to support conclusions. - 4
Compare losses
If the pool drops more than the bucket, you likely have a leak. If both drop similarly, evaporation is the cause. Consider weather factors and rainfall.
Tip: Repeat after weather changes for accuracy. - 5
Inspect for obvious leaks
Check around fittings, valves, and the pump for drips or dampness. Inspect the liner edge and shell for visible cracks or gaps.
Tip: Use a flashlight to catch tiny drips and crust around joints. - 6
Run a dye test near suspected sites
With the pump off, release a small amount of dye near suspected joints and seams. If dye moves toward a gap, you’ve located the source.
Tip: Test near skimmers, returns, and valve joints first. - 7
Isolate and confirm the source
Document the leak location with photos and notes. Re-test to confirm consistency before planning repairs.
Tip: Consider a second dye test to confirm the area. - 8
Decide on repair path
If the leak is minor and accessible, a DIY repair may be possible. If it involves structural cracks or complex plumbing, contact a licensed pro.
Tip: Follow manufacturer guidelines and local codes for any repair.
Questions & Answers
How do I know if my pool is leaking?
Signs include a consistent water drop beyond normal evaporation, damp areas around equipment, cracks in the shell, or an unexpectedly high water bill. Use tests like bucket and dye tests to confirm.
Look for consistent water loss beyond evaporation and damp spots around equipment; tests can confirm the leak.
How long should I run tests to differentiate evaporation?
Run tests for a full day or more to account for daily evaporation and weather changes. Compare pool and bucket losses for accuracy.
Run a full-day test and compare pool versus bucket losses.
Can a dye test damage the pool liner?
Dye tests used carefully should not damage most liners. Avoid excessive dye and test away from delicate edges.
Dye can be used safely if done carefully and away from liner edges.
When should I call a professional?
Call a pro if you detect a structural crack, a large hidden leak, or repairs involve gas lines, high pressure, or complex plumbing.
Call a pro if you find structural damage or risky plumbing.
How can I prevent future pool leaks?
Regular inspections, winterizing, quality seals and liners, and prompt repairs can prevent major leaks and extend the pool’s life.
Regular checks and timely repairs prevent future leaks.
Watch Video
Main Points
- Differentiate evaporation from leaks with a bucket test.
- Isolate the leak source using dye tests and inspection.
- Document findings before making repairs.
- Know when to DIY and when to call a pro.