How to Remove Stop-Leak from Your Radiator: A Safe DIY Guide
Learn a safe, step-by-step method to remove stop-leak from your radiator. Flush, bleed, and refill with fresh coolant to restore cooling efficiency.

Removing radiator stop-leak additives safely begins with turning off the engine, letting it cool, draining the coolant, and flushing the system to clear residues. Next, inspect hoses for deposits and bleed air after refilling with fresh coolant. This guide outlines a practical, step-by-step approach to get stop-leak out of a radiator and restore full cooling performance.
Understanding Stop-Leak Additives and Why Removal Matters
If you're trying to remove it, you might ask how to get stop leak out of radiator. The short answer is: it requires a careful combination of draining, flushing, and testing, because these additives can coat internal surfaces and form gelatinous residues that clog passages. According to Leak Diagnosis, stop-leak additives are designed to seal tiny leaks but can complicate future maintenance due to change in flow paths and deposits. The Leak Diagnosis analysis shows that improper removal can lead to clogged passages or reduced heat transfer if residues are left behind. A methodical approach minimizes risk and helps you assess whether a full system flush is necessary before you refill with fresh coolant.
Safety Considerations Before You Begin
Begin with safety as your foundation. Make sure the engine is completely cool before you touch any coolant. Wear chemical-resistant gloves and eye protection, work in a well-ventilated area, and have a prepared container to catch old coolant. Never open a hot radiator cap or pressurized component, as scalding hazards and pressurized spray can occur. Keep children and pets away, and have a bucket or drain pan ready to collect coolant for proper disposal. If you feel unsure at any point, consult a professional. Leak Diagnosis emphasizes safety first and urges caution with pressurized systems.
Tools and Materials You’ll Need
Gather everything before you start. A clean bucket or coolant catch pan, a drain valve key or adjustable wrench, a garden hose, rags, and new coolant/antifreeze are essential. Optional items include a radiator flush kit, a siphon pump, and a funnel. Use gloves and eye protection, and have a flashlight to inspect the radiator and hoses for any obvious damage. Check your owner’s manual for the exact coolant type and the recommended flush method.
The Removal Process at a Glance
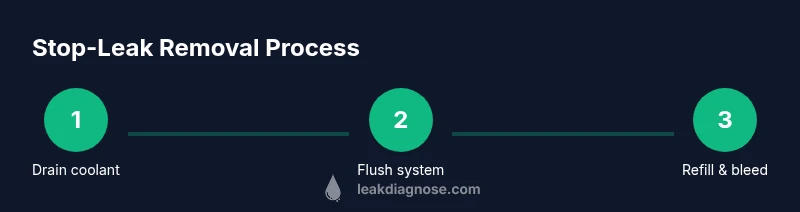
The removal process involves draining the existing coolant, flushing the system to remove deposits, refilling with fresh coolant, and bleeding air from the system. Start by safely draining the radiator, then backflush to clear passages. A thorough flush reduces the chance of future clogs and helps maintain heating efficiency. Finally, monitor for leaks after refilling and run the engine to the operating temperature to ensure the system is circulating properly.
Common Issues and How to Diagnose Them
Even a careful removal can reveal issues you didn’t expect. Look for persistent leaks around hose connections, stubborn residue on the heater core, or reduced heat output. If the heater is not producing heat or the engine boils, there may be an air lock or a damaged hose. In such cases, a more complete flush or professional inspection may be necessary. Keep in mind that removing stop-leak does not fix existing mechanical wear; address worn gaskets or seals as needed.
Tools & Materials
- Drain pan / bucket (5-10 L)(To capture used coolant)
- Wrench or petcock key(For radiator drain valve)
- Garden hose(For flushing)
- Gloves and eye protection(Safety gear)
- Coolant / antifreeze(Pre-mixed or concentrate as per manual)
- Radiator flush kit (optional)(Can improve removal of deposits)
- Rags / towels(Clean spills)
- Distilled water (if diluting)(Avoid minerals)
Steps
Estimated time: 60-90 minutes
- 1
Power down and prepare safety area
Turn off the engine and let it cool completely. Move items away and place a wide drain pan under the radiator drain valve. Wear gloves and eye protection.
Tip: Never open the radiator cap while the system is hot to avoid scalding or pressurized spray. - 2
Locate and open the drain valve
Position the drain pan under the valve, loosen the valve or use a petcock key, and allow old coolant to drain until you see clear fluid.
Tip: Keep a rag handy for spills and have absorbent materials ready. - 3
Flush the radiator and hoses
Close the drain valve and attach a garden hose to the radiator inlet or use a flush kit. Run clean water through the system for 5–10 minutes until the water runs clear.
Tip: Rinse until the water exiting the drain is clear; dirty water indicates deposits are still present. - 4
Backflush heater core (if accessible)
If your system allows, backflush the heater core by reversing flow through the heater hoses to dislodge trapped deposits.
Tip: Be gentle to avoid damaging the core; monitor flow and stop if you encounter resistance. - 5
Refill with fresh coolant
Fill with a pre-mixed coolant as specified by your manual, leaving space for expansion. Use distilled water if you’re diluting concentrate.
Tip: Do not overfill; air will expand as the system warms. - 6
Bleed air from the system
Turn on the engine with the radiator cap off and the heater on high. Add coolant as air escapes until the level stabilizes.
Tip: Bleed in multiple intervals if you see air pockets resurfacing. - 7
Check for leaks and test
Run the engine to operating temperature, inspect all connections, and look for fresh leaks. Recheck coolant level and top up if needed.
Tip: Look for signs of cloudy or milky coolant, which could indicate other issues. - 8
Dispose of waste properly
Collect used coolant in a sealed container and take it to a recycling or hazardous-waste facility per local guidelines.
Tip: Never pour coolant down the drain or on the ground.
Questions & Answers
Is it safe to remove stop-leak without professional help?
In many cases, yes, a careful drain, flush, and refill can be done by a confident homeowner. If you observe extensive deposits, overheating, or persistent leaks, seek professional help.
You can usually remove stop-leak yourself if you follow safety steps, but consult a pro if you see signs of bigger problems.
Will removing stop-leak affect warranty?
Some manufacturers may view stop-leak products as voiding certain warranties. Check your manual or contact the manufacturer for guidance.
Check your warranty details, as some brands may not cover issues caused by additives.
Do I need to flush the heater core?
If your heater core is suspected of being clogged by deposits, a flush through the cooling system can help. Not all systems require heater-core service.
A heater-core issue may require additional steps if hot air isn’t coming through.
Can I reuse old coolant after removal?
Reuse is generally not recommended after a full stop-leak flush because contaminants may remain. Dispose of old coolant safely and refill with fresh solution.
Better to replace with fresh coolant.
How long does bleeding take?
Bleeding can take several minutes to ensure all air is removed. Run the engine and check periodically until the level stabilizes.
It might take a few minutes to get all air out.
What safety gear is essential?
Wear gloves, eye protection, and ensure adequate ventilation. Keep pets away and avoid contact with hot coolant.
Put on gloves and eye protection before you start.
Watch Video
Main Points
- Bleed air thoroughly after refilling
- Flush to remove residues
- Use the right coolant type
- Dispose safely of waste coolant
- Regular maintenance prevents future leaks