How to Fix a Leak in Basement Wall: A DIY Guide
Learn step-by-step strategies to fix a leak in a basement wall, assess risk, choose interior or exterior fixes, and prevent future moisture with practical tips.

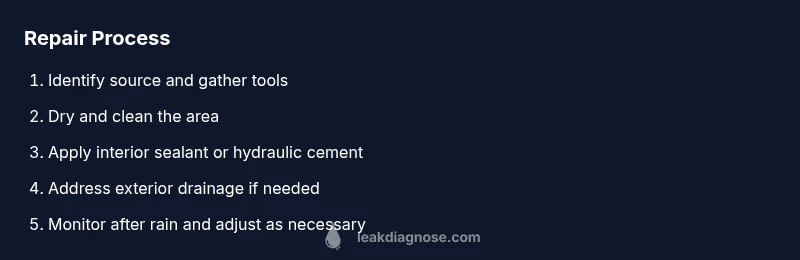
By following a structured approach, you can fix a basement wall leak yourself: locate the source, reduce moisture, and apply appropriate repairs. Start with identifying whether the leak is active, then clean and dry the area, and choose an interior fix (sealant or waterproof paint) or exterior drainage corrections. Monitor the wall after repairs and recheck during wet periods.
What causes basement wall leaks
According to Leak Diagnosis, most basement wall leaks occur when hydrostatic pressure pushes water through cracks in the concrete or masonry, often worsened by poor exterior drainage or high groundwater. Seasonal freeze-thaw cycles can widen cracks, and improper grading directs rainwater toward the foundation. Detecting the exact source is essential because interior repairs without addressing the root cause tend to fail over time. In many homes, small cracks become channels for moisture during heavy rain or rapid snowmelt, making a quick wipe-down insufficient. Additionally, unseen seepage behind finished walls can create mold-friendly environments that compromise indoor air quality if left unaddressed. A thorough assessment now can save significant repair costs later.
Knowing why leaks occur helps you pick the right fixes and prevents recurring dampness. When in doubt, document observed issues with photos and measurements so you can compare after each weather event.
How to assess severity and safety
Before you begin any repair, evaluate not only the moisture but also structural cues. Look for bowing walls, wide cracks, efflorescence (white powdery residue), or damp drywall on the interior. If you notice cracks widening over time or a wall pushing inward, contact a structural pro. For DIY projects, start with a clean, dry surface and keep children and pets away from the area. Always ventilate the space to reduce mold risk and wear a respirator if you see mold growth. Record measurements and photos to track progress after each rain event. If water is actively pouring in, stop the intrusion by diverting it away from the footprint using temporary measures and then reassess when it’s dry.
Safety first: if you suspect structural damage or bulging, delay nonessential work and seek professional input. Mold exposure warrants protective gear and careful cleaning protocols to prevent airborne spores from spreading through your living areas.
Interior fixes you can consider
Interior repairs focus on stopping water indoors and slowing further penetration. Start with the simplest option: sealant or waterproof paint on the interior wall to reduce capillary flow. For small cracks (hairline >1/8 inch), epoxy or polyurethane injections can seal channels from the inside, creating a moisture barrier. Hydraulic cement is a common interior repair for active leaks because it expands as it cures, filling gaps more aggressively than standard caulk. Remember, interior fixes address the symptom more than the root cause; combine these methods with drainage improvements to prevent new leaks. After applying products, recheck after the next heavy rain and keep the area dry to allow products to cure fully.
If you detect mold or persistent dampness behind studs or drywall, consider removing affected sections to ensure a complete seal and prevent regrowth. Proper ventilation and humidity control can make interior repairs more durable over time.
Exterior fixes and drainage improvements
Exterior approaches tackle the source of water before it reaches the foundation. Assess grading around the house and ensure the landscape slopes away from the wall to shed water effectively. Install or repair footing drains and exterior waterproofing membranes where feasible, especially on exposed wall surfaces. A French drain system or perforated drainage pipes can dramatically improve moisture management near the foundation. In cold climates, consider sealing cracks from the outside with masonry sealant and applying a moisture barrier to the outer wall. Exterior fixes are typically more robust but require more effort and sometimes professional coordination; they dramatically reduce hydrostatic pressure and long-term moisture intrusion when correctly installed.
When to DIY vs hire a pro
Homeowners can perform many interior fixes on simple, dry leaks and small cracks, especially when there is no visible wall movement. For cracks wider than 1/4 inch, bowing, notable cracks that widen with weather, or any sign of structural movement, hire a licensed contractor or structural engineer. Exterior repairs, drainage redesigns, or foundation waterproofing often require permits and specialized equipment; professionals can ensure proper drainage gradients and membrane applications without compromising the wall integrity. If you are unsure or the wall shows signs of bowing, assume a professional assessment is needed. DIY work should be limited to cleaning, sealing minor cracks, and applying interior moisture barriers when the root cause is addressed separately.
Tools and materials overview
For interior fixes, you’ll need a basic set of tools and materials. A quick-start list includes PPE (gloves, goggles, respirator), trowel, putty knife, caulking gun, hydraulic cement, epoxy or polyurethane crack injection kit, interior sealant or waterproof paint, a mechanic’s flashlight, plastic sheeting for dust control, and a wet/dry vac for cleanup. Exterior projects require shovels, masonry chisel, cold chisel, concrete sealant, membranes or waterproofing coating, and proper drainage components such as core trenching equipment or perforated piping. Always prepare plastic tarps and drop cloths to keep the work area clean and protect surrounding surfaces. Safety gear and proper PPE are essential when mold is present or dust levels are high and should be kept on throughout the project.
Tools & Materials
- Protective gear (gloves, goggles, respirator)(PPE rated for dust and mold; use respirator for dusty or moldy conditions)
- Chisel and hammer(Masonry chisel for exterior cracks; use with eye protection)
- Putty knife(For smoothing sealants and cleaning cracks)
- Caulking gun and interior sealant (silicone or polyurethane)(Flexible sealant compatible with masonry surfaces)
- Hydraulic cement(Expands as it cures to fill active cracks from the interior)
- Epoxy injection kit (optional)(For broader cracks; follow kit instructions carefully)
- Waterproofing paint/membrane (interior)(Use if interior walls are susceptible to moisture migration)
- Wet/dry vacuum(Cleanup and drying before sealing)
- Utility knife(Trim sealant and membranes as needed)
- Trowel(Smoothing repair materials and membranes)
- Plaster or masonry cleaner(Mold and mildew cleaner if needed)
- Plastic sheeting/drop cloths(Protect floors and adjacent areas)
Steps
Estimated time: 4-8 hours
- 1
Identify the leak source
Observe both interior signs (drips, damp patches, new stains) and exterior cues (wet soil, water pooling near foundation). Document crack locations and measure their widths. Knowing the source guides whether interior or exterior work is needed.
Tip: Take photos from multiple angles and note the weather conditions when the leak was observed. - 2
Prepare the work area and safety gear
Clear the space, remove furniture or belongings, and lay down drop cloths. Put on PPE, turn off power to nearby outlets if moisture is present, and ensure good ventilation to minimize mold exposure.
Tip: Ventilate for at least 15 minutes before starting and during curing times. - 3
Dry and clean affected surfaces
Use a vacuum or towels to remove standing water and dry the wall thoroughly. Mold-prone areas require a mold cleaner and scrubbing to prevent future growth.
Tip: Drying the surface is essential before applying any sealants or injections for proper adhesion. - 4
Apply interior crack repair or sealant
For small cracks, apply a suitable interior sealant or hydraulic cement following manufacturer instructions. If using epoxy, inject according to kit guidelines to seal deeper channels.
Tip: Work from the bottom up and tool the sealant for a smooth finish. - 5
Address exterior drainage if needed
If exterior drainage is inadequate, implement grading improvements, install or repair membranes, or lay a French drain to reduce hydrostatic pressure.
Tip: Ensure drainage paths direct water away from the wall by at least 5–10 feet. - 6
Monitor after rainfall and recheck
After repairs, observe the wall during and after a rain event. Recheck for new damp patches or cracks and address promptly.
Tip: Keep humidity low in the basement and use a dehumidifier to reduce mold risk. - 7
Document and maintain
Capture measurements, photos, and notes for future reference. Schedule annual inspections if water intrusion recurs.
Tip: Set calendar reminders to re-assess moisture levels after heavy rain seasons.
Questions & Answers
What are the most common signs of a basement wall leak?
Common signs include damp patches, efflorescence on the wall, interior cracks that widen after rain, musty odors, and mold growth. Active leaks may show running water or fresh stains after storms.
Look for damp patches and powdery residue on the wall; if you notice water after rain, you likely have a leak that needs attention.
Can I fix basement wall leaks myself?
Some interior fixes can be DIY, especially for small cracks and moisture barriers. More serious issues such as structural movement or persistent exterior leaks should be evaluated by a professional.
You can handle small cracks and moisture barriers yourself, but major structural problems should get a pro.
When should I call a professional?
Call a professional if you observe bowing walls, large or widening cracks, persistent dampness despite repairs, or visible water intrusion after heavy rains. They can assess structural integrity and provide a lasting solution.
If you see bowing or large cracks, it’s time to bring in a pro for safety and a proper fix.
Are interior waterproofing products effective?
Interior waterproofing products can reduce moisture and stop certain leaks, but they are most effective when combined with addressing exterior drainage and hydrostatic pressure.
Interior products help reduce moisture, but proper drainage and exterior fixes are usually necessary for lasting results.
How long does a typical repair take?
Repair duration depends on the severity and chosen method. Simple interior sealing can take a few hours, while exterior drainage upgrades may require days for permits and curing times.
Most DIY interior fixes can be completed in a day or two; exterior work may take longer.
What maintenance helps prevent future leaks?
Regularly inspect the foundation grading, keep gutters clean, direct downspouts away from the wall, and run a dehumidifier to control moisture. Annual checks help catch issues early.
Keep up with drainage and humidity to prevent future leaks.
Watch Video
Main Points
- Identify the leak source before repairs.
- Choose interior vs exterior fixes based on root cause.
- Dry surfaces thoroughly before sealing.
- Address drainage to prevent future leaks.
- Monitor after rainfall and maintain humidity control.