Water Leak in Basement: Urgent Troubleshooting Guide
Facing a water leak in basement? This urgent, practical guide helps homeowners quickly diagnose the source, stop water safely, and plan effective fixes with prevention tips.

Most likely cause is water intrusion from exterior cracks or poor drainage around the foundation. A quick fix is to stop the water entry by redirecting downspouts away from the foundation and sealing obvious cracks if accessible, then begin drying the area. If water continues, escalate with a professional assessment.
Understanding the urgency of a water leak in basement
A water leak in basement is more than a nuisance. Left unchecked, it can threaten your home's foundation, promote dangerous mold growth, and create electrical hazards where moisture meets outlets and wiring. In basements, leaks often hide behind drywall, under floors, or inside walls, so you may not notice until water stains become obvious or a musty odor appears. Acting quickly reduces damage and cost, protects your family's health, and makes future repairs easier.
According to Leak Diagnosis, the most important first steps are containment, evaluation, and a plan. Quick containment buys you time: stopping the flow and drying surfaces helps prevent mold growth and keeps visitors safe. The Leak Diagnosis team found that proactive homeowners who document the source and timing of a leak tend to fix the root cause faster and reveal secondary problems earlier.
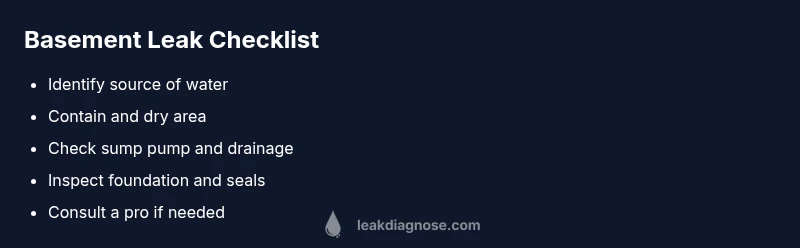
This guide is designed for homeowners and DIY enthusiasts who want practical, safe, and efficient ways to diagnose and begin repairing a basement water leak. You will learn how to identify likely causes, perform essential checks, and decide when to call a professional.
Common sources of basement water leaks
Water finds the path of least resistance, and in basements that path is often through the foundation, joints, or exterior walls. Common sources include hairline cracks in concrete, gaps around windows or doors below grade, and imperfect sealants where the wall meets the floor. Water can also enter through efflorescence on masonry or through gaps in damp proofing, letting moisture travel along studs and insulation.
Plumbing is another frequent culprit. Leaks from upstairs bathrooms, laundry areas, or utility lines can travel downward and emerge in basement ceilings or walls, sometimes far from the original leak. Sump pumps and drainage systems are critical lines of defense; if the pump fails, or if the discharge line is blocked or directed toward the foundation, water accumulates where you least expect it.
Finally, poor surface drainage matters. If downspouts dump next to the foundation or the soil slopes toward your home, rainwater can pool along the basement walls. Seasonal snowmelt and heavy rain compound the problem, making even small gaps produce persistent dampness.
Immediate safety and containment steps
Your first move is safety. Water and electricity are a dangerous mix, so switch off power to the affected area at the main panel if you can do so safely, and avoid entering a heavily flooded zone until it is de energised. If you must, wear rubber sandals and keep a dry route to the panel. Move people and pets to higher ground and keep doors open to improve airflow, but avoid creating new pathways for water to spread.
Next, contain the area. Place plastic sheeting or a tarp to cover the floor and slow the spread of water to other rooms. Use towels, buckets, and a wet/dry vacuum if you have one to remove standing water and prevent pooling near electrical outlets or equipment. Document the scene with photos and notes about where the water is coming from and when you first noticed it.
Finally, start drying and dehumidifying. Use fans, dehumidifiers, and open windows if weather allows, but never run dehumidifiers or fans in a flooded room that is also wet with electrical equipment. Keep a log of moisture levels and any changes in water level so you can share details with a contractor later.
How to assess moisture and damage
Moisture can hide in walls, floors, and insulation. Start by checking for damp patches, discoloration, or mineral deposits on concrete. Use a moisture meter on concrete walls and floor slabs to gauge relative humidity; readings near or above seventy percent often indicate ongoing moisture problems that promote mold.
Inspect for moldy odor, peeling paint, warped baseboards, or musty air. Water damage weakens framing and may lead to wood rot, so note any soft or crumbly sections. If you suspect hidden leaks, probe with a non destructive moisture detector or call a professional to perform infrared imaging.
Keep samples of water if possible for testing without touching it. If the leak is recurring, track patterns: time of rain, how long it runs, and whether it stops after a day or continues for weeks. This information helps pinpoint sources like drainage or plumbing.
Diagnostic-flow overview
A systematic diagnostic flow helps you move from symptoms to a reliable diagnosis and an appropriate fix. The general path is:
- Symptom: Water pooling or dampness appears after rain or during heavy use of household fixtures.
- Diagnosis: Identify whether the leak is external foundation or water intrusion, plumbing related, or drainage related.
- Solutions: Apply targeted fixes such as sealing cracks, correcting drainage, or repairing plumbing; escalate to professional help if needed.
By following a consistent flow you reduce guesswork and avoid wasted money on unnecessary repairs. Keep a record of findings and photos to share with a contractor or insurer.
Quick fixes you can try today (most common cause)
- Seal obvious foundation cracks with an exterior compatible sealant, and consider epoxy injections for wider gaps.
- Redirect downspouts and ensure drainage slopes away from the house; extend discharge lines if needed.
- Check exterior ground slope and rebuild soil grading to remove pooling near walls.
- Inspect the interior drain and sump pump: clean screens, clear blockages, and verify the pump runs when tested.
- Improve interior drying with dehumidifiers and fans, and place plastic sheeting to prevent cross contamination to living spaces.
If the leak persists after these steps, do not force solutions; instead proceed to professional evaluation.
Prevention and long term maintenance
- Schedule annual exterior waterproofing checks and reseal masonry as needed.
- Maintain a clear three to four inch clearance around foundation walls to discourage moisture buildup.
- Clean gutters and downspouts so water is directed away from the foundation.
- Install a properly sized sump pump with a reliable discharge line and backflow prevention.
- Monitor moisture levels seasonally, especially after heavy rain or rapid temperature changes.
A proactive maintenance plan reduces the chance of recurring leaks and saves money over time. Prevention is easier than remediation, and prevention measures are worth the investment.
When to call a professional and what to expect
If water intrusion continues after basic fixes, or if you see visible foundation cracks, mold growth, or ongoing damp conditions, it is time to call a licensed plumber or foundation specialist. A pro can perform a pressure test, interior and exterior inspections, and potentially epoxy or polyurethane injections for cracks, or structural repairs if needed. Expect a written assessment, an itemized repair plan, and a realistic timeline; ask about permits and insurance coverage if major work is anticipated. Early professional input can prevent costly mistakes and ensure safety for your family.
Steps
Estimated time: 60-120 minutes
- 1
Shut off power and water safely
Before touching any wet areas, turn off the main electrical power to the affected zone and shut off the main water supply if you can do so safely. This reduces the risk of shocks and further water damage.
Tip: Verify power at the panel with a non-contact tester before approaching wet equipment. - 2
Document the scene
Take clear photos from multiple angles, note water level changes, and record the time of day and rainfall. This information helps a contractor or insurer understand the scope.
Tip: Keep a dated log of water levels and actions taken. - 3
Check exterior drainage paths
Inspect downspouts, gutters, and grading away from the foundation. Ensure runoff is directed at least several feet away and that the soil slopes away from the wall.
Tip: Clear debris from gutters to maximize drainage efficiency. - 4
Test the sump pump and discharge
If you have a sump pump, simulate a water load to confirm the pump starts and discharges properly. Check for kinks and blockages in the discharge pipe.
Tip: Replace or repair a weak float switch or clogged check valve promptly. - 5
Inspect interior plumbing
Look for damp spots along joists, pipes, and fixtures in the basement. Tighten fittings and tighten hose clamps on any suspect lines.
Tip: Use a dye test to trace slow plumbing leaks behind walls. - 6
Dry and dehumidify
Set up dehumidifiers and fans to promote air movement. Remove standing water with a pump or bucket and dry surfaces thoroughly.
Tip: Aim for a relative humidity below 50 percent to suppress mold growth. - 7
Seal cracks and improve barriers
Apply a foundation crack sealant or epoxy to minor cracks. Consider exterior waterproofing measures for persistent seepage.
Tip: Do not rely on quick fixes for structural cracks; schedule a professional assessment if cracks widen. - 8
Monitor and plan next steps
Keep monitoring water presence and moisture levels for 48 to 72 hours. If water recurs, escalate to a professional evaluation.
Tip: Share your notes and photos with the contractor for efficient planning.
Diagnosis: Water pooling in basement after rain or during heavy water use
Possible Causes
- highFoundation crack or wall seepage
- mediumSump pump failure or blocked discharge
- lowInterior plumbing leak from nearby fixtures
Fixes
- easySeal foundation cracks with exterior sealant or epoxy; improve exterior drainage
- easyInspect and test sump pump; fix discharge line and check for backflow issues
- easyInspect interior plumbing for leaks and tighten fittings; replace damaged hoses
Questions & Answers
What is the first sign of a water leak in basement?
Common early signs include damp walls, musty odors, and unexplained water stains. Check for active drips and test areas with a moisture meter.
Look for damp walls, musty smell, and new water stains, then test with a moisture meter.
Can I fix a basement leak myself?
Minor cracks and poor drainage can often be addressed by sealing and improving drainage. More serious leaks require a professional assessment.
Some leaks you can handle, but serious leaks need a pro.
How can I tell if the leak is from plumbing or the foundation?
Check for patterns related to rainfall or running fixtures; inspect exterior foundation for cracks; water from plumbing often shows damp spots near pipes.
Look at when it happens and where water appears to tell plumbing from foundation.
Is a damp basement dangerous?
Yes, damp basements encourage mold growth and can affect air quality and structural materials. Use protective gear and address mold promptly.
Yes, damp spaces can be risky; address mold quickly.
How long does a typical basement leak repair take?
Repair time depends on the source and complexity; simple fixes may be completed in a few days, while major repairs can take longer.
It varies; simple fixes may be days, major repairs longer.
What should I do with standing water before help arrives?
If safe, remove standing water using a pump or buckets, but avoid touching electrical sources and call for help if needed.
Carefully remove standing water only if safe.
Watch Video
Main Points
- Prioritize safety and shut off power before inspections
- Use a structured diagnostic flow to locate the source
- Call a professional for foundation or mold issues
- Maintain drainage to prevent future leaks