Basement Leak Repair Near Me: A DIY Guide
Learn to identify, diagnose, and repair basement leaks near you with a clear, step-by-step approach. Safety, tools, costs, and maintenance tips from Leak Diagnosis.

You will learn how to locate, assess, and repair basement leaks near you safely, including when to seal walls, address groundwater intrusion, and improve drainage. Before you start, gather basic tools, check for mold, and know when a professional intervention is necessary. This guide helps homeowners take control of damp basements and prevent further water damage.
Understanding the Basement Leak Landscape
If you're searching for basement leak repair near me, you're not alone. Damp basements are a common problem that can escalate into mold, foundation damage, and costly repairs if ignored. According to Leak Diagnosis, understanding water movement helps homeowners identify sources, evaluate risk, and take safe, practical steps to stop water intrusion. By recognizing how water travels through soils and walls, you can choose the right mix of fixes and avoid unnecessary services. The goal is to reduce moisture, protect valuables, and preserve structural integrity while maintaining safe living spaces.
Common Causes of Basement Leaks
Basements leak for several reasons, often in combination. Poor exterior drainage, clogged gutters, and downspouts that point toward the foundation concentrate water at the base. Foundation cracks, joints around windows and doors, and damaged sump pits can provide pathways for groundwater. Basement walls may be porous, or concrete can develop micro-cracks over time due to freeze-thaw cycles. In newer homes, construction gaps and improper sealing can lead to early leaks. Understanding the cause guides both interior fixes and exterior improvements, reducing the chance of recurring moisture problems. Leak Diagnosis analysis shows that poor exterior drainage and foundation cracks are leading causes of interior basement leaks.
Quick Wins Before You Dig In
Before investing time and money, implement quick, low-risk measures. Use heavy-duty plastic sheeting to protect belongings from potential spray or dust. Set up a high-flow fan and dehumidifier to start drying the space. Clean existing drains and extend downspouts away from the foundation. Inspect around door thresholds and basement windows for splash intrusion after rain. These steps don’t replace long-term fixes, but they can buy time and help you scope the project more accurately.
Step-By-Step Inspection and Planning
Begin with a systematic inspection: look for interior wet spots, efflorescence on masonry, or damp insulation. Note the location, size, and season when leaks occur. Sketch a simple map of entry points and potential groundwater paths. Test exterior drainage by ensuring gutters flow properly and downspouts discharge water at least several feet from the wall. Plan repairs based on both interior symptoms and exterior conditions, then prioritize steps by risk and cost.
Temporary Mitigation While You Work
If water is actively entering the space, prioritize rapid mitigation. Bypass or seal off active sources if safe; use tarps to control drips. Run a sump pump if you have one and keep a battery backup in case of power outages. Ventilate the area to reduce humidity and prevent mold. Remember, temporary measures don’t fix the root cause, but they can protect belongings and maintain a healthier workspace during repairs.
DIY Sealing and Drainage Solutions
Interior sealing can reduce dampness, especially for small cracks and joints. Hydraulic cement forms a fast-setting seal for active leaks in concrete walls, while silicone or polyurethane caulk works for joints. For larger cracks, epoxy or polyurethane injections may be needed to restore structural integrity. Improve drainage by cleaning and regrading the soil near the foundation and extending downspouts away from the wall. Apply a basement-specific waterproof sealant to interior walls and floors where appropriate.
Exterior Repairs and Perimeter Drainage
Where possible, exterior fixes are the most durable. Excavating around the foundation allows resealing from the outside and installation or repair of a waterproof membrane. If full excavation isn’t feasible, exterior trenching at critical points or injecting sealant through cracks can help. A well-designed perimeter drainage system, including a French drain and a functional sump or pump, directs water away from the foundation and reduces hydrostatic pressure on walls.
When to Call a Professional
Some leaks indicate major structural concerns or persistent hydrostatic pressure that challenge DIY limits. If you notice large cracks, ongoing standing water despite fixes, sewer backups, or signs of structural movement, contact a licensed contractor or foundation specialist. A professional assessment can include soil analysis, moisture mapping, and fracture inspection to determine the best long-term strategy and safety considerations. Start by requesting a written estimate and a scope of work.
Permanent Fixes and Long-Term Prevention
Long-term solutions focus on stopping water at the source and managing moisture. Repaired cracks, exterior waterproofing, and a robust drainage system prevent future leaks. Combine interior repairs with exterior changes such as grading adjustments, gutter maintenance, and proper landscaping to direct water away. Regular inspections after heavy rains help you catch issues early. This integrated approach minimizes recurring dampness and protects structural components.
Materials, Tools, and Safety
A well-chosen toolkit speeds the repair. Essential items include a moisture meter, heavy-duty plastic sheeting, utility knife, caulking gun, hydraulic cement, concrete waterproof sealant, and a dehumidifier. Wear PPE—gloves, eye protection, and a respirator as needed. Keep a bucket, sponge, and rags for cleanup, plus a wet-dry vacuum for active water removal. Always work in a well-ventilated area and unplug electrical gear when near water.
Budget, Scheduling, and Realistic Timelines
Costs vary with the project’s scope, from quick fixes to major exterior work. Budget for interior sealants, drainage improvements, and potentially exterior work that requires excavation. Schedule weather considerations and allow time for curing products, drying cycles, and inspections. A conservative plan helps avoid rushed decisions and unplanned expenses, and helps you decide when to bring in help.
Maintenance Routine After Repair
Keep moisture levels in check with ongoing monitoring. Re-test humidity and moisture content periodically, and schedule seasonal inspections of gutters, downspouts, and foundation seals. Maintain a habit of cleaning drainage systems and ensuring proper grading around the foundation. A proactive maintenance routine reduces the likelihood of renewed dampness and protects your investment over time. If you notice recurring moisture, revisit exterior drainage and sealant choices.
Tools & Materials
- Moisture meter(to quantify moisture behind walls and floors)
- Heavy-duty plastic sheeting(to isolate area and protect belongings)
- Drop cloths and painter's tape(protects surfaces during work)
- Utility knife(for cutting sealants and sheeting)
- Hammer and chisel / pry bar(to expose cracks or create clean edges)
- Caulking gun(applies sealants and mortars evenly)
- Concrete hydraulic cement(forms fast-setting seal for active leaks)
- Concrete waterproof sealant(for interior walls and floors)
- Epoxy or polyurethane injection kit(for larger cracks (optional))
- Sump pump / submersible pump(use if water accumulates)
- Dehumidifier / high-flow fan(dries the space quickly)
- Nitrile gloves, goggles, respirator(protects from dust and chemicals)
- Bucket, sponge, rags(cleanup and initial drying)
- Wet-dry vacuum(removes standing water)
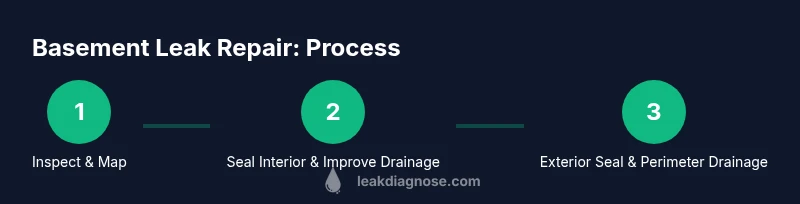
Steps
Estimated time: 2-6 hours
- 1
Inspect foundation and drainage
Start with a exterior walkaround to spot cracks, damaged grading, or pooling water. Note visible entry points and mark areas that stay damp after rainfall.
Tip: Wear sturdy boots and document findings with photos. - 2
Prepare workspace and protect valuables
Cover belongings with plastic, seal off the area, and remove items from the floor. Ensure good ventilation but avoid exposing electrical outlets to water.
Tip: Use plastic sheeting to minimize dust and debris. - 3
Dry the space and reduce humidity
Run a dehumidifier and fans to lower moisture. Target corners and walls where moisture lingers, and keep doors open to improve airflow.
Tip: Aim for humidity levels under 50% if possible. - 4
Identify interior leaks and moisture pathways
Look for damp spots, efflorescence, or staining on walls and floors. Map entry points and test suspected joints with a gentle water spray to confirm leaks.
Tip: Take notes on size and seasonality of leaks. - 5
Seal interior leaks and joints
Apply hydraulic cement to active seepage points and seal joints with silicone or polyurethane caulk. For larger cracks, consider epoxy injections per product instructions.
Tip: Work quickly with hydraulic cement before it sets. - 6
Improve drainage around the foundation
Clean and redirect downspouts away from the wall. Regrade soil to direct water away from the foundation and consider exterior membrane where feasible.
Tip: Keep drain lines clear of debris and test after rain. - 7
Exterior sealing and interior verification
If possible, seal the exterior cracks with appropriate waterproofing membrane. Revisit interior walls to verify that moisture levels are dropping.
Tip: Document curing times for exterior products. - 8
Monitor and plan the long term
After repairs, monitor the area for a full dry cycle and re-check moisture levels in 24–72 hours. Schedule periodic inspections for gutters and foundation seals.
Tip: Set reminders for seasonal checks.
Questions & Answers
What is hydrostatic pressure, and how does it cause basement leaks?
Hydrostatic pressure is the outward force of groundwater against basement walls. When pressure is high, water can push through cracks and joints. Mitigation focuses on improving drainage and sealing pathways to reduce this pressure over time.
Hydrostatic pressure is groundwater pushing on your basement walls. Reducing water around the foundation and sealing cracks helps lessen that pressure.
Can I fix a basement leak myself, or should I hire a pro?
Small, clearly defined leaks with accessible joints can often be addressed by homeowners using hydraulic cement and sealants. Larger cracks, complex hydrostatic issues, or persistent leaks may require professional evaluation to ensure safety and long-term reliability.
Small leaks can often be DIY, but big cracks or ongoing leaks usually need a pro for a thorough fix.
What tools are essential for basement leak repair?
Key tools include a moisture meter, plastic sheeting, utility knife, caulking gun, hydraulic cement, concrete sealant, and a dehumidifier. PPE like gloves and eye protection is important for safety.
You’ll need moisture meters, sealants, and protective gear to start fixing basement leaks safely.
How long does a typical basement leak repair take?
Time varies with the project scope. Simple interior sealing can take a few hours, while exterior waterproofing and drainage upgrades may require days, depending on soil conditions and access.
Most DIY fixes take a few hours, but more extensive exterior work can stretch to a few days.
Will repairs prevent future basement leaks?
Repairs that address drainage, cracks, and sealing can significantly reduce future leaks, but ongoing maintenance and seasonal checks are essential to sustain results.
Fixes help a lot, but regular upkeep is needed to prevent new leaks.
What signs indicate mold after a leak?
Look for musty odors, visible discoloration, and dark spots on walls or ceilings. If mold is suspected, address moisture first and consider a mold risk assessment.
If you smell mold or see dark spots, address moisture quickly and consider testing.
Watch Video
Main Points
- Identify sources before fixes begin
- Prioritize exterior drainage and grading
- Use appropriate interior sealants and fast-setting cement
- Monitor moisture after repairs to prevent recurrence