How to Find a Water Leak Inside a Wall: A DIY Guide
Learn practical, non-destructive methods to locate a water leak behind a wall. From signs to verification tests and safe opening strategies, this guide helps homeowners detect leaks early and plan effective repairs.

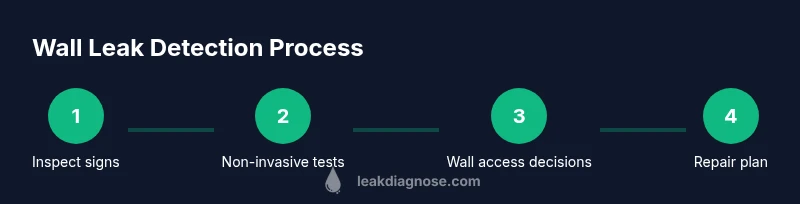
Follow a systematic, non-destructive approach to find a water leak inside a wall. Begin with signs like stains and musty odor, listen for running water, and use moisture meters and infrared scanning before any wall opening. The goal is to pinpoint the leak safely without major demolition.
Why walls leak and how leaks travel
According to Leak Diagnosis, hidden leaks behind walls often start as small drips that saturate studs and insulation, slowly degrading structural materials and triggering mold growth. Water can travel along pipes, studs, and electrical conduits, turning one minor drip into a large problem over weeks or months. Causes include loose connections, corroded fittings, failed seals around tubs or sinks, or negative pressure drawing groundwater into the wall cavity. Understanding how moisture migrates is the first step in an effective locate-and-repair plan. In many homes, pipes run behind kitchen and bathroom walls, within closets, or under sinks, making detection tricky yet feasible with the right approach. The key is to combine observation with safe testing techniques rather than ripping into walls at random. By the time you notice staining, bubbling plaster, or a musty odor, the leak may already have affected insulation and framing. This section outlines what to look for and how the moisture path typically behaves, so you can plan a targeted investigation that minimizes damage and disruption.
Signs that a leak is inside your wall
Hidden wall leaks manifest in several telltale ways. Water stains on wallpaper, drywall, or ceiling panels may appear first, followed by peeling paint or warped plaster. A persistent musty odor often indicates mold growth in a damp cavity. Soft, spongy drywall near fixtures can suggest moisture intrusion, while bubbling paint or crumbling plaster signals longer-term damage. You might also notice hot spots on nearby floors or walls when using radiant heat. A sudden rise in your water bill without a known source can be a red flag. If you hear faint drip sounds inside a wall, especially during night hours or when fixtures run, that’s another clue. Collect these observations over several days to distinguish a real leak from condensation or humidity fluctuations caused by weather. Remember: accurate detection hinges on correlating visual signs with measurements from proper tools.
Non-invasive detection methods you can use
Non-invasive methods let you verify moisture behind walls without cutting. Start with a digital moisture meter to map damp areas across studs, drywall seams, and insulation. Pin-type meters can measure depth of moisture if you must probe, but pinless meters are safer for finished surfaces. Pair moisture readings with an infrared or thermal imaging camera to visualize temperature differences caused by moisture migration. Wet areas often appear cooler on drywall or studs, revealing the leak path. A listening device or stethoscope designed for plumbing can sometimes detect hammering, running water, or air movement behind the surface. If you have access to a smart water meter, monitor for unexpected consumption spikes that align with spots showing moisture on your scans. Keep in mind that readings can be influenced by ambient humidity, wall materials, and the presence of insulation, so use multiple methods for confirmation.
A practical, field strategy to locate the leak without destructive demolition
Develop a plan that prioritizes safety and minimizes wall damage. Begin by turning off the water supply to the affected area if you suspect a fixture or line. Check nearby fixtures (sink, toilet, shower) for obvious drips or leaks and note those findings. Use a moisture meter to test exterior wall surfaces around suspected zones, then scan with an infrared camera to identify anomalous warm or cold spots. If you observe consistent moisture, proceed to isolate the zone by tightly sealing off sections of drywall or paneling around the area to prevent further spread while you investigate. Test the water meter for changes when fixtures are in use to correlate with observed moisture. Document all readings, photos, and times to build a clear case for the location and cause of the leak. This method helps you confirm a leak behind a wall without wide-ranging demolition.
When to consider a controlled wall opening
In some cases, non-invasive methods point to a precise area, but only an opening can reveal the leak source. Plan a controlled wall opening with care to minimize damage. If you’re renting or living in a shared building, coordinate with others and obtain any necessary permissions. Use a stud finder to locate framing members and avoid cutting through critical supports. Prepare a dry, clean workspace and have containers ready to capture water that may leak after the opening. Start with a small incision at a seam or junction and inspect gradually rather than removing large sections at once. If plumbing lines run behind the area, expect wet pipes or fittings behind gypsum board or tile. Always wear eye protection and a dust mask, and keep electrical circuits away from wet areas. This approach reduces waste and makes subsequent repairs simpler and cleaner.
Interpreting test results and deciding your next steps
After completing non-invasive tests and any controlled opening, compare results to determine the leak’s location and severity. If moisture concentrates near a single stud bay or pipe elbow, you likely found the source. If multiple zones show moisture, the problem may involve a shared line or a fixture with multiple connections. For minor leaks, you may be able to tighten fittings or replace seals without extensive demolition. More substantial leaks or mold growth require professional help and possibly replacement of drywall, insulation, or framing. Documented evidence from moisture readings, infrared images, and test observations will support repair decisions and insurance claims if needed. A cautious, staged approach helps you minimize costs and downtime while protecting your home.
Preventing future leaks: maintenance, monitoring, and fast response
Prevention starts with regular inspection of plumbing fixtures and supply lines behind walls. Check for signs of corrosion, loose connections, and displaced insulation that can conceal moisture. Install and maintain functional shut-off valves for kitchens and bathrooms, so you can stop leaks quickly. Consider adding a simple moisture alarm or smart sensor near susceptible wall cavities—these devices alert you early to rising humidity or dampness before damage escalates. Maintain drainage and venting in bathrooms to reduce condensation. Finally, set up a routine of seasonal checks and a quick response plan if you notice staining or a musty odor. Proactive monitoring and timely interventions are your best defense against costly wall leaks.
Quick recap and next steps
This section provides a concise guide to move from suspicion to a repair plan. Remember to verify signs with non-invasive tests, isolate the area, and decide when to cut safely. If mold, electrical components, or structural framing are involved, contact a licensed plumber or contractor. Keep a detailed log of measurements, observations, and tests to support a professional assessment and any repair work. With careful testing and documentation, you can fix a water leak inside a wall without unnecessary damage.
Tools & Materials
- Moisture meter (pinless preferred for walls)(Choose one with broad surface scanning and moisture depth reading)
- Infrared camera / thermal imaging device(Essential for visualizing moisture paths behind walls)
- Stud finder with density mode(Helps avoid cutting through studs or joists)
- Non-contact voltage tester(Use when working near electrical boxes or outlets)
- Moisture barrier materials (plastic sheeting, towels)(Optional for keeping the work area dry during testing)
Steps
Estimated time: 90-120 minutes
- 1
Identify symptoms and suspected area
Survey the space for stains, odors, warped surfaces, and any signs of ongoing dampness. Document the exact locations and times you notice changes to build a timeline, which helps separate incidental humidity from a true leak.
Tip: Take photos at different times of day and after fixtures are used to compare changes. - 2
Shut off the water supply to the suspected zone
If you suspect a fixture or supply line, turn off the appropriate shut-off valve to stop further water intrusion while you investigate. This prevents new water from masking or worsening the leak.
Tip: Label the valve to avoid accidental reopening during daily use. - 3
Check nearby fixtures for obvious leaks
Inspect sinks, toilets, showers, and laundry hookups in the area for active drips, loose fittings, or staining. Even a small, persistent drip can account for a wall leak over time.
Tip: Run the fixture briefly while inspecting for drips to catch slow leaks. - 4
Take moisture readings across suspect zones
Use a moisture meter to map damp spots along adjacent walls and ceiling lines. Compare readings to establish a pattern pointing toward a moisture source.
Tip: Prioritize areas with the highest readings for infrared scanning. - 5
Use infrared scanning to identify hidden moisture
Scan the wall surface and inspect for cold or damp pockets that correlate with moisture meter results. Thermal imaging can reveal moisture paths through insulation.
Tip: Small temperature differences can indicate hidden damp regions—don’t ignore them. - 6
Isolate the area to prevent spread
If moisture is detected, isolate the zone by sealing around the suspected area. This keeps moisture from affecting larger sections while you investigate.
Tip: Cover the area with plastic sheeting to keep dust and debris contained. - 7
Decide whether to perform a controlled wall opening
If non-invasive tests clearly localize a single area, decide if a small, controlled opening is warranted to inspect pipes or fittings behind the wall.
Tip: Consult a professional if you’re unsure about the wall’s structure or electrical lines nearby. - 8
Document findings and plan repairs
Record readings, photos, and any tests performed. This documentation supports repair planning and can be useful for insurance purposes.
Tip: Create a simple report with date-stamped images and labeled zones.
Questions & Answers
What are the first signs that a wall leak is present?
Look for water stains, peeling paint, musty odors, warped drywall, and unexplained spikes in your water bill. These signs often precede major wall damage.
Watch for stains and a musty odor as early signs of a wall leak.
Can I locate a wall leak without cutting into drywall?
Yes. Start with moisture meters and infrared cameras to map damp zones. Correlate findings with water meter readings and fixture checks before any cutting.
You can, with moisture meters and infrared scans before cutting.
Is it safe to test for leaks near electrical outlets or switches?
Exercise caution. If you must work near electricity, shut off power to the area and use non-contact testing tools. Consider a professional for any electrical risk.
Turn off power near damp areas and avoid testing near live outlets without proper precautions.
What tools do I need for wall leak detection?
A digital moisture meter, an infrared camera, a stud finder, and a basic flashlight are essential. Optional: a non-contact voltage tester and protective gear.
Essential tools include a moisture meter and infrared camera.
When should I call a professional plumber or contractor?
If you find mold growth, suspect mold behind the wall, or encounter electrical wiring, or if the leak persists after basic checks, hire a pro.
Call a pro if mold appears or the leak remains unresolved.
Can a leak behind a wall be fixed without replacing drywall?
Sometimes. If the leak is minor and localized, tightening fittings or resealing joints may suffice. More extensive damage often requires drywall replacement and insulation repair.
Minor leaks can sometimes be repaired without drywall replacement.
Watch Video
Main Points
- Identify signs before opening walls
- Use two independent tests to confirm leaks
- Shut off water before invasive checks
- Document findings for repairs and claims
- Call a pro if mold or electrical hazards appear