How to Find Water Leaks Underground
Learn practical, non-invasive methods to locate underground water leaks, with essential tools and clear, step-by-step guidance for homeowners and DIY enthusiasts.

You will locate an underground water leak by combining soil moisture checks, tracer-based testing, and pressure monitoring, then map the leak path to determine repair needs. Gather a moisture meter, non-toxic dye, a pressure gauge, and inspection access points before starting. This quick plan sets expectations, reduces excavation waste, and helps you coordinate with a plumber if the leak is beyond DIY reach. According to Leak Diagnosis, starting with non-invasive methods preserves soil structure and minimizes disruption.
What makes underground leaks tricky
When learning how to find water leak underground, you quickly realize these leaks are hidden below grade, within soil, under slabs, or behind foundations. Surface signs may be misleading because groundwater, soil composition, and drainage can carry moisture away from the source. Underground leaks can travel along conduits of least resistance, bypassing obvious fixtures and appearing far from the actual source. According to Leak Diagnosis, underground leaks can migrate through soil, making surface signs unreliable. A methodical approach that blends non-invasive testing with careful mapping is essential. Start with non-destructive checks, then confirm the source with targeted tests. A structured plan minimizes damage, saves time, and yields documentation for repair.
Signs of an underground leak to watch for
Detecting an underground leak begins with noticing patterns that don’t fit normal water use. Look for persistently damp soil patches, especially near foundations or street edges, and unusually lush vegetation in small, localized areas. Foundation cracks, efflorescence on concrete, damp basements, or a higher-than-normal water bill can indicate a leak below ground. Use the water meter as a simple early indicator: if it runs while all fixtures are off, there may be a hidden leak. Remember, some signs mimic irrigation or drainage work, so observe multiple indicators over time before drawing conclusions. This section helps you understand why the problem may be underground and not a visible pipe.
Tools and safety essentials you’ll need
Before you start, gather non-invasive tools and PPE to protect yourself. A moisture meter or soil moisture sensor, a basic infrared or thermal camera, a non-toxic dye test kit, a pressure gauge for temporary testing, and access to clean water sources are essential. Wear gloves, eye protection, and sturdy footwear. If you suspect gas lines, electrical conduits, or contaminated soil, stop and call a professional. The goal is to minimize disruption while keeping you safe and informed about the leak location. The right tools help you map a likely path without heavy excavation.
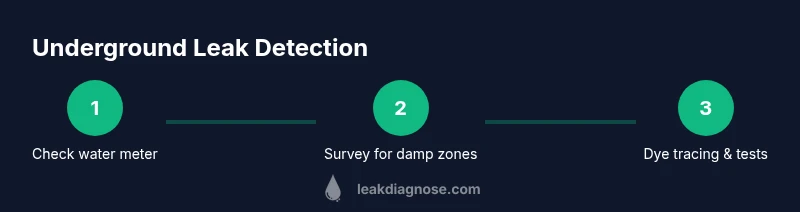
Step-by-step: non-invasive detection of the leak path
Step 1: Check the home’s water meter while all fixtures are off and note any changes in a 15-minute window. This helps confirm ongoing underground flow. Step 2: Survey the interior and exterior for damp spots that align with foundation lines or utility routes. Step 3: Map out the damp or discolored soil and mark areas for follow-up. Step 4: Use an infrared camera to identify temperature differences that indicate moisture movement under concrete or soil. Step 5: Create a rough leak-path diagram to guide non-invasive tests and future digs if needed.
Dye tracing and moisture tests to localize sources
Dye tracing is a powerful non-invasive method when used correctly. Introduce a safe, non-toxic dye into suspected water lines or fixtures that drain away from living areas—never into potable supply lines. Observe color movement in soil, drainage systems, or sewer lines to see where the dye emerges. Pair this with soil moisture readings to cross-verify the likely path. If you uncover consistent dye trails near a wall, slab edge, or utility trench, you’ve narrowed the area for a more precise investigation.
Pressure testing and flow analysis for confirmation
Temporary pressure testing helps distinguish between a flowing underground leak and a slow seep. Close valves to isolate sections and monitor pressure changes over 10–20 minutes. A steady drop in pressure or continuous flow despite isolation strongly indicates an underground leak along the tested segment. Combine this with flow data from the meter and dye results to confirm the path. Document readings and correlate them with the map you built earlier to guide the next steps.
Interpreting results and planning repairs
With non-invasive tests, dye traces, and pressure analysis, you should have a clear idea of the leak’s general area. If the path lies outside your property lines or involves utilities, contact your local utility or a licensed plumber. For interior trouble signs—such as damp walls or floors near a slab—prepare for targeted digging by marking a safe excavation zone and coordinating professional supervision. Always obtain permits if required and consider soil stabilization methods after repairs.
Common pitfalls and how to avoid them
Misinterpreting damp spots as leaks can lead to unnecessary digging. Don’t rely on a single method; use multiple indicators before digging. Be mindful of irrigation schedules or seasonal rain that can mimic leaks. Avoid dye near drinking water sources or plumbing that could be contaminated. Keep a detailed log of observations, measurements, and dye movement to prevent confusion later in the process.
Tools & Materials
- Moisture meter / soil moisture sensor(Prefer a probe-type meter for direct soil readings)
- Infrared or thermal camera(Optional, but helps locate moisture without digging)
- Non-toxic dye test kit(For tracing water movement; ensure safe for your environment)
- Pressure gauge (temporary test kit)(Used to monitor pressure changes during tests)
- Water-safe testing containers(For dye dilution and sample collection)
- Protective gear (gloves, goggles, boots)(Always prioritize safety; wear long sleeves and pants)
- Marking tools (chalk, spray paint)(Label suspected paths and test zones clearly)
Steps
Estimated time: 2-6 hours
- 1
Check main water meter status
With all fixtures off, observe the water meter for movement over 15 minutes to confirm continuous underground flow. This helps distinguish a leak from normal usage.
Tip: If the dial moves even slightly, document the rate and proceed to non-invasive checks. - 2
Survey interior/exterior for damp signs
Look along foundation lines, under slabs, and near utility corridors for damp patches, staining, or white efflorescence. Mark these spots clearly.
Tip: Take photos with scale to compare over time. - 3
Record soil moisture at suspect zones
Use a soil moisture meter to take readings at each marked area. Note whether readings are consistently high or spike after rain.
Tip: Take multiple readings at different depths for accuracy. - 4
Use infrared imaging to spot moisture
Scan exterior and interior walls or floors exposed to soil moisture for temperature anomalies that indicate damp soil beneath.
Tip: Cold spots may indicate cooler, wetter soil behind the surface. - 5
Perform a dye tracing test
Introduce dye into suspected water paths and observe where dye surfaces or drains away from living spaces. This confirms flow direction.
Tip: Never dye potable water lines; isolate and follow dedicated drainage routes. - 6
Apply temporary pressure testing
Close valves to segment the system and monitor pressure for 10–20 minutes. A drop indicates an active underground path within the tested segment.
Tip: Record baseline pressure before testing for reliable comparison. - 7
Correlate findings into a map
Align moisture data, dye trails, and pressure results on a single map to identify a probable leak corridor.
Tip: Use consistent symbols and scale for clarity. - 8
Decide on next steps
If the leak lies on private property and is accessible, plan targeted digging with caution. If utilities are involved, contact professionals.
Tip: Obtain required permissions and safety approvals before any excavation.
Questions & Answers
What is the first sign of an underground water leak?
Persistent damp soil, wet patches near foundations, or an unexplained increase in the water bill are common early indicators. Verify with multiple methods before acting.
Look for damp patches or a rising water bill, then confirm with several tests.
Is it safe to use dye tests around my home?
Yes, provided you use non-toxic, household-safe dyes and never introduce dye into potable water lines. Always follow product instructions and local guidelines.
Yes, dye tests can be safe if you use non-toxic dye and avoid drinking water lines.
What should I do before any digging?
Verify utility locations with local services, obtain any required permits, and consider hiring a professional for larger excavations to avoid damaging gas, electric, or water lines.
Check utilities and permits before digging; consider a pro for larger digs.
Can a leak be located without digging at all?
Often yes. Non-invasive methods like moisture testing, infrared imaging, and dye tracing can identify many underground leaks without immediate digging.
Usually, non-invasive tests can locate leaks before any digging.
What if the leak is in a neighbor's line?
If the suspected leak involves a shared or municipal line, contact your utility provider or a licensed plumber to handle access and repairs safely.
If it involves a shared line, call the utility or a licensed pro.
How long should I monitor for a leak after tests?
Continue monitoring for a few days after testing to observe if symptoms recur, especially after rain or irrigation cycles.
Watch for several days after tests, particularly after rain.
Watch Video
Main Points
- Start with non-invasive tests to map the path.
- Use dye tracing and moisture testing for confirmation.
- Isolate and test segments with a pressure gauge.
- Consult professionals for utility-involved leaks.