How to Tell Where a Leak Is Coming From
Learn a practical, safe method to identify the source of a water leak in your home with step-by-step checks, dye tests, moisture readings, and when to call a professional.

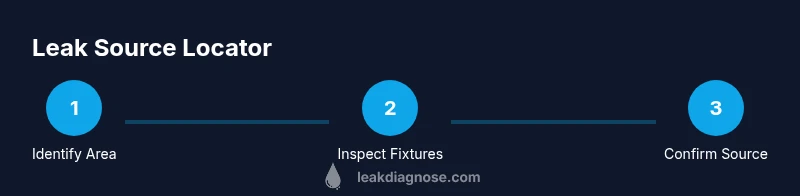
Ready to identify the source of a leak? This guide walks you through a safe, non-destructive approach to tell where a leak is coming from. You’ll learn visual inspection, dye-testing, moisture checks, and how to plan repairs. According to Leak Diagnosis, a structured, methodical process reduces guesswork and saves time and money.
Understanding how leaks originate
Leaks occur when water finds a path to surfaces where it shouldn't. The origin might be a pinhole in a supply line, a loose connection at a faucet, a failed gasket in a dishwasher, or even rainwater seeping through a flawed roof. The key concept is to think of water as following the path of least resistance: gravity, pressure differentials, and any point where moisture can move from the supply or drainage system into building materials. Over time, small drips can enlarge and travel behind walls, under floors, or into ceilings before visible signs appear. This is where many homeowners go wrong: they wait for obvious staining rather than tracing the route water takes from the source to the surface. The Leak Diagnosis team emphasizes that starting from the area where you notice signs and working outward helps prevent missed sources. By understanding potential origin points and the typical flow patterns in your home, you can design a safer, more efficient search plan. Early detection reduces damage to finishes and promotes safer, faster repairs, which is why a methodical approach matters.
Recognizing symptoms and spots where leaks hide
Leaks often reveal themselves with a set of telltale signs. You may notice warm or damp spots on walls, ceilings, or floors, a persistent musty odor, or panels that feel soft to the touch. Mold growth behind cabinetry or under sinks is another red flag. Listen for the sound of running water when no taps are on, or an unexplained drop in water pressure. In basements, a need for frequent cleaning due to moisture can indicate a hidden intrusion. Exterior clues include damp patches along the foundation, stained siding, or pooling near the foundation after rain. Understanding these symptoms helps you narrow the area before performing tests. The approach should balance speed with safety; if you see exposed wiring or suspect electrical risk, stop and call a professional. Leak Diagnosis notes that recognizing these signs early improves the chances of a successful resolution and lowers the risk of long-term damage.
A systematic approach to pinpoint the source
A disciplined search uses a process you can repeat in any room. Start with a broad area where you notice moisture or staining, then progressively narrow the zone by testing individual fixtures and sections of pipe. Create a simple diagram of observed signs, note the time of day when leaks worsen, and compare multiple locations to identify a common flow path. This method reduces guesswork and helps you determine whether the leak originates from a supply line, a drain, or an appliance connection. Remember that some leaks travel along hidden routes before becoming visible, so patience and systematic testing are essential. The revision of your plan should be data-driven: if a test fails to locate the source, expand the search to adjacent rooms and look for secondary signs such as elevated humidity or cooler surface temperatures.
Non-destructive testing methods you can use
Non-destructive testing minimizes damage while locating leaks. Dye tests involve placing colored water in the suspected line to see if color appears at the surface. Moisture meters measure relative humidity and surface moisture without opening walls. Infrared or thermal imaging can reveal temperature differences caused by moisture migration behind walls or under flooring. Visual inspection remains powerful—check joints, gaskets, valve fittings, supply lines, and appliance connections. When using these methods, keep safety in mind and document findings with notes and photos to avoid repeating steps. Leak Diagnosis emphasizes using a combination of tests to confirm a source without resorting to invasive demolitions.
Using common household tests safely
Household tests can quickly point to the leak origin when done carefully. Start by turning off the area’s water supply if you suspect a fixture. Perform a controlled test by isolating fixtures and watching for changes in moisture or staining. A toilet dye test can reveal leaks from the tank; place a few drops of dye in the tank and check the bowl after a few minutes. Sinks and showers can be tested by keeping the drain clear and observing moisture buildup after running water briefly. Always avoid electrical hazards: never test near exposed outlets or wiring with standing water. These steps help you verify the leak path before calling a professional.
Why some leaks are tricky and when to escalate
Concealed leaks behind walls, under slabs, or inside ceilings are notoriously difficult. Water can travel long distances before showing signs, so don’t rely on a single symptom. If tests fail to locate the source after thorough investigation, escalate to a professional with documentation of tests, measurements, and observed signs. Complex leaks may require advanced tools like acoustic listening devices or professional-grade infrared cameras. The goal is to minimize damage and quickly formulate a repair plan, not to force a diagnosis without adequate evidence. The Leak Diagnosis team recommends documenting every test result and area inspected to aid the repair process.
From leak detection to repair planning
Once you identify the probable source, you can plan next steps. If the origin is a simple fixture connection, a DIY tighten or gasket replacement might suffice. For damaged pipes or major appliance connections, plan for professional repair and potential replacement of sections of piping. Keep a record of findings, test results, and photos to share with a plumber or contractor. A well-documented plan helps you compare bids and understand the scope of work, reducing the chance of scope creep. By following a careful, methodical process, you align practical actions with safety and cost considerations.
Tools & Materials
- Flashlight or LED work light(Bright, adjustable beam; inspect dark corners and behind appliances)
- Cloths or towels(Dry surfaces and wipe spills as you work)
- Dye tablets or food coloring(Used for toilet and drain dye tests)
- Paper towels or rags(Clean up and isolate test areas)
- Moisture meter (handheld)(Optional but helpful for detecting hidden moisture)
- Gloves(Protect hands during inspections and tests)
- Screwdriver set and adjustable wrench(Useful for tightening fixture connections if accessible)
Steps
Estimated time: 60-90 minutes
- 1
Secure area and shut off water
Begin by turning off the water supply to the suspected area to prevent further damage. If you’re unsure, shut off the main water valve and re-check local fixtures. Remove any standing water and place towels to protect floors. This step is critical for safety and accurate testing.
Tip: Use color tape to mark the shutoff valve position for quick reference later. - 2
Do a broad visual inspection
Walk the space with a flashlight, looking for obvious drips, stains, or corrosion at joints and connections. Check under sinks, behind appliances, and inside cabinets. Note any areas that seem damp or cool to the touch, as these can indicate moisture movement.
Tip: Take photos from several angles to compare signs across time. - 3
Inspect visible pipes and fixtures
Carefully examine supply lines, valve connections, and appliance hoses. Look for loose fittings, cracks, or worn gaskets. Tap fittings gently with a screwdriver handle to listen for changes in sound that might indicate a loose connection.
Tip: If you find a loose connection, tighten gradually and avoid overtightening that could crack fittings. - 4
Check behind walls and near ceilings
If staining isn’t visible, moisture may be traveling behind surfaces. Use a moisture meter on suspected walls or ceilings and inspect baseboards and crown molding for dampness. Pause if you encounter insulation or electrical wiring; proceed only if it’s safe.
Tip: Document suspicious patches with a note of the room and approximate location. - 5
Perform dye tests to trace flow
For toilets, add dye to the tank and wait a few minutes to check if color appears in the bowl. For sinks or drains, run water through the fixture and watch for dye escape along pipes or joints. Use caution with dye to avoid staining unintended surfaces.
Tip: Reserve dye tests for areas you can observe directly to avoid confusion. - 6
Use moisture readings and simple tests
If available, use a handheld moisture meter to gauge humidity around the suspected area. Compare readings from the suspected zone to a control area. A rising moisture trend supports the likelihood of a leak source in that zone.
Tip: Record readings over a short time to identify any persistent moisture patterns. - 7
Document findings and plan next steps
Create a simple diagram of the likely leak path and list all tested areas. Decide whether a DIY fix is feasible or if professional help is required. Share your findings with a plumber if you escalate the repair.
Tip: Keep a running log of tests, observations, and actions taken.
Questions & Answers
What is the fastest way to locate a leak source?
Combine a quick visual check with dye testing to quickly identify the path of water. If signs persist, extend testing to nearby fixtures and walls.
Start with a quick visual check and dye testing to locate the leak path; expand if needed.
Can I locate a leak without special tools?
You can often identify a leak path using a flashlight, paper towels, and careful observation. For concealed leaks, moisture readings and dye tests improve accuracy.
Yes, but tools like a moisture meter improve accuracy for hidden leaks.
How do I perform a toilet dye test?
Add a few drops of dye to the toilet tank and wait several minutes. If dye shows up in the bowl or elsewhere, you’re seeing a tank-to-bowl leak.
Put dye in the tank and watch the bowl for color; that reveals leaks.
What should I do to stay safe during a leak search?
Shut off water supply when testing, avoid electrical hazards, and wear gloves. Do not force open walls with unknown wiring behind them.
Always shut off water and be mindful of electricity during testing.
Are roof or wall leaks looked for the same way?
Roof and wall leaks follow moisture paths differently. Start at the highest area and work downward, checking attic spaces and joints near the ceiling.
Roof leaks require inspecting from above down, including attic spaces.
When should I call a plumber?
If tests fail to locate the source, or if you discover structural damage, complex piping, or electrical risk, schedule a professional assessment.
Call a plumber if you’re unsure or encounter complex or unsafe conditions.
Watch Video
Main Points
- Follow a structured search to locate the leak source.
- Start with obvious fixtures, then expand to concealed areas.
- Use dye tests and moisture readings to confirm findings.
- Document results and decide on DIY vs. professional help.