How to Put Leak Detection into Your Home Maintenance Routine
A practical, step-by-step guide from Leak Diagnosis on detecting and fixing household leaks safely. Learn to locate sources, manage DIY fixes, and know when to call a pro in 2026.

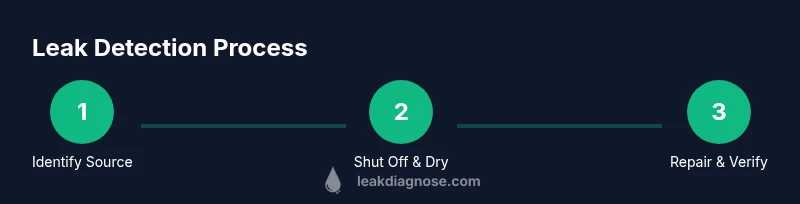
Learn how to put leak detection into your home maintenance routine. Start by locating the source, shutting off the water supply to the area, and thoroughly drying the area. Inspect plumbing connections and appliances, then perform safe, temporary fixes and re-test for leaks. Document findings and monitor for recurrence over the next 24–72 hours.
Understanding common causes of leaks
If you're wondering how to put leak into your home maintenance routine, leaks don’t happen out of nowhere. Most household leaks originate from aging or poorly joined components rather than sudden bursts. In kitchens and bathrooms, worn gaskets on faucet stems, damaged rubber seals on shower valves, and loose supply hoses are frequent culprits. In plumbing runs behind walls, corroded copper or galvanized steel pipes, calcified mineral buildup, and hidden cracks can hide a slow drip for months. Appliances are common leak sources too: washers on washing machines, hoses on dishwashers, and seals on refrigerators with water dispensers can degrade with time. The first step in learning how to put leak detection into your home maintenance is identifying likely hotspots. Start with fixtures you use daily: sinks, toilets, and showers; then extend your review to appliances, then to visible piping around the basement or crawlspace. While some leaks produce obvious signs—pooling water or damp ceilings—many leaks are stealthy. A slow leak behind a wall may manifest as a musty odor, paint bubbling, or wallpaper staining. Keeping your eyes open and your method consistent helps you catch leaks early, reducing damage and repair costs.
Tools & Materials
- Adjustable wrench(For tightening fittings and hoses)
- Screwdriver set(Philips and flat-head for clamps and fittings)
- Teflon plumber's tape(Wrap threads on pipe fittings)
- Bucket(Catch drips during repair)
- Absorbent towels or rags(Dry surfaces and clean up spills)
- Gloves(Protect hands)
- Flashlight(Inspect dark corners and behind appliances)
- PVC pipe cutter(If cutting and replacing pipes)
- Replacement hose or fittings(Have spares on hand)
- Drain snake or plunger(Unclog drains if needed)
Steps
Estimated time: 60-90 minutes
- 1
Identify suspected leak sources
Begin by surveying all fixtures in daily use. Look for damp spots, listen for dripping, and note any sign of moisture. This establishes the likely zones to inspect first.
Tip: Start at the source of highest water use, such as the kitchen sink or toilet. - 2
Shut off water to the area
Turn off the local shutoff valve if you can safely access it. If you cannot locate a shutoff, use the main valve but proceed with caution to prevent flooding.
Tip: Do not force a valve; if it is stiff, stop and proceed to the next safe option. - 3
Dry the area thoroughly
Wipe surfaces and remove standing water. Dry conditions make it easier to see new leaks and identify the source.
Tip: A dry surface helps you notice fresh moisture after tests. - 4
Inspect fittings and hoses
Check all visible fittings, hose clamps, and appliance supply lines for looseness, cracks, or wear. Tighten gently but avoid overtightening that can damage threads.
Tip: Use plumber’s tape on threaded connections only where appropriate. - 5
Perform safe temporary fixes
For minor drips, reseat washers, tighten nuts, or replace a worn washer with a compatible size. Use sealant where appropriate only on non potable lines as directed.
Tip: Avoid using epoxy on potable water lines unless you know it is rated for drinking water. - 6
Test for leaks after fixes
Restore water supply gradually and observe the repaired area. Look for fresh moisture and recheck fittings after a few minutes of running water.
Tip: Take photos before and after so you can compare results. - 7
Document and monitor
Record where you found the leak, what you did, and the results. Check the area again over the next 24–72 hours for signs of recurrence.
Tip: Set a reminder to re-check weekly for the first month. - 8
Know when to call a pro
If water continues to leak or you encounter gas lines, high pressure, or extensive drywall damage, contact a licensed plumber.
Tip: Professional help is wise if you encounter complex piping or unknown water supply issues. - 9
Plan for future prevention
Schedule regular inspections of hoses, seals, and exposed pipes. Replace aging components before they fail and maintain a leak prevention mindset.
Tip: Keep spare hoses and a basic tool kit on hand for quick response.
Questions & Answers
What are common signs of a hidden leak?
Common signs include damp spots, increased water bills, musty odors, and visible staining. If you suspect a leak, verify with a dye test or meter check and then inspect fixtures and piping.
Look for dampness, higher water usage, or stains. Use a dye test to confirm the source and then inspect fixtures.
Can I fix a leak myself?
Many small leaks can be fixed by tightening fittings or replacing washers. For complex piping, gas lines, or persistent leaks, hire a licensed plumber.
Yes, for simple leaks you can DIY, but for complex or risky leaks, call a pro.
How long does a typical leak repair take?
A simple fix may take under an hour, while more involved repairs can require a couple of hours. Plan for time to test and verify the fix.
Most DIY leaks take under a couple hours, including testing.
When should I call a professional?
Call a professional if you cannot locate the source, the leak recurs after a simple fix, or you encounter gas lines or extensive drywall damage.
Call a pro if you can't fix it, or if gas lines or major damage are involved.
Are chemical sealants safe for household leaks?
Some sealants are designed for specific uses; read product labels carefully. For potable water lines, choose rated products and follow the directions closely.
Only use products rated for the water line involved and follow directions.
Should I replace hoses preemptively?
If hoses show wear, cracking, or bulging, replace them. Preemptive replacement reduces the risk of sudden leaks.
Replace worn hoses to prevent surprise leaks.
Watch Video
Main Points
- Identify likely leak sources early
- Shut off water safely to limit damage
- Document fixes for future reference
- Test thoroughly before restoring operation