How to Fix a Pipe Leak: A Clear DIY Guide for Homeowners
Learn to locate, shut off water, and fix a pipe leak safely with a step-by-step DIY guide. Includes tools, temporary fixes, and prevention tips from Leak Diagnosis.

This guide equips homeowners with a practical, step-by-step method to locate a pipe leak, shut off water, apply a temporary fix if needed, and perform a permanent repair. You’ll learn essential safety practices, the tools required, and how to prevent future leaks without specialized equipment.
Discovering the Source of a Pipe Leak
Identifying where a pipe is leaking is the first and most crucial step. According to Leak Diagnosis, most leaks originate at joints, worn gaskets, corroded pipes, or damaged supply lines. Start with accessible sections under sinks, around toilets, and near appliances. Listen for drips or hiss sounds, and look for damp spots, staining, or mold growth to pinpoint the source.
Immediate Safety Steps and Water Shutoff
Before touching the piping, ensure your safety. Locate the main water shutoff in your home (often near the foundation or in the utility area) and turn it clockwise until it stops. Open a faucet at the highest point in the house and a lower one to relieve pressure. This reduces spray and minimizes flood risk while you work.
Tools and Materials You’ll Need (checklist)
Have these on hand before you start: adjustable wrench, pliers, bucket, rags or towels, flashlight, safety gloves, sealant tape, epoxy putty, rubber repair patch, and replacement pipe or fittings. Having everything ready saves time and keeps the work area tidy, which is especially important in tight crawlspaces or under sinks.
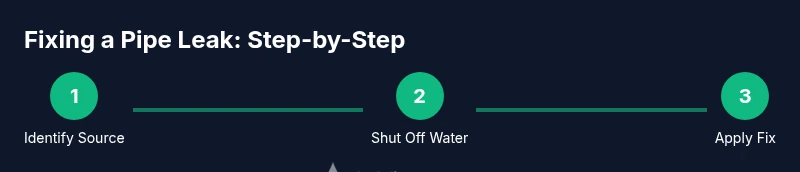
Step-by-Step Overview (What you’ll do first)
A successful repair combines a temporary fix to stop immediate flow with a plan for a permanent repair. Start by identifying the leak source, stopping water supply, drying the area, applying a temporary patch if needed, and finally replacing damaged sections or tightening joints. Always test the fix slowly to catch hidden leaks early.
Temporary Fixes vs. Permanent Repairs
Temporary fixes, like epoxy putty or rubber patches, can stop small drips long enough to complete more permanent work. They are not a substitute for replacing a damaged pipe or a failing joint. Permanent repairs typically involve cutting out the bad section and installing a new piece with proper fittings and sealant.
Preventive Maintenance to Reduce Future Leaks
Inspect exposed pipes at least twice a year for corrosion, rust, or mineral buildup. Replace aging copper or galvanized sections before a leak develops. Use pipe supports and insulation to minimize vibration and temperature-related stress. A quick monthly check around under-sink connections can catch leaks before they overflow.
When to Call a Professional
If you encounter gas lines, severely corroded pipes, hidden leaks behind walls, or leaks after a temporary fix, seek a licensed plumber. Complex pipe layouts, pressure testing, or rewiring water sensors are tasks that benefit from professional experience. Delaying help can cause water damage and mold growth.
Troubleshooting Common Symptoms
Persistent damp spots after an initial repair, unusual sounds (hissing or banging), reduced water pressure, or frequent resets of shutoff valves are red flags. Recheck joints, verify shutoffs work, and ensure correct pipe materials and sizes. If the leak persists, reassess the repair plan.
What Happens Next: A Quick Look at the Path Forward
Now that you know how to fix a pipe leak, schedule a follow-up check to confirm the repair holds. Keep a small stock of spare parts and practice safe handling, especially in tight spaces. Regular inspections help prevent major water damage over time.
Tools & Materials
- Adjustable wrench(Important for loosening/tightening fittings; choose 6-8 inch size)
- Pliers(Needle-nose pliers for clamps and small fittings)
- Bucket(Catch water and avoid spills during repair)
- Rags or towels(Dry surfaces and wipe up spills)
- Flashlight(Inspect dark corners and behind cabinets)
- Safety gloves(Protect hands from sharp edges and dirty water)
- Sealant tape (Teflon tape)(Seal threaded connections; choose appropriate width)
- Epoxy putty(Temporary fix for small leaks; follow product instructions)
- Rubber repair patch or clamp(Option for quick temporary fix; not a replacement for damaged pipes)
- Replacement pipe or fittings(Needed for permanent fixes; match diameter and material)
Steps
Estimated time: 45-60 minutes
- 1
Shut off the water
Locate the main shutoff valve and turn it clockwise until fully closed. Then open a faucet at a higher point in the house to drain remaining water and relieve pressure. This prevents further leaks while you work.
Tip: If the main shutoff is hard to reach, shut off at a nearby appliance valve (e.g., under the sink) as a temporary measure. - 2
Locate the leak source
Inspect exposed piping around the suspect area. Look for dampness, corrosion, mineral buildup, or staining. Use a flashlight to check joints and fittings, especially where pipes bend or connect to fixtures.
Tip: Check both supply lines and drainage pipes; leaks may travel and reveal themselves away from the actual source. - 3
Dry the area and prepare
Wipe the area clean and dry to ensure patches or tapes grip properly. Remove any standing water with a towel or bucket and keep the surface as dry as possible before applying a fix.
Tip: A dry surface improves sealant adhesion and prevents slipping during repair. - 4
Apply a temporary fix
If you need a quick stop-gap, apply epoxy putty or a rubber patch according to product instructions. This buys time for a permanent solution and reduces ongoing water loss.
Tip: Wear gloves and follow product curing times strictly for best results. - 5
Plan and perform a permanent repair
Depending on the pipe type and damage, you may replace a damaged section or tighten loose joints with proper fittings. Cut away only damaged portions and reattach with appropriate connectors and sealant.
Tip: Match pipe material and diameter exactly to prevent future leaks. - 6
Test the repair
Slowly turn the water back on and check for fresh leaks. If you see drips, turn off the water again and reassess the fix. Allow epoxy or patches to fully cure before heavy use.
Tip: Test gradually—start with low flow and watch the repaired area closely. - 7
Finish and monitor
Clean up the work area, store tools, and keep an eye on the repaired section over the next several days. Note any changes in moisture or stains and be prepared to recheck or call a pro if needed.
Tip: Document the repair with photos for future reference.
Questions & Answers
What should I do first when I discover a pipe leak?
Turn off the main water supply and drain the line. Then locate the leak source and prepare your tools before proceeding with a repair. This minimizes water damage and makes the repair safer.
First, shut off the water and drain the line, then locate the leak and gather your tools.
Can I fix a pipe leak myself?
Many small leaks can be fixed with basic tools and proper technique. More complex leaks, or those involving gas lines, should be handled by a licensed plumber.
Yes, you can fix simple leaks yourself, but call a pro for gas lines or complex layouts.
What tools do I need for a DIY pipe leak repair?
A basic set includes an adjustable wrench, pliers, Teflon tape, epoxy putty, rubber patch or clamp, a bucket, towels, and a flashlight.
You’ll need a wrench, pliers, tape, epoxy putty, patch or clamp, plus a bucket and flashlight.
How long does a typical pipe leak repair take?
For a small, accessible leak, expect about 45-60 minutes. More complex repairs may take longer depending on access and pipe type.
Usually under an hour for simple leaks, longer for complex jobs.
When should I call a professional plumber?
If the leak is behind walls, involves gas lines, or persists after a temporary fix, contact a licensed plumber promptly.
Call a professional if you can’t safely access the leak or it’s hazardous.
Is epoxy putty safe for potable water pipes?
Some epoxy putties are rated for potable water. Always check the product label and use potable-rated materials for drinking-water lines.
Check the label; use potable-rated epoxy for drinking water pipes when possible.
Watch Video
Main Points
- Shut off water before work to prevent flood damage
- Identify the leak source to direct proper repairs
- Use temporary fixes only as a stopgap; aim for a permanent fix
- Test the repair thoroughly and monitor for future leaks