How Stop Leak Works: A Practical Home Guide
Learn how stop leak works, the science behind seal failures, and safe DIY steps to tackle leaks in faucets, pipes, and appliances. Find when to DIY, which methods fit best, and how to evaluate results to prevent damage.

Learn how stop leak works by understanding the science behind seal failure, how common leak products function, and practical steps you can take at home. This guide covers when DIY is safe, which methods to choose for faucets, drains, or appliances, and how to evaluate results to prevent further damage.
How stop leak works: the core concepts
Leakage occurs when a joint or seal cannot hold pressure, allowing fluid to escape through tiny gaps. Stop-leak approaches target one or more points of failure: (1) mechanical sealing, where fittings are tightened or components replaced; (2) barrier films or swelling sealants that bridge micro-gaps; (3) adhesive or epoxy repairs that bond to metal and plastic surfaces. In practice, most home leaks fall into faucet, supply-line, drain, or appliance categories. Understanding the physics of pressure, fluid dynamics, and material wear helps you pick the right method. For example, a loose compression nut on a supply line is often quickly fixed by tightening, whereas a cracked pipe may require a more durable repair. According to Leak Diagnosis, knowing the right diagnosis improves your success rate and reduces the risk of secondary water damage. Always shut off the water, dry the area, and inspect for mold or damage before applying any fix. This knowledge forms the foundation for safer, more effective DIY repairs.
Common leak types and treatment differences
Leaks come in several common types, each with targeted remedies. A faucet leak from a worn washer or valve seat is usually resolved by replacing the washer, tightening fittings, or reseating the cartridge. Toilet leaks often stem from a failing flapper, fill valve, or wax ring—fixes range from gasket replacements to valve adjustments. Drain or shower leaks can involve worn seals, trap joints, or damaged gaskets, where resealing with plumber’s tape, silicone, or replacement seals is typical. Pipe leaks vary from pinhole drips to split pipes and require pipe replacement or epoxy fastenings. Appliance leaks (dishwasher, washing machine) typically involve inlet hoses, clamps, or external seals. When choosing a method, consider the leak source, water pressure, and accessibility. Leak Diagnosis notes that safe, staged repairs reduce collateral damage and make follow-up maintenance easier.
Safety and assessment before you begin
Before touching any plumbing, prioritize safety. Shut off the nearest water supply valve and, if possible, switch off electrical power to nearby outlets or appliances to avoid shock. Dry the area thoroughly to spot the exact source of the leak, using a flashlight to reveal micro-drips. Wear gloves and eye protection, especially when cutting or applying sealants. Keep a bucket and towels handy to manage any residual moisture. Check for signs of mold or rot around cabinets or walls, as long-term leaks invite structural damage. If the leak involves gas lines or pressure relief valves, stop work and contact a licensed professional. By performing a careful safety check, you reduce risk and set the stage for an effective, lasting repair.
Choosing methods: mechanical fixes vs sealants
Two broad strategies dominate DIY leak work. Mechanical fixes involve tightening, replacing components (washers, valves, hoses), or upgrading fittings to match the existing pipe size. Sealants and barrier products create a temporary or semi-permanent seal by forming a film, swelling a gasket, or bonding to surfaces with epoxy. Mechanical fixes are often more durable for larger leaks or damaged components, while sealants can bridge tiny gaps or shore up minor seepage. Be cautious with chemical stop-leaks in closed systems, as they can react with seals or affect downstream devices. Always match the method to the leak type, pressure, and material (copper, PVC, PEX) for best results. Leak Diagnosis emphasizes documenting the source and testing after repair to confirm the fix worked and to avoid repeating the process soon.
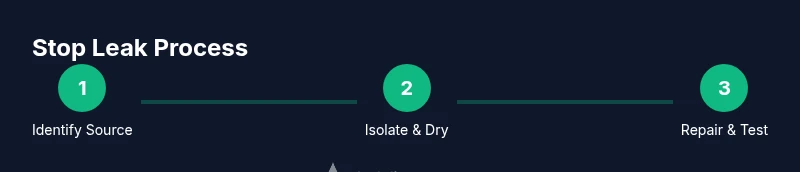
Step-by-step overview and quick-start plan
This section provides a high-level plan you can start now. It covers quick checks, preparation, and primary actions, while the dedicated Step-by-Step block below offers detailed instructions. Start by identifying the leak type, isolating the supply, and cleaning the area. Then choose a repair method relevant to the source—tightening a fitting, replacing a faulty component, or applying a compatible sealant. Finally, test the system, monitor for 24 hours, and document the repair for future maintenance. This overview is designed to empower homeowners with practical, safe, and repeatable steps, while minimizing water damage and downtime. For a full, itemized procedure, refer to the step-by-step section.
Maintenance and prevention after repair
Repair is only part of stopping leaks. Implement a routine inspection schedule to catch wear early: check hose clamps, appliance inlet hoses, and connections every 6–12 months. Tighten fittings gradually, avoid overtightening, and replace worn gaskets before they fail completely. Use quality sealants that are compatible with your system, and store spare washers and clamps in a labeled container. Consider installing water-efficient fixtures to reduce pressure on joints, which can prolong life and reduce leak risk. Finally, keep a small log of repairs, parts used, and dates so future maintenance is faster and more reliable.
Tools & Materials
- Adjustable wrench(8–12 inch range; avoid overtightening brass fittings)
- Screwdrivers (flathead and Phillips)(Used to remove and reseat fixtures or replace components)
- Pipe thread tape (PTFE/tape)(Wrap 3-4 turns clockwise on threaded connections before tightening)
- Plastic/metal putty or epoxy(Choose epoxy or putty compatible with pipe material)
- Silicone sealant or gasket sealant(Use for sealing joints or around fixtures where permitted)
- Leak-detection dye or food coloring(Optional for tracing slow leaks in drains or appliances)
- Towels, rags, and a bucket(Mop up spills during work; catch drips later)
- Safety gloves and eye protection(Protect skin and eyes from chemicals and sharp edges)
- flashlight or headlamp(Spot small drips behind cabinets or under sinks)
- Replacement washers or O-rings(Buy matching sizes for faucets or valves you service)
Steps
Estimated time: 60-90 minutes
- 1
Identify leak source and isolate water supply
Turn off the nearest shutoff valve and, if possible, the main water supply. Dry the area and inspect for the exact source—watch for dripping from joints, hoses, or fittings. Document observed leaks with photos for reference.
Tip: Label the shutoff valve so you can revert to normal flow after the repair. - 2
Prepare area and gather needed parts
Clear the workspace and collect all tools and replacement components before starting. If you need to replace a washer, valve stem, or hose, have the exact size ready. Ensure there is a dry, well-lit area to work.
Tip: Work on a dry surface; moisture can cause tools to slip. - 3
Choose repair method based on leak type
Decide whether a mechanical fix (tighten/replace) or a sealant repair is appropriate. For large, active leaks, mechanical fixes are usually safer and longer-lasting. For slow seepage from tiny gaps, a compatible sealant may suffice.
Tip: Do not mix repair methods on a single leak if it’s large or structurally damaged. - 4
Apply fix and secure components
If tightening, use the correct wrench to avoid rounding nuts. If replacing parts, install new washers, gaskets, or hoses as per manufacturer specs. Clean surfaces before applying any sealant and follow cure times.
Tip: Avoid overtightening; it can damage threads and cause future leaks. - 5
Test the repair and monitor
Restore water supply gradually and observe the repaired area for several minutes to ensure it’s dry. Check again after 24 hours for any signs of re-leakage or dampness.
Tip: Run cold water first to reduce thermal stress during testing. - 6
Document repair and plan follow-up
Record what was done, parts used, and dates. Schedule preventive checks in 6–12 months to catch wear before it leaks again. Keep spare washers and clamps handy.
Tip: A simple notebook or app note helps track maintenance trends.
Questions & Answers
What is the most common cause of a leak in the home?
Worn washers and seals are the most frequent reasons for leaks in faucets and valves. Replacing these small parts is often enough to stop drips, but larger issues may require replacing hoses or fittings.
Worn washers and seals are the usual culprits; replacing them usually fixes drips, though bigger problems may need new hoses or fittings.
Can stop-leak products fix a major pipe leak?
Major pipe leaks typically require mechanical repairs or pipe replacement. Stop-leak products are best for minor seepage or as a temporary measure until a permanent fix can be made.
For big leaks, you’ll likely need a mechanical repair or pipe replacement; sealants are usually for minor seepage or temporary use.
Is it safe to use sealants around drinking water lines?
Only use sealants labeled for potable water when applying near drinking water lines. Follow the product’s cure times and ensure no residue enters the water stream.
Only choose sealants rated for drinking water and follow the directions to avoid contamination.
When should I call a professional?
If you’re unsure of the leak source, if the leak is behind walls, or if gas lines or electrical components are involved, contact a licensed plumber to avoid safety risks.
If you’re unsure or the leak involves gas or electricity, it’s safest to call a licensed plumber.
How can I prevent leaks from recurring?
Regular maintenance, using correct fittings, and replacing worn parts before failure can prevent most leaks. Consider water-saving fixtures to reduce stress on joints.
Regular checks and timely part replacements go a long way in preventing leaks.
Are there risks to appliances when using stop-leak products?
Some stop-leak products can affect appliance seals if used improperly. Always follow product instructions and consult a professional for high-risk appliances.
Follow the product instructions carefully and be cautious with appliances; when in doubt, consult a pro.
Watch Video
Main Points
- Diagnose source before fix to choose the right method
- Mechanical repairs are typically more durable than sealants for active leaks
- Shut off water and ensure safety before starting any repair
- Test and monitor the fix for 24 hours to confirm success
- Maintain a repair log to simplify future maintenance