Stop a Leak at Home: Comprehensive Step-by-Step DIY Guide
Learn how to stop a leak safely with a clear, step-by-step plan. This guide covers quick containment, safety, and permanent repairs for faucets, pipes, and appliances—plus practical tips to prevent future leaks.

Goal: Stop a c leak safely and quickly, then plan a permanent repair. This quick guide covers containment, safety, and practical fixes for common home leaks—faucets, pipes, and appliances. Before you start, shut off the water supply if you can and gather basic tools. According to Leak Diagnosis, rapid action minimizes water damage and reduces repair costs.
What qualifies as a leak and why stopping it matters
A water leak isn't just a nuisance; it signals a potential for hidden damage, mold growth, and wasted water. For homeowners, every drip adds to bills and can weaken structures over time. If you want to stop a c leak in your home, acting quickly matters. The simplest leaks, such as a dripping faucet, are easier to fix than complex bursts behind walls, but both require a plan. According to Leak Diagnosis, the best results come from quick containment followed by a measurable repair plan. Start by classifying the leak type: visible drips, seeping through walls, or sudden bursts. Record the location and tone of the sound if you hear water where it shouldn’t be. This initial assessment sets the strategies for safe, effective stopping and reduces the risk of water damage to floors, ceilings, and electrical components.
Quick diagnostic checks to confirm the leak
Begin with a visual and contextual check. Look for puddles on floors, wet cabinets, or damp spots on walls. Listen for running water when fixtures are off, and use your water meter to gauge unusual movement. Inspect exposed pipes under sinks and behind appliances, but don’t force panels or drywall apart. Take photos for reference, especially if you’ll need a professional later. If the leak is behind a wall or ceiling, you may still be able to catch it early by noting changes in moisture, paint texture, or musty odors. Early detection reduces water damage risk and makes repairs faster and cheaper, which is why a calm, methodical check beats guesswork.
Safety first: shutoffs, PPE, and risk awareness
Before you touch any plumbing, prioritize safety. If a leak is actively spraying water or if a gas line could be involved, evacuate and call emergency services. Always wear eye protection and gloves, and use a flashlight to inspect dark spaces. Locate and test each shut-off valve: the main valve for the whole house and individual fixture valves. Shutting off at the source prevents further water damage and creates a safe working environment. If you’re unsure about gas or electrical proximity, treat it as a risk and call a professional. Remember: your safety comes first, and smart containment reduces cleanup time and damage.
Step-by-step: Stop a leak at a faucet
Start with the simplest fix first. Turn off the faucet supply valves, then disassemble the handle to access the cartridge or stem. Inspect washers, O-rings, and seats; replace worn components with identical sizes. If you see corrosion, clean the area and reseal with plumber's tape on threads before reassembling. Reopen the valve slowly and check for drips. For ongoing faithfulness, consider installing a new cartridge or an affordable faucet replacement if the wear is extensive. Pro tip: take photos during disassembly to ensure you reassemble correctly.
Step-by-step: Stop a leak at a toilet
Toilets often leak at the base or from the fill valve. Start by shutting off the shut-off valve behind the toilet and flushing to relieve pressure. Check the wax ring seal and bolts; tighten gently if needed, or replace the wax ring if you detect a steady leak at the base. For leaks from the tank, inspect the fill valve and flapper for wear and replace as necessary. After reassembly, flush and watch for a steady stream. If you notice continuing seepage, you may need a more thorough retrofit of the supply line.
Step-by-step: Stop a leak along a pipe joint
Pinhole leaks or loose joints near elbows require careful tightening and sealing. First, dry the area and use a marker to identify the exact leak point. Apply PTFE tape to threaded joints and tighten clockwise with a wrench; avoid overtightening. If threads are damaged, replace the fitting and reseal. For temporary containment on a small crack, you can use epoxy putty as a stopgap while you plan a more permanent repair. Verify by running water and inspecting surrounding areas for moisture.
Temporary fixes vs permanent repairs: when to call a pro
Temporary fixes buy you time, but they aren’t substitutes for permanent repairs in many cases. If the leak is behind walls, involves gas, or you lack the right tools or confidence, contact a licensed plumber. Major leaks or those affecting structural elements, electrical components, or gas lines should always be treated as emergencies. For minor, accessible leaks, a DIY approach is reasonable—provided you follow safety precautions and use proper materials. Leak prevention after repair is essential to avoid repeat issues.
Tools and materials you’ll need (overview)
Having the right gear speeds up and improves outcomes. Basic tools include an adjustable wrench, screwdrivers, and a flashlight. Essential materials include replacement washers and O-rings, Teflon tape, pipe sealant, a bucket, rags, and a silicone sealant for small gaps. Keep a digital camera or smartphone handy to document the leak and the fix. Always inspect for corrosion, mineral buildup, or damaged insulation, as these factors increase the likelihood of future leaks.
Preventative maintenance to reduce future leaks
Adopt a routine that includes inspecting hoses and connections at least twice a year, replacing aging components before failure, and keeping fixtures clean from mineral deposits. If you have hard water, consider a water softener or regular descaling to protect fittings. Use anti-corrosion compounds on metal joints and apply new seals where needed. Regular maintenance reduces surprises and keeps your system efficient, helping you stop leaks before they start.
How to test and verify the fix
Testing a repair is as important as the repair itself. After completing a fix, turn on the water supply gradually and observe the area for several minutes. Look for mist or drips, listen for faint running water, and check the surrounding tiles or drywall for moisture. If the leak returns, reassess the source, check fittings again, and consider a more permanent solution. Documentation of the fix helps when you discuss issues with a professional.
Cleaning up and drying to minimize damage
Water cleanup is not optional—it's essential to prevent mold and odor. Remove standing water with towels and a bucket, then ventilate the area. Use fans and a dehumidifier to dry the space thoroughly, especially behind walls or under cabinets. Check for hidden moisture in baseboards or flooring that might warp or swell. A thorough dry-out reduces the chance of secondary damage and makes the area safe to reoccupy.
Tools & Materials
- Adjustable wrench(Choose 6-12 inch for most under-sink fittings)
- Replacement washers and O-rings(Match diameter and thickness to fixture)
- Teflon tape (PTFE)(Wrap clockwise 3-5 turns on threaded connections)
- Bucket(Catch water during repairs)
- Rags or towels(Keep area dry and clean)
- Silicone sealant or plumber's putty(Temporary sealing for small gaps)
- Pipe repair clamp or epoxy putty(For quick temporary fixes on pinhole leaks)
- Flashlight or headlamp(Inspect dark spaces behind walls)
- Personal protective equipment (gloves, safety glasses)(Safety first)
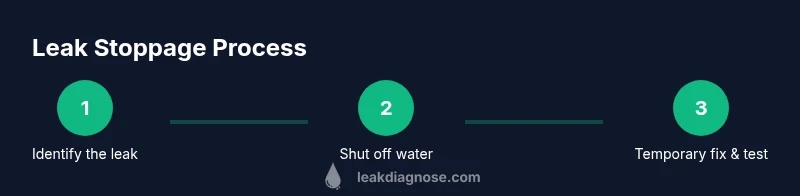
Steps
Estimated time: 60-120 minutes
- 1
Shut off the water supply
Locate the nearest shut-off valve for the area you’re working on and turn it clockwise until it stops. If you can’t find a local valve, shut off the main water supply to stop further flow. This step prevents ongoing damage and buys you time to work safely.
Tip: If the valve is stiff, use a wrench gently—don’t force it and risk breaking the handle. - 2
Drain the line and relieve pressure
Open a faucet at the lowest point in your home to drain residual water and relieve pressure in the line. This minimizes splashes and makes the repair easier. Close the faucet when water stops coming out.
Tip: Use a bucket to catch water and avoid slippery floors. - 3
Identify the leak source precisely
Carefully inspect the suspected area with a flashlight. Look for dampness, mineral buildup, or staining that pinpoints the leak. Mark the exact spot so you don’t lose track during disassembly.
Tip: If you’re dealing with a concealed leak, a moisture meter can help confirm the exact location. - 4
Apply a temporary fix to stop further flow
For a valve leak, reseal threads with PTFE tape and tighten. For a small crack, apply epoxy putty to seal the area as a stopgap until a permanent replacement is installed.
Tip: Do not rely on duct tape as a long-term fix for water leaks. - 5
Tighten or replace fittings and washers
Replace worn washers and O-rings and reseat fittings. Use the adjustable wrench to snug fittings without overtightening, which can cause damage.
Tip: Always replace worn components to prevent resealing problems. - 6
Test for leaks and monitor
Turn the water back on slowly and observe the repaired area for several minutes. Look for drips, listen for running water, and re-check seals. If you see moisture, stop the water again and reassess.
Tip: Take photos during the test to help diagnose future issues. - 7
Plan for permanent repair and schedule
If the leak recurs or if repairs involve concealed pipes, schedule a permanent fix with a licensed plumber. Document what you did and any parts replaced for future reference.
Tip: Keep a small repair log to track wear and repeat issues.
Questions & Answers
What is the quickest way to stop a minor faucet leak?
Shut off the faucet supply, disassemble, and replace worn washers or O-rings. Reassemble and test for drips. If the faucet remains leaky, consider replacing the entire faucet.
Shut off the supply, replace worn washers, reassemble, and test for leaks. If it keeps leaking, replace the faucet.
When should I call a plumber?
Call a plumber if the leak is behind walls, involves gas lines, is extensive, or you cannot locate the source safely. Persistent leaks after basic DIY attempts warrant professional help.
Call a plumber if the leak is hidden, involves gas, or persists after basic fixes.
Can I use epoxy to fix a pipe leak?
Epoxy putty can be a temporary seal for small surface leaks, but it is not a substitute for a proper joint repair. Plan a permanent fix as soon as possible.
Epoxy can be a temporary seal, but it isn't a permanent fix for pipe leaks.
What should I do if a leak is near electrical components?
Turn off power to the affected area if safe, evacuate if there's any risk, and call a licensed electrician or plumber. Water and electricity together are dangerous.
Switch off power to the area if safe and call a pro. Water plus electricity is dangerous.
Is a leaking appliance repairable by DIY?
Many appliance leaks can be addressed with replacement parts and seals. If the appliance is old, you may weigh replacement costs against repair.
Some appliance leaks are DIY-friendly with parts, but older appliances may be better replaced.
Does homeowners insurance cover leak damage?
Coverage varies by policy and cause. Review your policy for dwelling, contents, and liability coverage related to water damage from leaks.
Coverage depends on your policy—check dwelling and contents coverage for water damage.
Watch Video
Main Points
- Stop a c leak quickly to minimize damage.
- Prioritize safety with shutoffs and PPE.
- Different leaks require different fixes; know when to DIY vs call a pro.
- Document fixes for future reference.
- Test thoroughly and dry the area to prevent mold.