Fix Leaking Toilet: DIY Guide
Learn to diagnose and repair a leaking toilet with a clear, practical DIY guide from Leak Diagnosis. Step-by-step instructions, safety tips, and preventive maintenance to save water and avoid costly repairs.

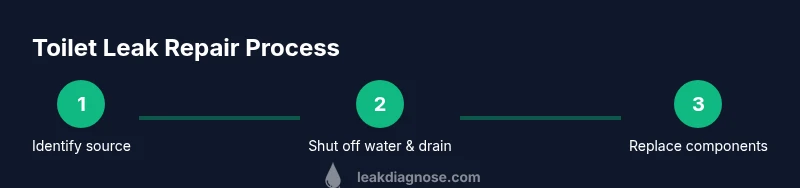
By following this guide, you will stop a leaking toilet and prevent water waste. You’ll diagnose common causes, shut off the water safely, replace worn components (flapper, fill valve, wax ring as needed), and test the fix before restoring normal use. No professional tools required for most DIY repairs, but safety comes first.
Understanding toilet leaks
Toilet leaks are more common than many homeowners expect, and ignoring them can waste hundreds of gallons of water over time. Most leaks originate from three points: the flapper at the bottom of the tank, the fill valve that refills the tank after flushing, and the wax ring that seals the toilet to the floor. Leaks may show up as water around the base, damp flooring, a faint running-water sound, or a perpetually damp tank. Even a slow drip wastes water and can drive up your bill if left unchecked. A practical first test is a simple dye test: add a few drops of food coloring or dye to the tank and observe the bowl for color without flushing. If color appears, you’ve identified the likely source and can proceed with targeted fixes.
Common Causes of Leaks
Leaks come from worn or damaged components, improper installation, or flange issues. The most frequent culprits are a deteriorated flapper, a faulty fill valve, a loose or cracked supply line, and a cracked tank or bowl. A base leak often traces back to a loose or degraded wax ring that seals the toilet to the floor. Salt stains, mineral buildup, or corrosion around connections can also create tiny drips that become bigger over time. Understanding these common causes helps you decide between a quick part replacement or a more involved repair.
Safety First: When to Call a Pro
DIY repairs work well for many toilet leaks, but certain situations warrant a pro. If you notice persistent base leaks after replacing the wax ring, a continuously shifting toilet, or cracks in the porcelain, stop and call a licensed plumber. Gas or septic-related odors, or water in ceilings below the bathroom, indicate more complex issues that require professional assessment. If you’re unsure about the structure of the flange or the building’s plumbing layout, consult a pro to avoid damage to the plumbing or floors.
Tools and Materials You’ll Need
Before you begin, gather essential tools and materials to avoid mid-project trips to the hardware store. You’ll need an adjustable wrench, screwdrivers (both Phillips and flathead), a bucket, towels, and gloves. For parts, stock up on a new flapper valve, a replacement fill valve if needed, a wax ring, closet bolts, and a flexible supply line. Optional items include silicone sealant for minor gaps, a putty knife to clean the flange, and food coloring for dye testing. Having everything on hand reduces risk and speeds up the repair.
Step-By-Step Diagnosis Procedure
Start with a visual inspection around the base and tank connections, then perform a dye test to pinpoint leaks. Check the tank components: the flapper seat, the chain length, and the flush valve for wear. Next, observe the fill valve and float mechanism; a slowly rising water level or constant running sound may indicate a faulty valve. Finally, test for a base leak by applying a dry tissue around the base after flushing and watching for moisture. If the leak source remains unclear, reassess each component and consider an incremental replacement strategy to minimize disruption.
Fixing the Tank: Flapper Replacement
If the flapper seals poorly or is warped, replace it with a compatible unit. Disconnect the water supply, drain the tank, remove the old flapper, and install the new one ensuring a snug fit around the flush valve opening. Reconnect the chain with a tiny amount of slack so the flapper can seal without binding. After replacement, flush the toilet a few times to confirm the tank stops leaking and that the flush action remains smooth.
Replacing the Wax Ring and Flange Gasket
A persistent base leak often means the wax ring has failed. Carefully remove the toilet by disconnecting the supply line and unbolting the closet bolts. Lift the toilet straight up, scrape away the old wax from the flange, and inspect the flange for damage. Install a new wax ring, reseat the toilet, and re-tighten the bolts evenly. Reconnect the supply line and run several test flushes. Keep in mind that a secure, level seating prevents wobbly movement that can reintroduce leaks.
Testing and Preventive Maintenance
After completing the repairs, perform a thorough test: flush several times, observe the base for drips, and recheck around all connections. A final 24-hour leak test is helpful; keep towels or a shallow tray to catch any slow leaks that may appear while the seal settles. Regular maintenance includes replacing worn seals at intervals, tightening connections, and addressing mineral buildup that can degrade components. A little preventive care goes a long way toward keeping your toilet leak-free.
What if the Leak Persists and Next Steps
If leaks persist after replacing the flapper, fill valve, and wax ring, the issue may be more complex, such as a cracked bowl or a damaged flange that needs professional attention. Document the steps you’ve taken, note the leakage patterns, and consult a licensed plumber to avoid further damage. In some cases, a full toilet replacement may be the most economical long-term solution, especially in older homes with aging plumbing.
Tools & Materials
- Adjustable wrench(Essential for loosening/retightening nuts on supply line and bolts.)
- Screwdrivers (Phillips and flathead)(Used to remove tank screws and flapper clip.)
- Bucket(Catch residual water during disassembly.)
- Towels or rags(Wipe spills and keep work area dry.)
- Gloves (rubber or latex)(Keep hands clean and protect skin.)
- New flapper valve(Replace worn flapper to stop tank leaks.)
- New fill valve (if needed)(Use if the fill valve shows wear or failure.)
- Wax ring(New wax ring to seal toilet to floor.)
- Closet bolts(Replace if the bolts are corroded or damaged.)
- Flexible supply line(Optional when replacing old line.)
- Putty knife(Clean the flange surface before reseating.)
- Food coloring (for dye test)(A quick dye test to verify leaks.)
Steps
Estimated time: 2-3 hours
- 1
Shut off water and drain the tank
Locate the shutoff valve near the floor behind the toilet and turn it clockwise to close. Flush once to empty the tank, then use towels to sop up any remaining water.
Tip: Keep a towel handy and place a bucket for drips to prevent spills. - 2
Inspect tank components
Carefully lift the tank lid and inspect the flapper, chain, and fill valve for wear or misalignment. If you see cracks or warping, prepare replacements.
Tip: Take a quick photo before removing parts to aid reassembly. - 3
Replace the flapper or adjust the chain
If the flapper is worn or the chain is too tight/loose, replace or adjust it so the valve closes properly without binding.
Tip: Ensure the chain has just enough slack for full closure. - 4
Check and adjust the fill valve
If water keeps running into the overflow tube or the level is off, replace the fill valve or adjust the float to the correct level.
Tip: Follow the valve manufacturer’s height guidelines for best results. - 5
Remove the toilet for wax ring replacement
Shut off water, disconnect supply line, unbolt closet bolts, and lift the toilet straight up. Scrape old wax from the flange and inspect for damage.
Tip: Ask a helper to steady the toilet when lifting. - 6
Re-seal and reassemble
Place a new wax ring on the flange, lower the toilet back into position, and tighten bolts evenly. Reconnect the supply line and flush to test.
Tip: Avoid overtightening bolts to prevent cracking the porcelain.
Questions & Answers
What are the common signs of a leaking toilet?
Common signs include water pooling at the base, a constantly running toilet, damp floors, or a persistent faucet-like sound from the tank. A quick dye test in the tank can confirm internal leaks.
Look for water around the base or a running toilet. A simple dye test will confirm leaks inside the tank.
Can I fix a leaking toilet myself?
Yes, many toilet leaks are repairable with basic tools. Typical fixes involve replacing the flapper, adjusting the fill valve, and possibly reseating or replacing the wax ring.
In many cases you can fix it yourself with basic tools and a little patience.
Is a leaking wax ring repair difficult?
Replacing a wax ring is a moderate task that requires lifting the toilet. If you’re comfortable with basic plumbing, you can do it; otherwise, hire a pro.
Wax ring replacement can be doable but requires careful handling of a heavy toilet.
When should I replace the fill valve?
Replace the fill valve if it’s leaking, if the float won’t hold a proper water level, or if the toilet continues to run after replacement of the flapper.
If the toilet still runs after fixing the flapper, the fill valve might be the culprit.
Do I need professional help for base leaks?
If base leaks persist after replacing the wax ring, or if the flange area is damaged, call a licensed plumber. Persistent leaks can indicate a hidden issue.
If leaks at the base keep returning, a professional assessment is advisable.
What tools help with toilet leaks?
Common tools include an adjustable wrench, screwdrivers, pliers, and a bucket. Having a wax ring, new flapper, and new fill valve on hand is also helpful.
You’ll typically need basic hand tools and a few replacement parts.
Watch Video
Main Points
- Identify leak source before replacing parts
- Shut off water and drain tank to prevent spills
- Replace worn flapper, fill valve, and wax ring as needed
- Test repair with a dye test and follow-up checks
- Call a professional if leaks persist after basic fixes