How to Find an EVAP Leak Without Smoke
Learn safe, smoke-free methods to locate evaporative (EVAP) leaks in your vehicle. This step-by-step guide uses non-smoke pressure testing, visual inspection, and diagnostic tools to identify common EVAP sources.

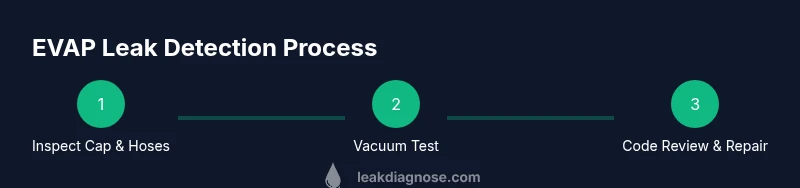
Learn to locate EVAP leaks without smoke by performing a non-smoke pressure test, inspect the gas cap and hoses, use a hand vacuum pump and a vacuum gauge to monitor system pressure, and check for vacuum loss with an OBD-II scanner. This approach avoids smoke while identifying most common leak sources.
What is the EVAP System and Why Leaks Happen
The evaporative emission control (EVAP) system is designed to prevent fuel vapors from escaping the fuel system into the atmosphere. It includes components like the gas cap, hoses, purge valve, canister, and related sensors. Leaks can arise from cracked hoses, loose clamps, degraded seals, a failed canister, or a faulty gas cap. Temperature fluctuations, road debris, and aging plastic fittings accelerate wear. When an EVAP leak occurs, the engine may store trouble codes (like P0440 family codes), the check engine light may illuminate, and the vehicle may fail a smoke-free emissions test depending on local regulations. For homeowners, understanding the common sources helps focus your inspection effort.
Pro tip: Start with the easy-access points (gas cap and hoses near the engine bay) before diving into less visible areas such as the purge line or canister mounting.
Signs That an EVAP Leak May Be Present (Without Smoke)
Common indicators of an EVAP leak, even without smoke, include a rough idle after fueling, repeated EVAP-related diagnostic trouble codes, a fuel odor around the vehicle, and a failing emissions test. A sudden drop in fuel economy can also hint at a leak. Anomalies in the EVAP system are often revealed by OBD-II scan data or live data from the purge valve and vapor canister pressure sensor. If the check engine light is on, pulling fault codes with an OBD-II scanner is your first step toward targeted testing.
Key nuance: A leak might be intermittent—present only after the car sits for a while or only at certain temperatures—so note when symptoms occur and under what conditions.
Essential Tools and Safety Precautions
Non-smoke EVAP testing relies on controlled vacuum and pressure observation, not on flame or smoke testing. Gather the following essentials:
- OBD-II scanner to read and monitor EVAP-related codes and live data.
- Hand-operated vacuum pump to apply a known vacuum to the system.
- Vacuum gauge or manometer to measure how quickly the vacuum leaks down.
- A shut-off valve or adapter to isolate portions of the line when needed.
- A flashlight, clean rags, and protective gloves.
- Replacement gas cap or seals for testing variations.
Safety matters: Work in a well-ventilated area away from open flames. Gasoline vapors are flammable; avoid sparks and smoking instruments nearby. Wear eye protection and gloves when handling fuel-system components.
Step-by-Step: Non-Smoke EVAP Leak Detection
-
Prepare the workspace and safety checks. Park on a level surface, engage the parking brake, and disconnect the battery if you are going to disassemble components. Inspect the area for obvious fuel odors, stains, or damaged hoses.
-
Check the gas cap thoroughly. A loose, cracked, or cross-threaded gas cap can cause evaporative leaks. Tighten or replace the cap as needed and clear any warning codes if the issue was cap-related.
-
Visually inspect hoses, clamps, and connections. Look for cracks, splits, or softened hoses, especially near hose junctions and under-hood clamps. A flashlight helps reveal hairline cracks that are easy to miss.
-
Apply vacuum to the EVAP system. Connect the vacuum pump to the service port or a safe testing point and apply a steady vacuum. Observe the vacuum gauge and note any rapid drop indicating a leak. If you cannot create or hold vacuum, isolate sections to identify the source.
-
Monitor for vacuum decay over time. Hold a vacuum for 5–15 minutes and compare readings. A rising or falling gauge suggests a leak or a faulty seal. If the gauge holds but a code persists, the issue may be sensor-related rather than a large hose leak.
-
Use a controlled pressure test (if applicable). Some setups allow applying slight positive pressure to the EVAP system and watching for pressure loss. This method can reveal leaks in canisters, hoses, or purge lines that don’t show up under vacuum alone.
-
Scan codes and validate findings. Reconnect the battery, run the engine, and perform a fresh OBD-II scan. If a leak code returns after a vacuum test, review sensor data (purge valve status, canister pressure sensor) to narrow the suspect area.
Pro tip: Always document the exact steps and readings for your records; this helps if you later visit a shop or re-test after maintenance.
Special Techniques: Pressure Testing and Sensor Checks
Besides vacuum testing, pressure-based methods help localize EVAP leaks. Some DIY testers use a shop vacuum with a precision regulator to introduce a known pressure and watch for slow leak-down. Many modern vehicles rely on the purge valve and canister pressure sensor data to confirm leaks. If a leak is suspected but not physically visible, rely on live sensor readings from the OBD-II tool (e.g., purge valve duty cycle, canister pressure). Addressing the issue may involve replacing a cracked hose, reseating clamps, or replacing the gas cap; advanced problems may require component replacement.
Note: Do not exceed manufacturer-recommended pressure when testing; excessive pressure can damage lines, canisters, and valves.
Interpreting Diagnostic Codes and Real-World Clues
EVAP codes (P0440, P0446, P0442, etc.) indicate general issues with the evaporative system. Use the OBD-II scan to determine whether the fault is cap-related, line leaks, canister problems, or purge-valve faults. Real-world clues include fuel odor, failing emissions tests, and idle instability that manifests after refueling. Remember that some problems trigger intermittent codes; if a code clears during testing, recheck after a drive cycle. In many cases, addressing a loose gas cap resolves multiple symptoms, whereas persistent codes require targeted component checks.
Prevention and Maintenance to Reduce EVAP Leaks
Prevention beats replacement. Regularly inspect the gas cap and its seal, replace worn hoses, and tighten clamps to factory specifications. Keep the engine bay clean so you can spot leaks early. When performing any EVAP work, use OEM-style parts and follow torque specs to avoid over-tightening clamps that can crack fittings. Periodic inspections during routine maintenance can catch issues before they trigger codes or fuel odors. A proactive approach reduces the likelihood of unexpected smog-check failures and keeps your vehicle running smoothly.
Authoritative sources and further reading will be listed below to help you corroborate methods and stay up to date with best practices in EVAP leak detection.
Authoritative sources
- Environmental Protection Agency (EPA) – Evaporative Emission Control System overview: https://www.epa.gov
- National Highway Traffic Safety Administration (NHTSA) – Vehicle emissions and EVAP fundamentals: https://www.nhtsa.gov
- Federal Trade Commission (FTC) – Consumer guidance on automotive emissions and maintenance: https://www.ftc.gov
Tools & Materials
- OBD-II scanner(Reads EVAP-related codes; shows live data for purge valve and canister pressure sensors)
- Hand-operated vacuum pump(Ability to apply a stable vacuum to EVAP system without starting the engine)
- Vacuum gauge or manometer(Measures vacuum level and rate of decay accurately)
- Shut-off valve or testing adapter(Isolates sections of tubing to localize leaks)
- Gas-cap (new or known-good)(Used to test replacement cap effect or compare with suspected cap leaks)
- Flashlight, rags, gloves(Basic safety and visibility for inspection)
- Fuel-safe handling tools(Includes spill tray and absorbent pads for minor leaks)
Steps
Estimated time: 60-150 minutes
- 1
Prepare workspace and safety checks
Park on level ground, engage parking brake, and ensure the area is well-ventilated away from ignition sources. Gather your tools and inspect the immediate area for obvious signs of fuel leakage. This reduces risk and sets you up for accurate testing.
Tip: Keep a log of initial conditions (engine cold, fuel level) to compare with post-test results. - 2
Test the gas cap integrity
Visually inspect the cap and seal for cracks or damage. Tighten securely and re-run the test if needed. A faulty cap is a common source of evap codes and small leaks, and replacement is inexpensive.
Tip: If a used cap previously caused events, replace with an OEM or high-quality aftermarket cap. - 3
Visual hose and clamp inspection
Look for cracks, stiffness, or swelling on hoses near the canister and purge lines. Check all clamps for corrosion or looseness, and reseat or replace as necessary.
Tip: Use a mirror for hard-to-see angles; even hairline cracks can escalate under pressure. - 4
Apply vacuum and monitor
Connect the vacuum pump to a service port or test point and apply a steady vacuum. Observe the gauge; a steady hold indicates no major leak in the tested section, while a decay suggests a leakage path.
Tip: If you cannot create vacuum, isolate sections (cap one line, test another) to identify the source. - 5
Perform a controlled pressure check
If available, introduce a small amount of positive pressure and watch the system for pressure loss. This helps detect leaks that a vacuum test might miss, especially in canister or purge-line components.
Tip: Do not exceed the recommended pressure; excessive pressure can damage components. - 6
Scan codes and review live data
Run an OBD-II scan after the test and review live data for purge valve duty cycle and canister pressure sensor readings. Correlate with physical observations to pinpoint suspect parts.
Tip: Clear codes after repairs and recheck to confirm the fix resolved the issue. - 7
Finalize diagnostics and plan repairs
Based on findings, replace faulty hoses, seals, or the gas cap as needed. If a component is inaccessible or damaged, consider professional service for safe removal and replacement.
Tip: Document the parts changed and test again to confirm success.
Questions & Answers
Can EVAP leaks be diagnosed without professional equipment?
Yes, to a degree. You can perform basic checks like gas cap inspection and visual hose inspection, and use an OBD-II scanner for codes. More precise localization often requires a vacuum pump, gauge, and sometimes a pressure test kit.
Yes, you can start with gas cap checks and an OBD-II scan, but for precise localization you’ll likely need a vacuum pump and gauge.
What is the quickest non-smoke EVAP test?
A cap check followed by a quick vacuum test can quickly rule out obvious leaks. If the issue persists, proceed with a full vacuum hold test and sensor data review.
Check the gas cap first, then do a quick vacuum test to see if there’s an obvious leak.
What symptoms indicate an EVAP leak?
Symptoms include a frequent check engine light, failure in emissions tests, fuel odor, rough idle after fueling, or unsettled vacuum readings from live data.
Common signs are a check engine light and fuel odor, especially after fueling.
Can a faulty gas cap cause all EVAP codes?
A bad gas cap can trigger several EVAP codes and light the check engine. Replacing with a proper cap often resolves the issue without deeper repairs.
A bad gas cap can trigger EVAP codes; replacing it can fix many cases.
When should I seek professional EVAP service?
If tests are inconclusive, if the leak source is hard to access, or if you encounter dangerous components, seek professional service for safe and thorough repairs.
If you can’t locate the leak or your tests are unsafe, call a pro.
Are smoke tests mandatory for EVAP leaks?
No. Smoke tests are common in garages, but many leaks can be found with vacuum testing, sensor data, and visual inspections. Smoke testing is an option if available and appropriate for stubborn cases.
Smoke tests aren’t mandatory; vacuum tests and code data usually do the job.
Watch Video
Main Points
- Identify common EVAP leak sources early.
- Use vacuum testing and OBD-II data for precise localization.
- Gas cap integrity is a frequent leak source.
- Avoid smoke tests and follow safety protocols.
- Document findings and verify repairs with a re-test.