Is EVAP Leak Hard to Fix? Troubleshooting and Fixes
Urgent guide to diagnosing and fixing EVAP leaks in automotive emissions systems. Learn common causes, testing steps, and when to DIY or call a pro. Leak Diagnosis shares actionable steps for safe, effective repairs.

An EVAP leak is generally hard to fix for DIYers because the system is sealed under vacuum and uses sensitive canisters, hoses, and valves. The quickest path is a shop scan and dye test to confirm leak location, then decide if DIY replacement of hoses or clamps is enough or if a full EVAP canister replacement is needed.
What is an EVAP leak and why it happens
An EVAP leak involves the evaporative emissions system, which traps fuel vapors from the gas tank and routes them to the engine for combustion. A leak can occur anywhere along hoses, connectors, the charcoal canister, purge valve, or the fuel filler neck. If you’ve ever wondered whether is evap leak hard to fix, the short answer is: it depends on location and component. Some leaks are small and show up as a P0440 diagnostic code; others are masked by weather conditions or fuel additives. Over time, brittle hoses, loose clamps, a cracked charcoal canister, or a degraded seal around the purge valve can allow vapors to escape. The system is designed to operate under vacuum and with precise tolerances, so even a minor crack or loose clamp can trigger a check engine light and emissions failure. According to Leak Diagnosis, many EVAP leaks begin as tiny cracks in low-pressure hoses or a single loose fitting, which, if ignored, can grow and create more serious issues.
Signs of an EVAP leak and initial checks
Noticeable symptoms can include a persistent gasoline odor near the vehicle, a Check Engine light, and a failed emissions test. Other signals include rough idle, reduced fuel efficiency, or the engine stalling in certain conditions. Before diving into repairs, perform simple checks: inspect the fuel cap for a proper seal, look for obvious cracks on hoses, and ensure clamps are tight. A professional scan with an OBD-II reader can reveal diagnostic trouble codes (DTCs) such as P0440 or P0455, which point to the EVAP system. If your vehicle uses a dye-based leak test, you may notice UV-reactive dye around hoses or the canister. Even if the odor or code seems minor, don’t ignore it—small leaks can grow when heat, vibration, or humidity changes occur. The goal is to pinpoint the source before replacing parts and incurring unnecessary work.
Is evap leak hard to fix? DIY vs professional
Whether a repair is DIY-friendly depends on access, skill, and the leak’s location. Simple fixes, such as replacing a cracked hose or tightening a loose clamp, are often within reach for a confident homeowner with basic tools. However, many EVAP repairs require a smoke test or pressure test to locate hidden leaks, and those tests usually demand specialized equipment. More importantly, the EVAP system operates under vacuum and stores fuel vapors that can be hazardous if mishandled. If a leak is near the charcoal canister or purge valve, or if the lines run through the chassis, you’ll likely want a professional with the right equipment and environmental safeguards. The Leak Diagnosis team notes that attempting to seal a larger leak with tape or sealant is not a lasting solution and can introduce new problems.
Tools, safety, and prep
Before you start, assemble the right tools: a set of nut drivers, clamps pliers, and replacement hoses, plus a compatible smoke tester or UV dye kit if you have access. Wear safety gear: gloves, eye protection, and a respirator rated for chemical vapors when working around fuel vapors. Disconnecting the battery is optional for some tasks but prudent if you’ll be near the electrical harness. Work in a well-ventilated area and avoid open flames or smoking nearby. If you’re doing a dye test, follow the product instructions for introducing dye into the EVAP system and using UV light to spot leaks. Always consult your vehicle’s service manual for torque specs and part numbers, and double-check that you’re not violating local environmental rules when handling fuel vapors.
Diagnostic approach and flow
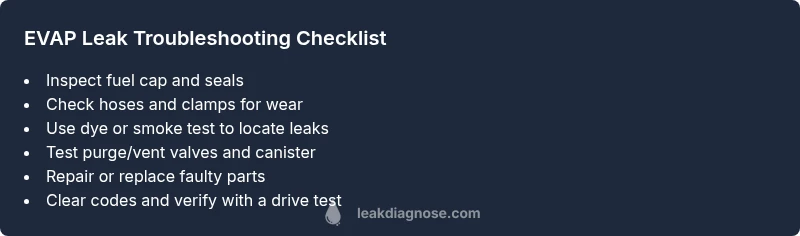
Start with the simplest explanation: a loose gas cap or a cracked hose. Confirm by tightening the cap and re-checking the code, then proceed to inspect hoses and clamps along the purge lines. If no obvious issues are found, run a dye or smoke test to force vapor through the system and visually locate the leak. Once you identify a location, choose a repair path: replace a clamp or hose for a minor leak, or replace a canister or valve for a larger issue. After repairs, clear the codes with a scan tool and perform a road test to ensure the system reaches ready status and no new leaks appear.
Preventing future EVAP leaks
To reduce future leaks, regularly inspect fuel hoses for wear and replace brittle lines before they fail. Use high-quality clamps and ensure a proper seal on the fuel cap; avoid over-tightening which can damage seals. Keep the battery in good condition to avoid unnecessary electrical issues that can complicate EVAP diagnostics. Schedule periodic inspections during routine maintenance and address any unusual readings promptly. A proactive approach, including testing and cleaning the purge valve and canister connections, helps maintain optimal emissions performance and keeps your vehicle running cleanly and reliably.
Steps
Estimated time: 60-180 minutes
- 1
Prepare safely and gather tools
Put on gloves and eye protection, ventilate the area, and gather hoses, clamps, a smoke tester or UV dye kit, and a torque wrench. Have a service manual on hand for reference.
Tip: Double-check local safety rules for handling gasoline vapors before starting. - 2
Check obvious causes first
Inspect the fuel cap for proper sealing and tighten it to the manufacturer’s torque spec. Do a visual scan of hoses and clamps around the canister and purge valve for cracks or looseness.
Tip: A loose gas cap is a common, easy fix that can turn off codes quickly. - 3
Perform dye or smoke testing
Introduce UV dye or use a smoke tester to force vapor through the system. Look for dye trails or smoke plumes to identify the leak source.
Tip: Follow the kit instructions exactly to avoid contamination or misdiagnosis. - 4
Repair the identified leak
Replace cracked hoses, tight clamps, or faulty valves as needed. If the canister or purge valve is leaking, consider professional service as these parts require special tools and handling.
Tip: Avoid temporary sealants; they rarely fix EVAP leaks long-term. - 5
Clear codes and verify
Reset the trouble codes with a scan tool and drive the vehicle to confirm readiness monitors run without reappearing codes.
Tip: Test drive for a few miles to ensure stability under different conditions. - 6
Review prevention steps
Record what caused the leak and implement preventive maintenance like regular cap checks and hose inspections. Schedule periodic EVAP system checks as part of routine maintenance.
Tip: Keep a maintenance log for quicker future diagnostics.
Diagnosis: Check Engine Light illuminated with odor or emissions codes
Possible Causes
- highLoose or cracked EVAP hoses and clamps
- highFaulty purge/vent valves
- mediumCracked charcoal canister
- lowFuel cap not sealing properly
Fixes
- easyInspect and tighten/replace hoses and clamps
- mediumReplace purge or vent valves and test
- hardSmoke/pressure test to locate leak; replace canister if needed
- easyReplace faulty fuel cap and reseal
Questions & Answers
What does EVAP stand for and why does a leak matter?
EVAP stands for evaporative emissions control. Leaks let fuel vapors escape, harming the environment and triggering engine warning codes. Left unfixed, leaks can affect fuel economy and emissions compliance.
EVAP stands for evaporative emissions control, and leaks can trigger warning codes and hurt emissions, so they should be fixed promptly.
Can I fix an EVAP leak myself?
Simple hose or clamp repairs are often doable for confident DIYers with basic tools. More complex leaks near the canister or purge valve usually require specialized tests and professional service.
You can fix small hose issues yourself, but more complex leaks often need pros and special tests.
How long does EVAP leak repair take?
Repair time varies by leak; simple hose replacements may take under an hour, while diagnosing and replacing the canister or valves can take several hours and may require a shop visit.
It depends on the leak, but expect from under an hour to several hours for more involved repairs.
How much does an EVAP leak repair cost?
Costs vary widely based on parts and labor. Minor hose fixes are inexpensive; major repairs, like canister replacement, can be significantly more. A professional diagnosis is essential to estimate accurately.
Costs vary a lot; get a professional diagnosis to get a precise estimate.
What are common signs of an EVAP leak that homeowners should watch for?
Common signs include a persistent fuel odor, a flashing or solid Check Engine light, poor fuel economy, and potential failed emissions testing. Early detection helps prevent bigger issues.
Look for fuel smells, engine codes, and reduced fuel efficiency as early signs.
Watch Video
Main Points
- EVAP leaks vary from simple hose fixes to complex canister issues.
- DIY fixes are possible for easy hose/clamp problems but require proper testing.
- Use dye or smoke tests to locate hidden leaks before replacing parts.
- Professional help is recommended for high-pressure or hard-to-access components.