Leak in evap system: A practical troubleshooting guide
Urgent guide to diagnosing a leak in evap system in vehicles. Learn common causes, top at‑home checks, safe fixes, when to call a pro, and prevention tips to pass emissions and keep your car running smoothly.

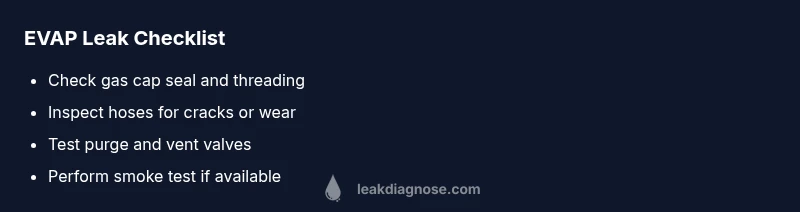
Steps to address a suspected leak in the evap system: 1) tighten or replace the gas cap and check its seal; 2) inspect the surrounding hoses and clamps for cracks or loose connections; 3) run a smoke or EVAP diagnostic test to locate the leak; if the check engine light persists or you smell fuel, stop and seek professional help.
Why a leak in evap system matters
A leak in evap system (Evaporative Emission Control System) can trigger a check engine light, increase fuel vapors, and raise environmental and safety concerns. The evap system captures fuel vapors from the tank and routes them to the engine to be burned rather than vented to the atmosphere. When any component develops a leak, the vehicle's onboard diagnostics run leak tests and flag the anomaly. For homeowners working on auto issues, understanding this system is essential because even small leaks can escalate into costly repairs and emissions failures. According to Leak Diagnosis, EVAP leaks are a common source of trouble for many vehicles, especially as hoses age or connections loosen. The consequences aren't just about passing an inspection; persistent vapors can degrade air quality around your driveway and garage. Early attention can prevent fuel smells, reduced gas mileage, and rough engine behavior. In practice, many leaks are slow and initially go unnoticed until the check engine light appears. If you notice a strong gasoline odor near the fuel system, a noisy under-hood rattling, or inconsistent idle, treat it as a warning sign and start a careful inspection. The EVAP network is complex, but a systematic approach keeps you from chasing false positives.
Common causes of evap system leaks
EVAP leaks can arise from several sources, and identifying the right culprit is essential before replacing parts. The most frequent causes include a faulty or loose gas cap with a worn seal, which is the easiest fix and often the culprit for a mystery check engine light. Harsh road conditions, aging hoses, and brittle plastics in the vacuum lines can crack or detach, especially where hoses meet fittings and clamps. The purge valve or vent valve can fail to seal properly, allowing vapors to escape or be misrouted. A damaged or collapsed charcoal canister is another common source, particularly in older vehicles or those exposed to long-term fuel exposure. Finally, a cracked intake manifold gasket or other intake components can introduce vapor leaks into the系统. When diagnosing, prioritize the gas cap, visible hoses, and the purge valve, then consider the canister and fittings if the basics check out.
Symptoms you might notice
Recognizing EVAP leaks early helps prevent more serious emissions issues. Look for the check engine light as a primary cue, often accompanied by a stored trouble code such as P0440–P0446 range in many vehicles. You may notice a noticeable fuel odor near the gas tank or under the car, particularly after fueling. A sudden drop in fuel economy can occur if vapors escape rather than being routed back into the engine. Rough idling or engine stalling is less common but possible if the leak disrupts the air-fuel mixture. Some leaks are small and only detectable with a smoke test or diagnostic scan, making a professional evaluation essential when symptoms are subtle.
Diagnostic steps you can take at home
Begin with the simplest checks before moving to advanced diagnostics. 1) Inspect the gas cap: ensure it threads correctly, the seal is intact, and the cap shows no cracks or damage. 2) Visually inspect all obvious EVAP hoses and clamps for cracks, wear, or disconnection, paying attention to hard-to-reach areas near the fuel tank and purge valve. 3) Look for fuel smell as you pump gas or after fueling, noting any persistent odor or damp soot near the tank. 4) If you have access to an OBD-II scanner, read the stored codes and check for EVAP-related faults. 5) Consider a smoke test if available—introducing harmless fog into the system can reveal leaks that are invisible to the eye. 6) After any small fix, drive normally and recheck for codes to ensure the issue is resolved. If the light returns or smells persist, avoid driving long distances and schedule a professional EVAP leak test promptly.
How to fix common causes: quick fixes you can try safely
Some fixes are DIY-friendly, while others require professional service. Start with the gas cap: replace it if the seal is damaged or if it doesn’t click securely. Re-map and ensure the cap threads cleanly. For hoses and clamps, replace any cracked hoses and tighten clamps to the recommended torque. A faulty purge valve or vent valve should be tested with a scan tool; replacement is usually straightforward but may require service manual guidance. If the charcoal canister is damaged, or if there is structural damage to the EVAP lines, replacement is typically needed and best performed by a trained technician. In any case, avoid running the engine with a known leak, as vapors can be hazardous and emissions tests may fail. After any repair, clear codes with the scanner and take the vehicle for a test drive to confirm the fault is resolved.
Professional testing and when to call a pro
If DIY checks do not locate a clear source, a professional EVAP diagnostic is warranted. Shops typically perform a smoke test, pressure test, and automated EVAP leak test to isolate faults. A qualified technician can measure system pressure, verify valve operation, and inspect the canister for contamination or damage. If you smell fuel near the vehicle, hear hiss or roars from under the hood, or your check engine light returns after a DIY repair, stop driving and arrange service—fuel vapors are flammable and leaks can indicate a bigger fault. Regular maintenance and battery or engine checks do not replace EVAP-specific diagnostics, and attempting to bypass tests can lead to failed emissions or safety hazards.
Prevention tips to avoid future EVAP leaks
Proactive maintenance reduces the risk of EVAP leaks. Use high-quality fuel and avoid exposure to long storage or high heat conditions that degrade hoses and seals. Periodically inspect hoses for signs of aging, stiffness, or cracking, especially near connection points. Replace aging hoses proactively and use OEM or high-quality aftermarket parts designed for your vehicle. Keep the fuel system clean, check the evaporative canister for contamination, and ensure the purge valve operates smoothly. Regular emissions testing and diagnostic scans help catch issues before they escalate. By following a proactive maintenance plan, you can minimize leaks and preserve performance, fuel economy, and air quality.
Steps
Estimated time: 60-120 minutes
- 1
Gather tools and safety gear
Collect a flashlight, basic hand tools, a gas cap, replacement hoses, clamps, and an OBD-II scanner. Wear gloves and goggles. Safety first, especially around fuel systems.
Tip: Have a fire extinguisher handy in case of accidental fuel exposure. - 2
Check the gas cap and seal
Inspect the cap for cracks, worn threads, or a damaged seal. Replace with an OEM or high-quality aftermarket cap if any issue is found. After replacement, clear codes and drive to verify if the light returns.
Tip: Always ensure the cap is fully tightened until you hear a click. - 3
Inspect EVAP hoses and clamps
Follow hoses from the tank to the purge valve, looking for cracks, soft spots, or loose clamps. Replace damaged sections and reseal joints. Re-check with a smoke test if available.
Tip: Use a mirror for hard-to-see areas and replace worn hose segments rather than patching. - 4
Test the purge and vent valves
With the engine off, listen for valve operation and verify vacuum is held. Use a scan tool to command the valve if supported and observe any abnormal readings. Replace if the valve fails to seal or operate.
Tip: Valve failures are common; a test is more reliable than visual inspection alone. - 5
Perform a smoke or pressure test
If you have access to a smoke machine or a pressure tester, introduce fog or air to the EVAP system and locate the exact leak path. Mark the area and plan the replacement.
Tip: Do not inhale smoke; ensure the vehicle is secure and engine is off. - 6
Clear codes and verify
Erase the stored codes with your OBD-II scanner and take a short drive under varied conditions to see if the check engine light returns. Confirm the leak is resolved before completing the job.
Tip: Keep a log of codes and symptoms for future reference.
Diagnosis: Vehicle shows check engine light or fuel odor indicating a potential leak in evap system
Possible Causes
- highGas cap not tightened or worn seal
- highCracked or disconnected EVAP hoses or connections
- mediumFaulty purge valve or vent valve
- lowDamaged charcoal canister
Fixes
- easyTighten or replace gas cap and verify seal
- mediumInspect hoses/clamps and reseal or replace damaged sections
- mediumTest and replace purge/vent valves as needed
- hardReplace charcoal canister if damaged
Questions & Answers
What is an EVAP leak and why does it trigger the check engine light?
An EVAP leak allows fuel vapors to escape, which the vehicle detects through its emissions system. This triggers the check engine light to indicate a fault that needs inspection. The root cause could be a loose cap, cracked hose, or faulty valve.
An EVAP leak lets fuel vapors escape, which sets off the check engine light. Common causes are a loose gas cap, cracked hoses, or a bad valve.
Can I fix EVAP leaks myself?
Some fixes are DIY-friendly, such as replacing a faulty gas cap or damaged hoses. More complex issues like a failing purge valve or damaged canister should be handled by a professional to avoid safety risks and improper repairs.
Some fixes you can do at home include replacing the gas cap or damaged hoses, but other repairs should be left to a professional.
How do I know if the leak is in the gas cap or hoses?
If the check engine light comes on after fueling or if the cap feels loose, start there. If light persists after cap replacement, inspect hoses and clamps for cracks or disconnections, then test valves if needed.
If the light pops up after fueling, check the gas cap first. If it stays on, inspect hoses and valves next.
What tools do I need for DIY EVAP checks?
Basic tools include a flashlight, socket/wrench set, new gas cap, replacement hoses, clamps, and an OBD-II scanner. A smoke machine is optional but very helpful for locating leaks.
Grab a flashlight, a basic tool set, a new gas cap if needed, hoses, clamps, and an OBD-II scanner.
How long do EVAP leak repairs take?
Repair duration varies by source. Some fixes take under an hour, such as gas cap replacement, while others may require more time for hose replacement or valve testing and emissions recheck.
It depends on the fix; simple cap replacements are quick, but hoses or valves can take longer and may require a test after.
Will an EVAP leak cause emissions test failure?
A confirmed EVAP leak can cause emissions test failure. Correcting the leak and clearing codes is essential before attempting another test.
Yes, an EVAP leak can fail an emissions test until it’s repaired and codes are cleared.
Watch Video
Main Points
- Check the gas cap first and reseal properly
- Inspect hoses and purge valves for wear or leaks
- Use smoke/pressure tests to locate hidden leaks
- Address leaks promptly to pass emissions tests