EVAP System Leak Troubleshooting Guide for DIYers
Learn to diagnose and fix evaporative emission control system leaks safely. This guide covers quick checks, a diagnostic flow, step-by-step repairs, and practical prevention tips for homeowners and DIY enthusiasts.

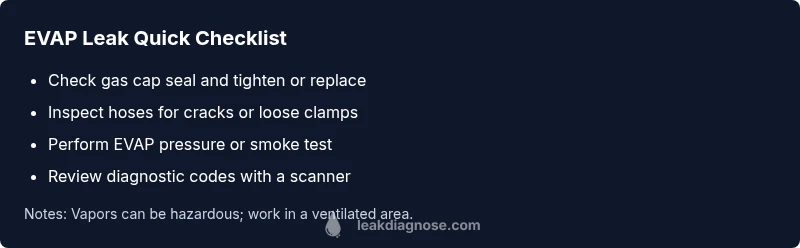
The most common EVAP leak is from a worn gas cap or cracked hoses. Start by inspecting the filler cap and its seal, then check purge lines and vacuum hoses for cracks. If leaks persist, perform a smoke test or use an EVAP system tester. Address worn components or consult a professional.
Understanding evaporative emission control system leak and why it matters
An evaporative emission control system leak allows fuel vapors to escape from the sealed system that captures vapors from the fuel tank. This not only triggers emissions codes but can lead to reduced fuel economy and stronger fuel odors. The EVAP system is designed to prevent vented vapors from polluting the air, so any leak warrants prompt attention. According to Leak Diagnosis, small cracks in hoses or seals are a frequent cause in older vehicles, and addressing them early can prevent more costly repairs later. A methodical diagnosis helps homeowners avoid unnecessary replacements and focus on the actual faulty component.
For homeowners, understanding the EVAP leak basics reduces frustration and speeds up safe fixes. This guide keeps safety front and center while explaining practical checks you can perform with common tools. Leak Diagnosis emphasizes cautious handling of fuel vapors and the importance of ventilated spaces when inspecting hoses, canisters, and caps.
Common symptoms and quick checks
Look for a Check Engine Light illuminated on the dash, a noticeable fuel odor, or a failed emissions test. You may also notice a rough idle or active vacuum leaks when the engine is running. Simple checks you can perform at home include inspecting the gas cap for tightness and seal, visually verifying hoses for cracks, and listening for a hiss when applying gentle pressure to hoses. Early signs like a lingering gasoline smell without obvious leakage often point to a small EVAP leak that can grow if neglected.
Causes of EVAP leaks and what to inspect first
The most common causes are a loose or defective gas cap, cracked or disconnected hoses, a damaged purge valve, or a cracked charcoal canister. Start with the gas cap: ensure it is snug and the seal is intact. Then trace accessible hoses from the canister to the engine bay, looking for cracks, stiffness, or loose clamps. Also inspect the purge valve for sticking or broken seals. When visual inspection fails to locate the leak, the next steps usually involve pressure testing and diagnostic tools to pinpoint hidden issues. According to Leak Diagnosis, many leaks originate in the cap seal or near serviceable hoses, so prioritize those areas first.
Identifying the exact source can save time and prevent unnecessary component replacement. Remember that EVAP components are designed to work together; replacing one part may not fully resolve the issue if another connection remains compromised.
Diagnostic approach: from simple checks to professional methods
A logical diagnostic flow begins with basic inspections and progresses to pressure testing. Begin by verifying the gas cap; if the cap seems fine, perform a smoke test to locate the leak. Use an OBD-II scanner to pull EVAP codes and note the stored codes. If a leak cannot be found visually, or if diagnostic trouble codes point to the canister or purge valve, consider professional service. Leak Diagnosis highlights that many DIY fixes succeed when paired with systematic testing and clean, dry connections. Always document your findings so a technician can follow your trail if escalation is required.
In some cases, a professional service will use a calibrated smoke machine to locate tiny leaks that the eye cannot see, especially around the canister and purge valve assembly.
Step-by-step home troubleshooting overview
This section provides a practical sequence you can follow:
- Turn off the engine and remove the keys. 2) Check gas cap and replace if needed. 3) Inspect purge valve and hoses for visible cracks. 4) Tighten clamps and reseal connections. 5) Use smoke tester if available to locate hidden leaks. 6) If the leak remains, plan a professional diagnostic. This approach minimizes risk and ensures you address the actual leak source rather than guesswork. Leak Diagnosis advises to work in a well-ventilated area and to avoid ignition sources while inspecting the fuel system.
Prevention, maintenance, and safety tips
Prevention is cheaper than repair. Schedule periodic EVAP system inspections during routine vehicle maintenance, especially as components age. Replace aging hoses and seals proactively and use proper fueling practices to minimize vapor generation. Do not overfill the tank, and replace a faulty gas cap promptly. Work in a well-ventilated area and avoid smoking or open flames near fuel vapors. Regular inspection reduces the chance of a surprise check-engine light and costly repairs later. Regular checks also help catch small leaks before they escalate.
Steps
Estimated time: 60-90 minutes
- 1
Safety first and visual check
Park in a well-ventilated area with the engine off. Open the hood and visually inspect the gas cap, filler neck, and nearby hoses for cracks, damage, or loose clamps. Look for signs of fresh vapors around joints.
Tip: Wear eye protection and gloves when inspecting fuel system components. - 2
Gas cap inspection
Tighten the gas cap until it clicks. If the cap is damaged, replace it with a properly rated cap and ensure the seal seat is clean. A faulty cap is one of the most common EVAP leak causes.
Tip: Store a spare gas cap in the glove box for quick fixups. - 3
Check evaporative hoses
Follow the hoses from the canister to the intake and engine. Look for cracks, bulges, stiffness, or melted insulation. Tighten loose clamps and replace any cracked hoses.
Tip: When replacing hoses, use OEM or high-quality aftermarket parts with proper hose clamps. - 4
Purge valve and canister inspection
Inspect the purge valve for sticking or cracked seals. If you suspect canister damage, note that replacement often requires professional service due to fuel system integration.
Tip: Do not force or pry components that feel tight; reserve canister work for trained technicians. - 5
Smoke test or diagnostic scan
If available, perform a smoke test to locate leaks. Otherwise, use an OBD-II scanner to retrieve EVAP codes and observe live data related to the EVAP system. Record codes for reference during service.
Tip: Smoke tests should be done with proper ventilation and protective gear. - 6
Decide on repair path
If a leak remains after basic checks, plan a professional diagnosis. For persistent issues, fuel system leaks can present safety risks; avoid driving an unsafe vehicle for extended periods.
Tip: Document steps taken and codes observed to speed up the repair process.
Diagnosis: Check engine light or fuel odor with suspected EVAP leak
Possible Causes
- highLoose or faulty gas cap
- highDamaged or disconnected EVAP hoses
- mediumFaulty purge valve or cracked canister
- lowLeaking fuel filler neck or vent line
Fixes
- easyTighten or replace gas cap seal
- mediumInspect and replace damaged hoses or purge valve
- mediumPerform smoke test to locate hidden leaks
- hardRepair or replace charcoal canister as needed
Questions & Answers
What is an evaporative emission control system leak?
An EVAP leak is a breach in the fuel vapor capture system, allowing vapors to escape. It can trigger a check engine light and emissions test failures. Leaks often originate in hoses, seals, or the gas cap.
An EVAP leak is a breach in the fuel vapor system that lets vapors escape, often from hoses or the gas cap.
Can a bad gas cap cause EVAP codes?
Yes. A loose or damaged gas cap can trigger EVAP-related trouble codes. Ensure the cap is tight and the seal is clean; replace if worn.
Yes, a loose gas cap can trigger EVAP codes. Tighten or replace it if worn.
How do I test the EVAP system at home?
Start with a visual inspection, check the gas cap, and look for obvious hose damage. If you have access to a smoke tester or EVAP scanner, use them to identify hidden leaks.
Begin with a visual check and a gas cap test; use a smoke tester if available.
When should I replace the charcoal canister or purge valve?
If tests point to the canister or purge valve or if cracks are observed, replacement is typically required. This is often more complex and may require professional service.
If the canister or purge valve is faulty, replacement is usually necessary and may need a pro.
Is an EVAP leak dangerous?
Vapor leaks can be flammable and harmful to the environment. Avoid ignition sources and seek prompt repair to minimize risk and emissions.
EVAP leaks can be dangerous due to flammable vapors; get it checked soon.
Watch Video
Main Points
- Inspect the gas cap first to stop many EVAP leaks.
- Use a smoke test to locate hidden leaks effectively.
- Replace aging hoses and purge valve to prevent recurring leaks.
- Maintain regular EVAP system checks during vehicle service.