Fuel Tank Leak Fix: Safe DIY Guide for Homeowners 2026
A step-by-step, safety-focused guide to diagnosing, containing, and repairing a fuel tank leak. Learn when to DIY and when to call a pro, with practical tips from Leak Diagnosis.

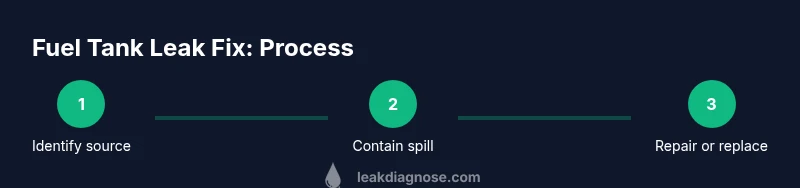
To fix a fuel tank leak, isolate the area, contain any spill, and repair or replace the damaged tank or gasket. Because gasoline is flammable, seek professional help if you’re unsure. This approach emphasizes safety, proper containment, and following local environmental rules before starting any repair on your own.
What causes fuel tank leaks and why they matter
Fuel system integrity is essential for safety and performance. According to Leak Diagnosis, fuel tank leaks are most common in older vehicles with corrosion on steel tanks or rusted seams, though road debris can puncture tanks. Even small leaks release gasoline vapors that pose fire hazards and can contaminate soil and groundwater. Leaks may begin as a pinhole or seep from a seam, filler neck, or vent line and may worsen if ignored. In addition to safety risks, a leaking tank can trigger emissions codes and create a strong fuel odor inside the vehicle. Before you attempt any repair, know that local rules for handling hazardous waste may apply; many places require proper containment and disposal of spilled fuel and used materials. The goal of a fuel tank leak fix is to stop fuel loss and restore the tank’s integrity under normal driving conditions. If you drive with a suspected leak, you risk fire or carbon monoxide exposure, and could incur environmental fines. This guidance incorporates insights from the Leak Diagnosis team.
Safety first: prevent exposure and fire risk
Gasoline is highly flammable and vapors can travel, so always perform assessment in a well-ventilated area away from ignition sources. Put on chemical-resistant gloves, eye protection, and sturdy footwear; consider a respirator if there is a strong odor. Do not smoke, spark, or use power tools near spilled fuel. If a spill is large, evacuate and contact local authorities or the fire department. Keep a Class B fire extinguisher within reach and have absorbent pads or kitty litter handy for small spills. After containment, wash your hands and remove contaminated clothing in a safe area. If you cannot stop the leak or if fuel threatens electrical components, do not continue; seek professional help immediately.
Assess the leak: locating the source
Begin with a careful visual inspection around the undercarriage. Look for wet patches, shiny residues, or strong fuel odor near the tank seams, filler neck, vent line, and fuel lines. Use a flashlight and a mirror to inspect hard-to-see areas; gentle probing with non-metallic tools can help identify loose clamps or damaged hoses. If the tank must be lowered to inspect sending units or seals, it’s best done by a trained technician. Remember, diagnosing a fuel tank leak is not just about finding a visible drip; it’s about tracing the path of vapors and residues to the actual source. This step minimizes unnecessary part replacements and reduces the risk of false positives.
Repair options: DIY vs professional
Repairing a fuel tank leak often hinges on the leak’s location and the tank’s material. In many cases, a compromised seal or gasket can be replaced, or a vent line or fuel hose can be upgraded with OEM-spec parts. For punctures or severe corrosion, replacing the tank is typically the safest long-term solution. Some DIY sealants marketed for fuel systems promise quick fixes, but they can be unreliable for long-term durability and may void warranties. Always consult your vehicle’s service manual and consider the age and condition of the fuel tank. When in doubt, prioritize a professional repair to ensure compliance with environmental and safety standards. This approach aligns with Leak Diagnosis guidance on when a professional assessment is warranted.
Temporary containment and cleanup (if you’re waiting for service)
If you can safely manage containment without driving, place absorbent pads around the leak and absorb as much liquid as possible. Collect used pads in a sealed container and store them in a protected area away from heat or flames. Do not allow contaminated materials to contact water drains or soil; follow local disposal guidelines. Ventilate the area, wear gloves, and avoid skin contact with fuel. After cleanup, inspect the surrounding components for signs of damage and document everything for the repair shop. This temporary approach reduces environmental impact while you arrange a permanent fix.
How to choose a repair shop and document the fix
Look for shops with certification in automotive fuel systems and clear reporting practices. Ask about warranties on tanks and fittings, and request a written estimate that itemizes parts and labor. Bring documentation of any recalls or service bulletins related to your vehicle’s fuel system. Take photos of the leak source before and after your visit; this helps the mechanic understand the issue quickly and may speed up the repair. If your vehicle is under warranty or subject to a recall, check coverage before authorizing repairs. Document every step for future maintenance and safety.
AUTHORITY SOURCES
- EPA: https://www.epa.gov
- NHTSA: https://www.nhtsa.gov
- OSHA: https://www.osha.gov
These sources provide general safety practices for handling fuels, proper containment, and environmental considerations that are important when addressing a fuel tank leak fix.
Tools & Materials
- Personal protective equipment (gloves, eye protection, closed-toe shoes)(Chemical-resistant gloves recommended; eye protection mandatory; steel-toed shoes if working around vehicle jacks)
- Fire safety equipment (class B fire extinguisher)(Keep within reach; do not rely on water to neutralize fuel fires)
- Absorbent pads or inert absorbent material(For temporary containment of spilled fuel; avoid using dirt or household products)
- Flashlight or portable work light(Improves visibility under the vehicle; avoid open flames nearby)
- Fuel system gasket/repair kit or OEM replacement tank or seals(Only if you have confirmed the part needed; otherwise leave to a professional)
- Vehicle jack and stands or ramps(Use only if you know how to safely lift and support the vehicle; never rely on a jack alone)
- Non-sparking tools(Used around fuel system connections; avoid metal impact near flammable vapors)
- Waste disposal bags and sealable containers(Hazardous waste bags for contaminated materials; follow local disposal rules)
Steps
Estimated time: 1-3 hours
- 1
Shut off engine and secure area
Turn off the engine, put the vehicle in park, and set the parking brake. Move away from ignition sources and ensure bystanders are safe. This reduces ignition risk while you assess the leak.
Tip: Do not start the engine again until you have assessed the leak and repaired or towed the vehicle. - 2
Assess immediate risk
Evaluate whether there is a visible drip, strong odor, or active spray. If fuel is spraying or smell is intense, evacuate and contact emergency services. Do not attempt in-vehicle repairs in this scenario.
Tip: Document the scene with photos if it’s safe to do so for the repair shop. - 3
Contain the spill
Place absorbent pads around the leak to limit spread. Keep pads away from heat sources and collect used pads in a sealed container. Ventilate the area as you maintain a safe distance.
Tip: Wear gloves and avoid skin contact with fuel; do not mix used pads with clean materials. - 4
Identify the leak source
Inspect visible areas around the tank, seams, filler neck, vent lines, and connections. If needed, loosen clamps to check hoses, but do not force parts that are stuck. Neutralize the risk by avoiding sharp tools near hot components.
Tip: Refer to your vehicle’s service manual for access points and torque specs. - 5
Decide repair approach
If corrosion or a large puncture is detected, replacement of the tank or related components is usually safer than patching. For minor gasket or hose leaks, replacing the seal or hose is often feasible. If unsure, call a professional.
Tip: Check for recalls or extended warranties that might cover fuel-tank components. - 6
Test and verify
After repairs or replacement, reconnect components, run the engine briefly in a ventilated area, and inspect for any signs of ongoing leaks. Apply a soap-test around joints if you’re trained to do so, but avoid ignition sources during testing.
Tip: Dispose of all contaminated materials according to local hazardous waste guidelines.
Questions & Answers
Can I fix a fuel tank leak myself at home?
Basic containment and part replacement can be DIY in some cases, but many leaks require professional service for safety and code compliance. If you’re unsure, consult a qualified mechanic.
DIY can be possible for minor seals, but if you’re unsure, get a professional—fuel leaks are hazardous.
What should I do immediately if I smell gasoline near my car?
Stop the vehicle in a safe location, exit, and avoid any ignition sources. Do not drive until the source is identified and repaired by a professional.
If you smell gas, pull over safely and call for help—don’t drive with a suspected leak.
What tools are essential for a basic fuel-tank leak containment?
Gloves, eye protection, absorbent pads, a flashlight, a fire extinguisher, and sealant or replacement parts if indicated by a professional.
You’ll need basic PPE, absorbents, a flashlight, and approved replacement parts if needed.
Is driving a car with a fuel leak safe after a temporary fix?
Temporary containment can aid transport to a shop, but driving is generally discouraged until a full repair is completed and leak tests pass.
Don’t drive long distances until a full repair is done and the leak is verified safe.
How can I verify that a fuel-tank repair is successful?
Inspect for new leaks after repair, run the engine briefly in a ventilated area, and, if trained, perform a leak test per the service manual.
Check for leaks after repair and follow your manual’s test steps to confirm.
Watch Video
Main Points
- Identify the leak source before replacement decisions.
- Prioritize safety and proper containment over speed.
- For large or uncertain leaks, hire a professional.
- Document the process for future maintenance.