Rear Differential Leak Repair: A Practical DIY Guide
Learn how to identify, diagnose, and repair rear differential leaks with safe, practical steps. This guide covers common causes, DIY options, required tools, and maintenance to prevent future leaks.

You can locate, diagnose, and repair a rear differential leak by isolating the source, draining old oil, replacing seals or gaskets, and refilling with the correct gear oil. You’ll need basic hand tools, a jack and stands, a drain pan, and the appropriate seal kit. This DIY approach is feasible for many owners, but complex leaks or gearing concerns may require a pro.
What rear differential leaks are and why they matter
A rear differential leak means gear oil is escaping from seals, gaskets, or fittings around the differential housing and axle shafts. The rear differential is the heart of a rear-wheel-drive vehicle’s drivetrain, providing lubrication for gears and bearings in a sealed enclosure. When a leak persists, the differential oil level drops, leading to increased metal wear, overheating, and potentially expensive damage. According to Leak Diagnosis, addressing leaks early minimizes damage and downtime, and saves money over the life of the vehicle. Understanding the basics helps homeowners and DIY enthusiasts approach the repair with confidence and safety. In addition to protecting the drivetrain, fixing leaks reduces environmental contamination and keeps your garage clean and safe for work.
Common causes of rear differential leaks
Leaks can arise from several sources. A worn or damaged axle seal or pinion seal is a frequent culprit, as they reside where the differential meets the axle shaft. Drain and fill plugs with worn gaskets can also seep, especially if the plugs were over-tightened or cross-threaded. Seals near the vent or the cover gasket may fail due to age, overheating, or improper torque during maintenance. A cracked differential cover or damaged housing can leak at the seam, while corroded or damaged OEM sealants and gaskets may fail over time. Finally, excessive overfilling or operating the vehicle at extreme temperatures can stress seals and create seepage that worsens with vibration and mileage.
Signs and initial checks you can perform safely
Begin by inspecting for fresh oil drips under the differential when the vehicle is parked on a level surface. Note the oil color and scent; gear oil is typically dark brown and has a distinctive smell, different from engine oil. Look for seepage around the axle seals, the fill and drain plugs, and the differential cover. If you can access the fill plug safely, check the oil level using the appropriate method for your model (some diffs have a dipstick, others require removing the fill plug). Do not operate the vehicle if you find a large leak or suspect a loss of oil; leak repair requires clean surfaces and controlled oil drainage.
How leaks are diagnosed: from fluid color to seepage
Diagnosis combines visual inspection with leak-detection techniques. Clean the differential area to remove old oil and debris, then re-check for new seepage. A UV dye can be added to the gear oil and a blacklight used to pinpoint leak paths. A mechanic’s stethoscope can help isolate abnormal gear noise that accompanies insufficient lubrication, while inspecting seals for hardening, cracking, or pitting. For persistent leaks, consider pressure testing the housing as part of a professional evaluation. Early, methodical inspection reduces guesswork and speeds repairs, aligning with Leak Diagnosis’s recommendations for methodical problem-solving.
DIY repair vs professional service: decision criteria
If the source is a simple seal or gasket replacement and you have the right seal kit, toolbox, and a safe workspace, a DIY repair is feasible. However, if you encounter structural damage, a warped housing, suspect gear wear, or require differential disassembly beyond your comfort zone, professional assistance may be the safer choice. A shop can provide precise torque specs, reseal guidance, and a gear oil change with proper disposal. Budget considerations include parts, fluids, rental tools, and potential diagnostic charges. The Leak Diagnosis team notes that DIY repairs can be cost-effective when the leak is localized and you follow proper safety protocols, but do not hesitate to seek help for complicated issues or if you lack the required space and tools.
Tools, gear, and safety before you begin
Before starting, assemble a clean workspace, jack stands, wheel chocks, and a drain pan. Gather a metric socket set, torque wrench, pick-pry tools, sealant remover, cleaning solvent, and fresh gear oil of the correct specification for your differential. Safety gear is essential: gloves, safety glasses, and sturdy footwear. Prepare a plan to safely lift and support the vehicle, and ensure the parking brake is engaged. Keep a fire extinguisher and a spill kit handy in case of oil spills. Taking precautions minimizes injury and protects your vehicle during the repair.
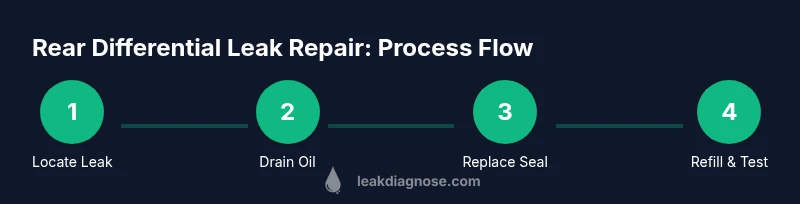
Step-by-step overview of the repair path
This high-level overview outlines the typical repair path for a rear differential leak. First, locate the exact leak source using cleaning and rechecking. Then, drain old oil, remove the differential cover or seal components as needed, and replace worn gaskets or seals with new ones. Reassemble, refill with the recommended gear oil, and torque fasteners to spec. Finally, perform a leak test with the vehicle on a level surface, checking for drips around all seals and plugs. The exact steps may vary by model, but a methodical approach reduces error and increases success.
Maintenance tips to prevent future leaks
Regular visual inspections and oil level checks are essential. Schedule preventative maintenance aligned with your vehicle’s service intervals, including inspecting seals during every oil change or major service. Avoid overfilling the differential, which can increase pressure on seals. If you hear whining or feel vibration, or notice a sudden oil smell near the rear of the vehicle, stop driving and inspect immediately. Use OEM-recommended gear oil and fill to the correct level; incorrect viscosity or quantity can cause a leak to worsen. Finally, ensure the vent tube is free of obstructions to prevent pressure buildup that can push oil past seals.
What to do if you can't fix it yourself: warranty, insurance, and costs
If the problem is beyond your skill level, contact a qualified mechanic or a dealer service department. Check your warranty, service contract, or roadside assistance for coverage options related to leaks and repairs. Document all leaks with photos and keep receipts for parts and fluids. If the vehicle is under warranty, some seals and gaskets may be replaced at no cost, depending on the terms. In all cases, addressing a rear differential leak promptly minimizes potential damage and cost, and improves safety and reliability.
Tools & Materials
- Vehicle jack and jack stands(Use on solid, level ground; never rely on a jack alone)
- Wheel chocks(Place on both sides of wheels opposite the jack)
- Drain pan(Large enough to catch gear oil during drain)
- Socket set and torque wrench(Metric sizes; have a range for bolts and plugs)
- Seal kit or gasket set(Choose parts compatible with your differential model)
- Gear oil (correct specification)(Check owner’s manual for viscosity and capacity)
- Silicone sealant or gasket maker (if required)(Only if your model requires it)
- Cleaning solvent and lint-free rags(For degreasing before resealing)
- Gasket scraper or plastic scraper(Avoid metal tools that could gouge surfaces)
- Gloves and eye protection(Protect hands and eyes from hot parts and oil)
- Flashlight or work light(Improve visibility in the differential area)
- Rags and spill kit(Contain spills and keep workspace clean)
Steps
Estimated time: 3-6 hours
- 1
Prepare and safety check
Park on level ground, engage parking brake, and chock wheels. Loosen bolts only after vehicle is supported by jack stands. This reduces the risk of movement while you work.
Tip: Never crawl under a vehicle supported only by a jack; use jack stands. - 2
Locate the source of the leak
Clean the differential surface, then inspect for fresh oil around seals and covers. Note the exact location to target the repair.
Tip: Take photos from multiple angles to guide seal replacement. - 3
Drain old gear oil
Place the drain pan under the differential, remove the drain plug, and allow oil to fully drain. Collect and dispose of old oil properly according to local regulations.
Tip: Remove the drain plug only when the area is clear to avoid oil splashes. - 4
Remove components for access
If necessary, remove the differential cover or axle components to access the leaking seal or gasket. Keep track of bolts with a labeled tray.
Tip: Keep bolts organized to avoid misassembly. - 5
Clean surfaces and remove old sealant
Scrape away old gasket material and clean mating surfaces with solvent. Ensure the surfaces are dry and free of debris before applying new sealant or seal.
Tip: Avoid gouging the metal; use a plastic scraper. - 6
Install new seals/gaskets
Install new axle or pinion seals and replace the differential cover gasket as required. Follow the manufacturer's torque specs for all fasteners.
Tip: Apply gasket sealant only where specified by the parts kit. - 7
Refill with fresh gear oil
Reinstall the drain plug and refill with the correct gear oil to the specified level. Don’t overfill, as this can cause leaks and foaming.
Tip: Use a funnel and pour slowly to avoid air bubbles. - 8
Reassemble and inspect for leaks
Reattach any components removed for access, torque to spec, and wipe the area clean. Start the vehicle and run at idle, then inspect for new leaks after a brief drive.
Tip: Check for leaks after driving and cooling; hot oil may hide leaks initially. - 9
Test drive and final check
Take a short drive to warm the differential and observe for leaks. Recheck oil level and tighten any fittings if necessary.
Tip: If any leak persists, stop and reassess the seal or seek professional help.
Questions & Answers
What is the most common cause of a rear differential leak?
The most common cause is a worn axle or pinion seal and failing gasket around the differential cover. Replacing these seals and gaskets usually resolves the leak, provided there are no cracks in the housing.
Most leaks come from worn seals or a bad gasket around the differential cover. Replacing seals and gaskets is typically enough, but check for housing cracks too.
Can I drive my car if I notice a leak?
Short drives may be possible if the oil level is still adequate, but driving with a leak risks severe differential damage. Stop driving and inspect or seek professional help if you notice significant oil loss or grease on the ground.
If you notice a leak, stop driving and inspect. Driving with low gear oil can ruin the differential.
Do I need special tools to fix a rear differential leak?
Basic hand tools, a jack and stands, a drain pan, and a gear oil seal kit are enough for many DIY fixes. Some jobs may require torque specs from the service manual and specialty seals.
Mostly you’ll need common tools and a seal kit. For some models, check the manual for torque specs.
How long does a typical rear differential leak repair take?
A straightforward seal replacement with a DIY approach can take several hours, often 3-6 hours depending on access and vehicle model. More complex issues may require professional service.
Most fixes take a few hours. If the job is complicated, expect to spend more time or get a pro to help.
What should I check after completing the repair?
Recheck the gear oil level, inspect for fresh leaks, and take a short test drive to warm the differential. Re-torque fasteners if required and ensure the fill plug is properly seated.
After repair, check the oil level and look for any signs of a new leak after a short drive.
Is it necessary to replace the entire differential to stop a leak?
Rarely. Most leaks are due to seals or covers. Replacing the entire differential is usually unnecessary unless there is extensive internal damage or cracked housing.
Usually you don’t need to replace the whole differential—just seals or covers, unless the housing is cracked.
Watch Video
Main Points
- Identify seal or gasket as leak source before disassembly
- Use proper gear oil specifications and torque specs
- DIY repairs are feasible for simple seals with the right tools
- Safety and organization reduce error and injury
- Promptly address leaks to protect drivetrain integrity