Can You Fix an Oil Leak in a Car? DIY Guide for Enthusiasts
Learn how to identify, diagnose, and safely fix an oil leak in your car with practical steps, common causes, and safety tips from Leak Diagnosis.

Yes—many minor automotive oil leaks can be diagnosed and addressed by a capable DIYer using a basic toolset, proper safety precautions, and a dye/UV test to confirm the source. Start with common culprits like the valve cover gasket, oil filter, or drain plug seal. If the leak originates from the rear main seal, main oil passages, or severe engine damage, stop DIY work and consult a professional.
What is an oil leak in a car?
An oil leak occurs when engine oil escapes its intended path and drips onto the ground or over engine components. Leaks can originate from gaskets, seals, or fittings that wear over time due to heat, vibration, and contamination. Small leaks may begin as a slow seep that grows; if left unchecked, they can cause low oil levels, insufficient lubrication, and potential engine damage. You might notice oil spots on the driveway, a burning oil smell, or visible oil on engine parts after running the engine. The severity depends on location and rate; some drips are minor nuisances, while others demand urgent attention. Early detection helps you decide whether a DIY fix is feasible or if professional service is required.
From a safety and maintenance perspective, addressing leaks promptly protects your engine, maintains proper oil pressure, and helps prevent environmental stains.
Common sources of automotive oil leaks
Oil leaks can originate from several components, and the most frequent culprits tend to be gasketed joints and seals that live under heat and vibration. Common sources include:
- Valve cover gasket: a frequent source when you see oil on the valve cover or near the top of the engine.
- Oil pan gasket: leaks around the oil pan can lead to pooled oil under the car.
- Drain plug washer or oil filter seal: a worn washer or faulty seal around the filter often shows as a drip near the bottom of the engine.
- Front or rear crankshaft seals (including the rear main): leaks here can be more challenging and may require more extensive work.
- Oil cooler lines and hose fittings: leaks at connections or hoses can seep oil that drips onto the ground or engine.
Understanding the likely sources helps you focus your inspection and avoid unnecessary part replacement. Each source has distinct signs and repair approaches, so progress often comes from a process of elimination and careful observation.
Safety and initial checks before you begin
Before you touch anything, set up a safe workspace. Park on level ground and engage the parking brake. Use wheel chocks on the wheels that remain on the ground. Let the engine cool for at least 15-30 minutes to avoid burns from hot oil or exhaust parts. Wear eye protection and gloves, and keep a metal drain pan handy for any oil collection. If you must lift the car, use a professional-grade jack and secure stands; never rely on a jack alone. Lastly, ensure you have a clean, well-lit area and a clear plan so you don’t miss hidden leaks or leak paths.
These precautions reduce the risk of injury and help you stay organized as you locate the leak.
How to diagnose an oil leak safely
To identify the leak source, start with a visual inspection of the engine bay and undercarriage. Look for fresh oil deposits, staining, or wet areas around gasket joints and fittings. A clean engine makes leaks easier to see, so you may want to degrease the engine first and then operate the engine briefly to reveal active seepage. A common and accurate method is dye testing: add UV dye to the engine oil, run the engine for a short time, and scan for fluorescence with a UV light. This highlights the exact source without guesswork. Note that some leaks are intermittent or slow, so repeated checks after driving and cooling can be informative. Record findings with photos for future reference and for any professional you may consult.
If you’re not comfortable performing dye testing, you can still track patterns by tracing the drip path back to the highest point of seepage.
DIY viability: what you can fix yourself vs what requires a pro
Basic, common fixes are within reach for many DIY enthusiasts, including replacing a valve cover gasket, installing a new oil filter seal, or replacing a drain plug washer. These tasks usually require basic hand tools, a few replacement parts, and careful torque according to the vehicle’s specifications. More complex leaks—such as rear main seals, main oil passages, or leaks inside the oil gallery—often require specialized tools, engine timing considerations, or removal of components. If you’re unsure, start with non-invasive components, document your work, and stop if oil pressure or engine integrity is compromised. When in doubt, seeking professional assistance prevents potential engine damage and ensures the repair is performed to manufacturer specifications.
Safety and proper procedure trump speed when dealing with engine oil systems.
Tools and materials you’ll need (overview)
Having the right tools before you start makes the job smoother and safer. While the exact toolkit depends on your car model, a typical list includes a basic socket set, wrenches, screwdrivers, a drain pan, rags, a funnel, and an impact-rated torque wrench. You’ll also want replacement parts such as a new drain plug washer, valve cover gaskets, or an oil filter seal if needed. Degreaser or degreasing wipes help expose the leak path, and UV dye with a blue flashlight makes pinpointing the source easier. Always confirm you have the correct torque specs and gasket types for your vehicle model and year. Keeping a camera or phone handy to document your work will help when you consult a guide or a shop later.
This overview helps you prepare so you have what you need when you start.
(You will find a detailed, itemized tools-and-materials list in the dedicated block.)
Step-by-step diagnostic workflow (overview)
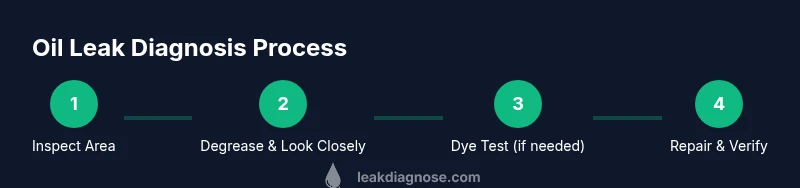
This section outlines a practical workflow to locate and diagnose oil leaks efficiently. Begin with a thorough visual inspection, then clean the area to reveal fresh seepage. Use dye testing if necessary to confirm the origin. Once identified, decide whether the fix is straightforward (e.g., replacing a gasket) or requires professional service (e.g., rear main seal). After you perform a repair, recheck the system by running the engine and inspecting for renewed leaks. Document your steps and results to track progress and guide future maintenance. This approach reduces guesswork and increases your chances of a successful DIY repair.
A systematic workflow keeps your repair efficient and safe.
Maintenance and prevention to avoid future leaks
Prevention starts with regular maintenance. Change engine oil at recommended intervals, use the correct oil grade, and replace worn gaskets and seals proactively. Keep the engine clean so you can spot leaks early, and consider dye testing during routine inspections. Pay attention to oil levels; a sudden drop is a sign something is wrong. If you drive in harsh conditions or have high mileage, more frequent checks are wise. Finally, proper disposal of used oil protects the environment and aligns with responsible DIY practices.
Regular checks extend engine life and reduce the risk of major, costly leaks.
Aftercare: monitoring and verification after a fix
After performing a repair, monitor the area over the next several trips. Refill the oil to the correct level and run the engine to reach normal operating temperatures, then recheck for any fresh leaks. If the dye test was used, inspect the engine with UV light after a short drive to verify the leak path remains sealed. Dispose of any used rags, oil, and contaminated materials safely in accordance with local regulations. Maintain a brief log of leak checks, repairs performed, and outcomes to inform future maintenance decisions.
Ongoing monitoring helps ensure the fix is durable and prevents a return leak.
Tools & Materials
- Safety gloves(Leather or nitrile, chemical resistant)
- Eye protection(ANSI-rated goggles)
- Drain pan(Large enough for oil capacity)
- Rags or shop towels(For cleanup and wiping surfaces)
- Degreaser/engine cleaner(Use as directed)
- Torque wrench(To spec for fasteners)
- Socket set and wrenches(SAE/metric as needed)
- Screwdrivers (flat and Phillips)(For clamps and covers)
- Gasket kit (valve cover, oil pan as needed)(Only if signs point to gasket failure)
- Oil filter and drain plug washer(Replacement as needed)
- Replacement seals/gaskets(Valve cover gasket, etc.)
- Oil dye and UV flashlight(For precise leak tracing)
- Funnel and oil(To refill oil cleanly)
- Shop manual for torque specs(Model-specific)
Steps
Estimated time: 2-3 hours
- 1
Prep the vehicle and safety
Park on level ground, set the parking brake, chock wheels, and allow the engine to cool. Gather your tools and wear PPE. This ensures you can work safely without burns or slips.
Tip: Double-check the area is stable before you crawl under the car. - 2
Inspect visually for obvious leaks
Look around the engine bay and under the vehicle for fresh oil pools or wet areas. Note the highest point of seepage to guide your focus.
Tip: Take photos to track where oil appears over time. - 3
Clean and prepare the area
Apply degreaser to the suspected sites and wipe clean. A clean surface helps you see new drips after running the engine.
Tip: Avoid harsh scrubbing that could damage sensitive components. - 4
Use dye testing if needed
Add UV dye to the engine oil, run the engine briefly, and inspect with a UV light to reveal the leak source.
Tip: Follow the product's instructions and only run the engine as long as necessary. - 5
Address simple sources
If the source is a drain plug washer, valve cover gasket, or oil filter seal, replace the part following manufacturer torque specs.
Tip: Use the correct gasket type and avoid over-tightening. - 6
Recheck and test drive
Refill oil to the proper level, start the engine, and run to operational temperature. Reinspect for leaks after a short drive and cooling.
Tip: Dispose of old oil and rags responsibly.
Questions & Answers
Can I fix an oil leak myself, or should I always go to a shop?
Small leaks from gaskets or seals can often be fixed at home with the right tools and safety precautions. More complex leaks, such as the rear main seal, generally require a professional due to engine disassembly and torque requirements.
You can fix many small leaks at home if you have the right tools, but complex leaks usually need a professional.
What are the most common sources of car oil leaks?
Valve cover gaskets, oil pan gaskets, drain plug washers, and oil filter seals are among the most common sources. Less frequent but serious leaks include rear main seals and timing cover seals.
The common culprits are valve cover gaskets, oil pan gaskets, drain plug seals, and oil filter seals.
How can I tell if a leak is serious?
If you see a large oil puddle, a rapid oil level drop, or burning oil/drips on hot exhaust components, treat it as serious. Stop driving if the leak is substantial and seek professional help.
Big puddles or rapid oil loss signals that you should stop driving and get it checked.
Is it safe to drive with an oil leak?
Driving a car with a significant oil leak can cause engine damage due to loss of lubrication. If the leak is minor and doesn’t affect oil pressure, limit trips and monitor oil level while planning a repair.
Only drive short, cautious trips if the leak is minor; otherwise, don’t drive and get it fixed.
What is the typical cost to fix an oil leak?
Repair costs vary by source and vehicle. DIY fixes like replacing a valve cover gasket are usually cheaper than large-scale engine seal replacements, but prices depend on parts and labor in your area.
Costs vary; DIY parts are cheaper, but more complex leaks require professional service.
When should I replace a gasket versus a full engine seal?
If the leak is localized to a gasket and the surrounding components are in good condition, gasket replacement may suffice. Rear main seals or multiple seals indicating wear usually require more comprehensive service.
If the leak comes from a gasket and the engine is otherwise healthy, replace the gasket; for main seals, seek a pro.
Watch Video
Main Points
- Identify the source before replacing parts.
- Start with simple gaskets and seals before complex repairs.
- Use dye testing for accurate localization of leaks.
- Follow torque specs and safety procedures at all times.