Oil Leak from Top of Engine: Diagnosis & Fix Guide
Urgent, practical guide to diagnose and fix an oil leak from the top of the engine. Learn common causes, safe inspection steps, and when to call a professional for valve cover gasket or oil cap issues.

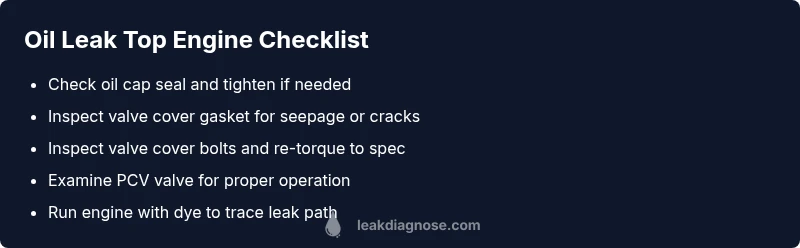
Most likely, an oil leak from the top of the engine stems from a failing valve cover gasket or a loose oil cap. Quick steps: 1) tighten the oil cap firmly and inspect for residue around the cap, 2) inspect the valve cover gasket and its bolts for tightness, cracks, or oil seepage, 3) wipe clean, run the engine, and watch the area for fresh oil. If leaks persist, seek professional service.
Why oil leak from top of engine happens
This oil leak from top of the engine is most often due to a failing valve cover gasket or a loose oil cap. According to Leak Diagnosis, these sources account for the majority of cases, especially in older vehicles or after a recent oil change when caps or gaskets can be mis-seated. Worn valve cover bolts can also loosen over time, creating a small gap for oil to seep out and drip onto hot engine components. The result is a visible sheen around the valve cover area, sometimes accompanied by a faint burning odor. While many leaks appear small at first, they can worsen with driving and temperature fluctuations. Early, careful inspection helps prevent more serious engine damage.
Other contributing factors include overfilling the oil, which increases crankcase pressure and can force oil past seals; a cracked or warped valve cover; and a failing PCV valve that allows excess pressure to push oil toward the valve cover gasket. In some vehicles, premium or synthetic oils behave differently with gaskets, revealing wear sooner. The takeaway: start with the simplest causes (cap and gasket) and work toward more involved repairs if the leak persists. This pragmatic approach keeps you safe and minimizes engine risk.
As you assess the situation, remember that the top-side source is accessible and the most common point of origin for leaks you’ll notice on your driveway or garage floor. The Leak Diagnosis team emphasizes a systematic check to avoid missing a lurking issue, especially if you drive with a leak for several days.
Common sources and symptoms
Identifying where an oil leak originates from the top of the engine relies on correlating symptoms with likely culprits. The most common sources are the valve cover gasket and the oil cap, followed by worn valve cover bolts or a cracked valve cover. Less frequent but possible contributors include a faulty PCV valve or a gasket where the valve cover meets the intake manifold. Symptoms to watch for include oil spots under the vehicle, a noticeable oil smell, smoke or mist near the engine after a drive, and a sudden drop in oil level that isn’t explained by an obvious spill.
- Valve cover gasket: usually shows as a streak or seepage around the gasket edge or along the valve cover seams. - Oil cap: a residue ring around the cap or a cap that doesn’t seal tightly can cause leaking under pressure. - Valve cover bolts: loose bolts create gaps for oil to escape; you may see fresh oil around bolt heads. - PCV valve: a stuck PCV valve can increase crankcase pressure, forcing oil to escape the valve cover area. - Cracked valve cover: visible cracks or oil seeping from the cover edge is a more serious defect. If you notice multiple areas dripping oil, the root cause may be more complex and require professional diagnosis.
If you’re unsure, a professional inspection is advised, particularly if you notice blue smoke or oil pooling on the exhaust components, which could indicate a high-risk condition.
How to diagnose safely
Safety comes first when diagnosing an oil leak from the top of the engine. Park on a level surface and allow the engine to cool completely before touching anything under the hood. Wear gloves and eye protection, and avoid leaning directly over hot components. Start with the simplest checks: verify the oil cap is tight and that the cap’s seal isn’t damaged; inspect the edge of the valve cover where it meets the gasket for seepage. Use a flashlight and, if available, a disposable white cloth to identify fresh oil rather than residue. A clean surface helps you spot new leaks more reliably.
If basic checks don’t locate the source, perform a controlled test. Lightly tighten or reseat the valve cover bolts to the manufacturer’s torque specification, then start the engine for a brief period and observe carefully. Another option is a dye test: add a UV dye to the engine oil and use a UV light to detect the exact leak path. This method is particularly helpful when leaks are small or occur intermittently. Always consider environmental and fire-safety precautions when testing with oil, and never operate a vehicle if you notice poolable oil on the exhaust manifold or heat shields.
As you interpret results, document where fresh oil appears and whether the leak is constant or intermittent. This information helps you and any mechanic you consult to quickly isolate the root cause.
Tools and safety gear you need
Before starting any inspection, assemble a basic, safe toolkit and personal protective gear. Essential items include: a socket/wrench set with a torque wrench, screwdrivers, a clean rags or lint-free towels, a DOT-approved jack stand or ramps if you need to access under the vehicle, PPE such as gloves and safety glasses, a work light, and optionally UV dye with a handheld UV flashlight for tracing leaks. If you plan to replace gaskets or the oil cap, have replacement parts on hand that match your vehicle’s year, make, and model. A shop manual or manufacturer torque specs are invaluable to avoid over-tightening.
Safety notes: never start the engine with oil exposed to hot surfaces, and never remove a component under tension or with the engine running. Keep a fire extinguisher nearby and ensure the parking brake is engaged when you’re beneath the vehicle. There’s no substitute for patience here; rushed work increases the risk of misdiagnosis and injury.
Pro tips to prevent future leaks
After you’ve addressed the immediate leak, adopt routine maintenance steps to minimize recurrence. Regularly check the oil cap and gasket seals, especially after oil changes. Use the correct oil grade and avoid overfilling, which can raise crankcase pressure. Periodically inspect valve cover bolts and re-torque them to the manufacturer’s specs as part of a scheduled maintenance routine. If you notice oil seepage after a service or part replacement, re-check the area promptly to catch mis-seated components early. Consider replacing aging valve cover gaskets proactively in older vehicles instead of waiting for leaks to worsen.
Safety and when to call a professional
If you observe a rapid oil loss, significant pooling, or any signs of oil contacting hot exhaust parts, stop driving and seek professional service immediately. A persistent leak can cause engine failure or fire risk if oil drenches a hot surface. If you’re not confident performing the checks described above or the leak persists after basic maintenance, contact a qualified mechanic. A professional can perform a pressure test, drain and refill oil correctly, and verify all seals and gaskets are restored to specification.
What to do next and quick prevention tips
- Document every sign you notice: where oil collects, whether the leak is constant or intermittent, and any changes in engine oil level. - Never ignore an oil leak; even a small drip can lead to low oil pressure and serious engine damage. - Schedule preventive maintenance, including gasket inspection during major service intervals. - When in doubt, prioritize safety and seek professional diagnostics rather than attempting risky DIY fixes on a live engine.
Steps
Estimated time: 60-90 minutes
- 1
Park safely and let the engine cool
Pull the vehicle onto a flat, level surface and switch off the engine. Allow at least 15 minutes for the engine to cool to avoid burns from hot components and oil.
Tip: Use wheel chocks and engage the parking brake before getting under the hood. - 2
Check the oil cap and seal
Inspect the oil cap for residue and ensure it sits snugly with a clean seal. If you detect a degraded gasket on the cap, replace it before proceeding.
Tip: Tighten gradually and avoid overtightening to prevent thread damage. - 3
Inspect valve cover area and bolts
Look around the valve cover edge for fresh oil and check the bolts for looseness. Gasket wear may show as oil seepage along the gasket line.
Tip: If you see oil on bolt heads, looseness or gasket seepage may be present. - 4
Clean and recheck after running briefly
Wipe the area clean, start the engine for a short test, and observe where new oil forms. A dye test can help trace the exact path of the leak.
Tip: Use a flashlight and a white paper towel to spot fresh drops quickly. - 5
Replace gasket or cap as needed
If seepage persists after testing, replace the valve cover gasket and, if necessary, the valve cover bolts. Recheck for leaks after reassembly.
Tip: Keep torque specs handy and follow the manufacturer’s sequence during reassembly. - 6
Confirm fix and monitor
After replacement, run the engine and inspect the area for continued seepage. Check oil level and look for any signs the problem recurs.
Tip: Take a photo log of the repair area for future reference.
Diagnosis: Oil leak from top of engine
Possible Causes
- highFailed valve cover gasket or loose valve cover bolts
- highLoose or damaged oil cap seal
- lowCracked valve cover or warped gasket mating surface
Fixes
- easyTighten oil cap and inspect seal; replace if damaged
- mediumReplace valve cover gasket and re-torque bolts to spec
- hardReplace cracked valve cover or reseal mating surfaces
Questions & Answers
What is the most common cause of an oil leak from the top of the engine?
The valve cover gasket or oil cap is typically the source. Wear, improper sealing, or loose bolts allow oil to escape near the valve cover area.
Usually the valve cover gasket or the oil cap causes the leak.
Can I drive my car if I notice an oil leak from the top of the engine?
Avoid driving long distances. Oil loss can lead to low oil pressure and engine damage. If the leak is noticeable, schedule diagnostics or have the vehicle towed if safe.
Don’t drive far; get it checked to avoid engine damage.
How do I tell if the leak is from the valve cover gasket vs the PCV valve?
If oil is pooling around the valve cover edge and the PCV valve shows poor performance, both can contribute. A dye test or professional inspection helps confirm the exact source.
A dye test or pro check will tell you if it's the gasket or the PCV valve.
How long does a typical valve cover gasket replacement take?
Time varies by vehicle, but a straightforward gasket replacement commonly takes about one to three hours, depending on accessibility and whether additional parts are needed.
Usually about one to three hours, depending on the car.
Is it safe to use sealants or stop-leak products for this issue?
Stop-leak products can provide a temporary fix but often don’t address the root cause and can clog other seals. It’s better to repair the gasket or cap properly.
Stop-leaks are not a long-term fix; repair the gasket or cap instead.
What should I do if there is oil on the exhaust after repair?
Oil on the exhaust can indicate a path toward hot surfaces. Stop the engine, inspect quickly, and seek professional service to ensure no dangerous leaks remain.
Oil on the exhaust means you should get it checked right away.
Watch Video
Main Points
- Inspect cap and gasket first
- Observe for fresh oil after cleaning
- Use dye tests if needed
- Call a professional if leaks persist
- The Leak Diagnosis team recommends proactive gasket checks