Engine Oil Leak Diagnosis and Fix Guide
Learn to diagnose and fix engine oil leaks quickly and safely with a practical step-by-step plan, from quick checks to professional help when needed.

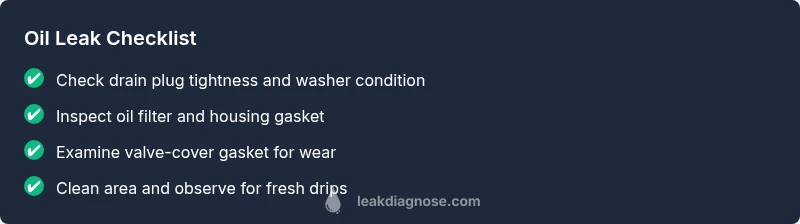
The most common engine leak oil sources are a worn valve-cover gasket, a failing oil pan gasket, or a loose drain plug. Start with easy checks: tighten the drain plug, inspect the oil filter, and wipe the area clean to observe fresh drips. If leaks persist, use the diagnostic flow below to pinpoint the exact source.
What an engine leak oil means
An engine leak oil is not just a nuisance on your driveway—it’s a signal that your engine’s seals or gaskets are letting oil escape. The phrase you’ll often hear on the shop floor is that the leak is coming from a specific component, but the underlying issue is a compromised seal or gasket that changes how oil travels through the engine bay. According to Leak Diagnosis, many homeowners encounter an engine leak oil after months of ownership, and addressing it early can prevent more serious damage. If you notice oil on the garage floor or a burning oil odor after idling, treat it as a priority.
The key is to identify the source before it worsens. Engine oil is critical for lubrication and cooling; even small leaks can degrade performance and accelerate wear. For many vehicles, the first clue is a dark stain that grows under the vehicle after parking. Use a flashlight and clean rags, and look for fresh drips rather than expanding stains. The goal is to locate the source quickly so you can plan a safe, effective fix.
Common sources of engine leak oil
There are several frequent culprits behind an engine oil leak. The most common include a worn valve-cover gasket, a failing oil pan gasket, and a loose or damaged drain plug. The oil filter housing gasket, oil filter itself, and the rear main seal are other frequent sources in older engines. In newer engines, a small crack in the oil pan or a compromised gasket can appear after road debris or over-tightening during maintenance. When diagnosing, check for oil around the drain plug area, along the valve cover edges, and near the oil pan seams. Leak Diagnosis notes that these sources account for a large share of DIY-repair cases, especially when the leak is slow and localized.
Safety and immediate actions
Oil leaks pose slip hazards and potential fire risk if oil contacts hot exhaust components. If you discover a sizable seepage, stop driving the vehicle and place a disposable liner or tray under the suspected area to catch drips. Do not run the engine long enough to reach operating temperature if you smell burning oil or see smoke. Allow the engine to cool before attempting any checks. Wear gloves and safety glasses when handling oil, and dispose of used rags properly. If you have a known allergy to solvents, avoid strong cleaners—use dedicated degreasers and a brush.
Quick checks you can do in minutes
- Check for a loose drain plug: ensure it’s snug, not overtightened, and the washer is intact.
- Inspect the oil filter and its gasket; a loose filter or damaged seal can cause a leak near the filter housing.
- Clean the area around the drain plug and valve covers, then start the engine for a short period while watching for fresh drips.
- Check the oil level with the dipstick after cooling; a sudden drop indicates ongoing leakage or consumption.
- Look for oil on the underside of the vehicle and on engine components, including the timing cover and oil pan.
If you notice only a small, steady seep near the drain plug or valve-cover gasket, this is often the easiest fix. If the leak persists after these checks, continue with the diagnostic flow below.
Diagnostic flow: symptom → diagnosis → solutions
Symptoms can guide you toward a likely source. A slow, localized drip near the drain plug usually means a loose plug or worn washer. Oil staining along the valve-cover edge points to the valve-cover gasket. A wider oil trace along the oil pan seam suggests a pan gasket issue. If oil pools under the rear of the engine, inspect the rear main seal. For each symptom, a focused remedy follows.
Step-by-step fixes for the most common source
- Tighten or replace the drain plug
- Description: If the leak is at the drain plug, ensure the plug is tight and the washer intact. Do not over-tighten, which can deform the gasket.
- Tip: Use a torque wrench to reach the manufacturer’s recommended torque rather than guessing.
- Replace the valve-cover gasket
- Description: A worn valve-cover gasket is a frequent culprit. Remove the valve cover, inspect the gasket, and replace it with an OEM or high-quality aftermarket part. Reassemble with gasket sealant if recommended by the manufacturer.
- Tip: Replace both valve-cover grommets to prevent future seepage.
- Inspect and reseal the oil pan gasket
- Description: A leaking oil pan gasket may require removing the pan. Clean the mating surfaces, replace the gasket, and use a proper sealant if specified.
- Tip: Avoid overtightening oil pan bolts, which can warp the pan and worsen leaks.
- Inspect the oil filter and housing gasket
- Description: A damaged oil filter seal or overtightened housing can cause leaks around the filter.
- Tip: Install a new filter with a clean seal and inspect the housing mating surfaces for nicks.
- Conduct a post-repair test
- Description: Refill to the correct oil level, run the engine, and watch for new oil seepage. Check for any changes in oil pressure or warning lights.
- Tip: Let the engine reach operating temperature and re-check after a short drive to confirm the fix.
post-repair safety and cleanup
After repairs, clean any spilled oil and ensure the area is dry before driving. Dispose of used oil and contaminated materials per local regulations. If you notice a persistent leak after attempting these fixes, you likely need a professional assessment.
When to call a professional
If the source remains unclear after the quick checks and your vehicle continues to leak oil, seek professional help. Certain issues, such as rear main seal leaks or cracked engine blocks, require specialized tools and expertise. A professional mechanic can perform a pressure test, dye test, or advanced leak-detection method to pinpoint the leak without unnecessary disassembly. In the interim, minimize driving to prevent further damage and oil loss.
Preventing engine oil leaks in the future
Regular maintenance is your best defense against engine oil leaks. Keep track of oil changes, replace worn gaskets during routine service, and avoid over-tightening fasteners. Use high-quality OEM or aftermarket parts that meet your vehicle’s specifications. Periodically check for oil staining after service and after icy or dusty seasons that may accelerate gasket wear. A simple habit—checking the dipstick and undercarriage during every oil change—can catch leaks early and save repair costs.
Troubleshooting recap and maintenance plan
Takeaways: identify the most common leak sources, perform quick checks, and follow a logical diagnostic flow. Maintain your seals and gaskets, replace faulty components promptly, and document maintenance to prevent future engine leak oil issues. By staying proactive, you reduce risk to the engine and minimize downtime. Leak Diagnosis recommends keeping a simple maintenance log and addressing leaks promptly to protect engine health.
Steps
Estimated time: 60-90 minutes
- 1
Prepare and safety check
Park on a flat surface, engage parking brake, and let the engine cool completely before touching anything. Wear gloves and eye protection. Gather rags, a catch pan, and basic tools.
Tip: Never open hot engine components; hot oil can cause severe burns. - 2
Locate the leak source area
Clean the suspected area with a degreaser and wipe away residue. Inspect around the drain plug, oil filter, and valve-cover seals for fresh drips.
Tip: Use a flashlight and a mirror to examine tight spaces under the engine. - 3
Tighten the drain plug or replace exposing seals
If the drain plug is loose, tighten to the manufacturer’s torque spec or replace the washer. Check the oil filter coupling for tightness.
Tip: Avoid over-tightening; use a torque wrench where possible. - 4
Inspect valve-cover gasket and oil pan gasket
If the leak traces to the valve-cover edges or oil pan seams, remove the cover/pan according to your service manual and replace the gasket.
Tip: Take photos during disassembly to aid reassembly. - 5
Refill and test
Refill oil to the correct level, start the engine, and observe for fresh leaks for several minutes under idle and light load.
Tip: Do not exceed the recommended oil capacity; overfilling can cause issues. - 6
Assess results and plan next steps
If leaks persist after these steps, consult a professional for advanced diagnostics like dye testing or pressure tests.
Tip: Document where you observed leaks for the technician.
Diagnosis: Oil leaks visible on the ground or engine bay after engine cools
Possible Causes
- highLoose or damaged drain plug or oil filter gasket
- highWorn valve-cover gasket
- mediumCracked oil pan or gasket
- lowRear main seal wear or damage
Fixes
- easyTighten or replace the drain plug and inspect the washer
- hardReplace the valve-cover gasket and reseal the cover
- hardReplace the oil pan gasket or pan if damaged
- hardPerform a professional rear main seal inspection if suspected
Questions & Answers
What is the most common source of an engine oil leak?
The valve-cover gasket or the drain plug/o-ring is typically the most common source. Leaks can also originate from the oil filter seal or pan gasket.
Most leaks start at the valve-cover gasket or the drain plug. If you’re unsure, start with those areas.
Can I fix an engine oil leak myself?
Many minor leaks from drain plugs or gaskets can be fixed at home with basic tools. More complex leaks, like rear main seals or warped pans, usually require a mechanic.
DIY fixes work for simple leaks; more complex ones need professional help.
Is an engine oil leak dangerous?
Oil leaks can create fire hazards and slippery surfaces. They may also mask other problems, like engine overheating, so address them promptly.
Oil leaks are a safety concern; clean up spills and fix the source quickly.
How much does it cost to repair an engine oil leak?
Costs vary widely by source and vehicle. DIY fixes are cheaper but canned tests and gasket replacements from a shop can be more expensive. A professional assessment is often the safest option for persistent leaks.
Costs depend on the source; a quick DIY fix is cheaper, but some leaks need a shop visit.
What maintenance prevents engine oil leaks?
Regular oil changes, using quality gaskets, and inspecting seals during maintenance helps prevent leaks. Addressing small seepage early saves bigger problems later.
Keep up with maintenance and check seals during service to prevent leaks.
What should I do if I see oil on the driveway after work?
Clean the area and observe for fresh leaks after a short drive. If leaks continue, review drain plug and gasket conditions or seek a professional check.
If you see oil on the driveway, inspect the obvious sources and test after a drive.
How long can I drive with a slow oil leak?
Driving with any oil leak is risky. A slow leak can worsen, so limit driving and get it checked soon to avoid engine damage.
Avoid driving long with leaks; get it checked promptly.
Do I need special tools to diagnose leaks?
Basic tools can handle many leaks, but powerful dye tests and pressure testing require specialized equipment that a mechanic typically has.
A basic toolbox helps, but some tests need professional gear.
Watch Video
Main Points
- Identify sources early to stop damage quickly
- Start with drain plug and filter checks
- Use a logical diagnostic flow to pinpoint leaks
- When in doubt, call a pro for severe leaks