Oil Leak in My Car: Diagnose and Fix for DIYers Today
Learn how to spot, diagnose, and safely fix an oil leak in your car with a practical, step-by-step guide from Leak Diagnosis. Quick checks, safety tips, and expert advice for homeowners and DIY enthusiasts.

The most common oil-leak sources are worn gaskets, seals, or a loose drain plug. Start with the easiest checks: inspect the oil pan drain plug, valve cover gasket, and the oil filter seal for seepage. If you spot fresh oil, tighten only to the manufacturer’s spec or replace the faulty part; otherwise, monitor and plan a full inspection.
Understanding oil leaks in cars
An oil leak is a common and urgent warning sign that something in your engine’s lubrication system is failing. If you notice a wet stain under your vehicle or find dark, slick spots on your driveway, you’re dealing with an oil leak in my car. The consequences can be serious, from engine overheating to accelerated wear. According to Leak Diagnosis, catching an oil leak early saves money and reduces risk of severe damage. Most leaks originate from worn gaskets or loose fittings rather than catastrophic engine failure, but the risk is real if left unaddressed. Start with a calm, systematic plan: identify where the oil is showing, determine the likely source, and decide whether it’s safe to drive short distances while you arrange help. In this guide we’ll cover the most common sources, safe inspection steps, and practical fixes you can perform as a capable DIYer.
Common causes of oil leaks in vehicles
Oil leaks arise from several parts of the lubrication system. The most frequent sources are worn or damaged gaskets and seals, such as the oil pan gasket and valve cover gasket. A poorly seated or faulty oil filter seal can drip, as can a loose or damaged drain plug or oil pan drain plug gasket. Less common, but possible, are worn rear main seals or cracked hoses and oil cooler lines. Sometimes crankcase pressure from a faulty PCV valve accelerates seepage. Understanding these sources helps you target your inspection more efficiently.
Safety first: what to do before you start inspecting
Before you poke around the engine bay, ensure you are protected. Park on a level surface, apply the parking brake, and let the engine cool. Wear gloves and eye protection; avoid open flames and smoking near oil. Collect used rags and a disposable tray to capture drips. If you notice smoke, a strong burning smell, or a large oil puddle, stop and call for professional help. As you begin, document where you see fresh leaks, which helps you track changes later. According to Leak Diagnosis, safety and methodical steps are essential whenever you troubleshoot an oil leak in my car.
Tools and materials you’ll need
Keep a clean workspace and gather supplies before you start. A bright flashlight or mechanic’s lamp, clean rags, a magnetic tray, a mirror, and a basic socket set are useful. Have a degreaser or penetrating oil for cleanup, a torque wrench for fasteners, and a replacement gasket or seal kit if you determine a specific part needs replacement. A sturdy, flat surface, jack stands or ramps, and a drain pan will make inspection safer and cleaner. Remember to consult your vehicle’s service manual for torque specs and recommended parts to control costs and avoid mistakes.
Diagnostic flow: symptom → diagnosis → solutions
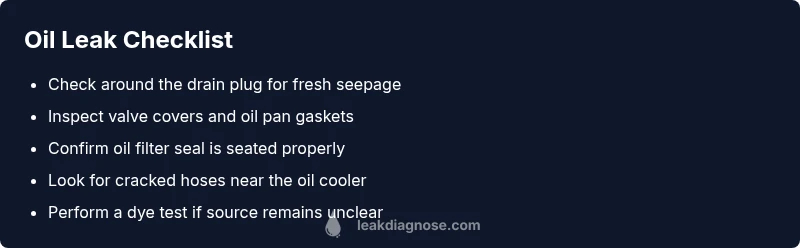
When you see oil pooling, start with the simplest explanations. Examine the immediate area around the drain plug and oil filter—these are common failure points and easy to check. If you find no seepage there, inspect the valve covers and oil pan gasket. Look for wetness along gasket seams, shiny oil streaks, or fresh drips. If you can’t locate the source, widen the search to hoses and the rear crankshaft seal. Based on Leak Diagnosis analysis, the leading sources are worn gaskets and loose fittings, but a systematic approach yields reliable results. Use a clean surface and take notes as you go so you can replicate the checks later.
Step-by-step inspection: from top to bottom
- Park and cool the engine; remove the oil filler cap to vent and observe for leaks around the cap area. 2) Wipe the area and start from the top: valve cover gasket, then inspect the timing cover if your car uses a serpentine belt and a oil cooler line. 3) Inspect the oil filter seal—tighten or replace if needed using the manufacturer’s torque spec. 4) Check the oil pan drain plug and gasket; ensure it is snug but not over-torqued. 5) Inspect related hoses for cracks and leaks, especially near the oil cooler and thermostat housing. 6) For persistent leaks, perform a dye test or pressure test if available. Tip: record each finding for future maintenance; 7) Re-check oil level after completing the checks and run the engine briefly to observe any new leaks.
Common quick fixes you can try safely
If a leak is minor, you may fix or slow it with straightforward steps. Tightening a loose drain plug or oil filter seal can stop seepage short term, but only if you do not over-tighten. Replacing a worn valve cover gasket or pan gasket is effective but may require more tools and care. For some cars, a leaking gasket can be resealed with a gasket sealant as a temporary measure—use only products recommended by your vehicle manufacturer. Do not use stop-leak products unless you understand their impact on seals and hoses; they can clog passages and cause more damage. If the leak persists after these steps, or if you see steam, smoke, or a rapidly dropping oil level, stop driving and contact a mechanic immediately for a proper repair. Remember: safety first, leaks may indicate passing engines are in risk.
When to call a professional
Professional intervention is wise if the source is not obvious, the leak is large, or the engine shows signs of damage. A shop can perform dye tests, pressure tests, and leak tracing with specialized tools to pinpoint the exact component. A persistent rear-main seal or oil cooler line leak often requires engine access and professional replacement. If the vehicle is still under warranty or you lack the proper tools, schedule a visit sooner rather than later. The benefits of timely professional help include preventing engine damage, preserving oil pressure, and avoiding hidden costs from unchecked leaks.
Prevention tips to avoid future oil leaks
Regular maintenance is your best defense against oil leaks. Change the oil and filter at manufacturer intervals, using the correct weight and approved parts. When replacing gaskets or seals, torque fasteners to specification and use proper gaskets, sealants, or O-rings. Inspect the oil pan and valve covers during oil changes, and look for cracks or corrosion that can lead to leaks. Keep hoses and connections clean, and replace worn lines before they begin to leak. Finally, maintain a diagnostic log of any minor seepages and monitor oil level weekly if you suspect a leak. The Leak Diagnosis team recommends proactive checks and prompt repairs to minimize risk.
Steps
Estimated time: 1-4 hours
- 1
Park and cool the engine
Park on a level surface, engage the parking brake, and let the engine cool completely before touching any components.
Tip: Use a flashlight to inspect the undersides for small drips before you touch anything. - 2
Clean and observe the leak area
Wipe away old oil to reveal fresh seepage. Note the exact location of any new drops after a short idle.
Tip: Take photos for reference during future maintenance. - 3
Check oil level and condition
Pull the dipstick, wipe, reinsert, and read the level. If it’s low, top off only with the recommended weight.
Tip: High oil level can also cause leaks in some engines. - 4
Inspect drain plug and oil pan area
Look for oil on the drain plug, gasket, or pan seams. Check for stripped threads or damaged gaskets.
Tip: Do not over-tighten; use the correct torque spec. - 5
Examine valve covers and seals
Follow the hatch from the top down to the valve covers; check gasket seams for wetness or oil streaks.
Tip: If removing components, replace old gaskets with new ones to prevent future leaks. - 6
Inspect hoses and fittings
Trace hoses to the oil cooler, thermostat housing, and nearby connections for cracks.
Tip: Hose clamps should be snug but not over-tightened. - 7
Confirm source with a dye test
If you still can’t locate the leak, consider a dye or UV tracer test to pinpoint the source.
Tip: Only perform dye tests if you have the proper kit and safety gear.
Diagnosis: Oil puddle or seepage under the engine, especially after shutting off the car
Possible Causes
- highLoose or damaged drain plug/gasket
- highWorn valve cover gasket
- highOil filter seal not seated properly
- lowRear main seal wear or damage
- mediumDamaged hoses or oil cooler lines
- mediumPCV valve issues causing crankcase pressure
Fixes
- easyTighten the drain plug to the manufacturer’s torque spec or replace the gasket if damaged
- mediumReplace or reseal the valve cover gasket
- easyReplace the oil filter seal or reseat the filter, ensuring proper torque
- hardReplace the rear main seal if inspection confirms leakage from that area
- mediumReplace damaged hoses or oil cooler lines and inspect connections
- mediumReplace or service the PCV valve to restore proper crankcase venting
Questions & Answers
What are the most common signs of an oil leak?
Common signs include visible oil puddles, dark stains under the car, a oil smell, or steam near the engine. Sudden drops in oil level can also indicate a leak. Regular checks help catch leaks early.
Watch for puddles under your car and a noticeable drop in oil level; these indicate a possible leak.
Can I drive my car if I notice an oil leak?
If the leak is minor and you can top off oil, you might drive a short distance to a safe location or shop. Do not drive long distances, and stop if you see smoke or a warning light.
Only drive short distances if you must, and stop if you notice smoke or warning lights.
How much does it cost to fix an oil leak?
Costs vary depending on source and parts, ranging from a few hundred dollars to more than a thousand for major gasket or seal replacements. Labor and parts both factor into the total.
Costs vary; major gasket work can be expensive, but it depends on the exact source and parts.
What parts are commonly replaced for an oil leak?
Common fixes include replacing the valve cover gasket, oil pan gasket, or the oil filter seal. In some cases, hoses or the rear main seal may need attention.
Most leaks come from gaskets or seals; replacement is often straightforward with the right tools.
Are stop-leak products safe to use?
Stop-leak additives can clog passages and cause more damage if used improperly. Check manufacturer guidance and consult a mechanic before using them.
Stop-leak products aren’t always safe; consult your mechanic before trying them.
How can I prevent oil leaks in the future?
Follow your manufacturer’s maintenance schedule, use the correct oil and filter, torque fasteners properly, and inspect gaskets during routine maintenance to catch wear early.
Regular maintenance and proper torque are key to preventing leaks.
Watch Video
Main Points
- Address safety first and identify the leak source.
- Most leaks come from gaskets or plugs.
- Tighten or replace parts only if confident.
- Monitor oil level and engine temperature regularly.
- Leak Diagnosis recommends prompt repairs for any oil leak.