Oil Leak from Filter: Troubleshooting Guide
Learn how to diagnose and fix an oil leak from the engine oil filter with a clear, step-by-step plan. This Leak Diagnosis guide covers common causes, safe practices, diagnostic flow, and prevention tips for DIY enthusiasts.

An oil leak from the engine oil filter is usually caused by a worn gasket or a loose filter. Start by tightening the filter by hand and replacing the gasket if needed, then recheck for leaks. If oil keeps seeping, inspect the mounting surface and nearby fittings, and consider professional help.
Safety and Immediate Shutdown
Park the vehicle on a flat, level surface and engage the parking brake. If the engine has been running, allow it to cool completely before touching the engine bay to prevent burns. Put on gloves and eye protection, and position a wide, clean drain pan beneath the filter area. Have rags ready to wipe up drips. Oil leaks around the filter are most often caused by a loose filter, a worn gasket, or a mis-seated seal. This is a safety-critical issue—work calmly and methodically, and stop if you notice a large spill or strong odor. Leak Diagnosis emphasizes safe, methodical checks so you can decide whether you can fix it yourself or need a professional.
Common causes of oil leak from the engine oil filter
Understanding the typical culprits helps you decide on the right fix quickly. The most common cause is an improperly tightened filter or an old gasket that has degraded with heat cycles. Cross-threading during installation can also damage the filter and create a steady drip. A damaged oil filter housing or a rough mounting surface can prevent a clean seal. Over-tightening the filter can crush the gasket and cause leaks as well. Finally, oil leaks around the filter can sometimes mimic leaks from nearby components like the oil pressure switch or lines, so confirm the source by cleaning the area and rechecking after a short run.
Where to look around the filter area
Start by locating the oil filter housing and the gasket seat. Look for fresh oil droplets at the base of the filter, around the gasket, and along the mating surfaces. Inspect the filter threads for any signs of cross-threading or damage. Check the mounting surface for warping, nicks, or dirt that could prevent a proper seal. Also inspect nearby hoses and fittings—sometimes leaks travel along hoses and appear to come from the filter. If you see oil on the underside of the engine or on the engine skid plate, clean the area and re-check after running the engine briefly.
Diagnostic flow overview for oil filter leaks
The diagnostic flow for an oil filter leak follows a simple path: observe symptom, hypothesize likely causes, test by basic fixes, verify leak status, and escalate if needed. Start by confirming the source—wipe the area clean and run the engine briefly while someone watches the filter. If the gasket area shows seepage, tighten or replace. If leakage persists, inspect gasket integrity, filter, and housing for damage. Each test should be followed by a leak check and a clean-up to keep the area safe and visible.
Step-by-step fix for a leaking oil filter
- Gather tools and materials: a new filter and gasket, a torque wrench if available, clean rags, and a drain pan.
- Shut off the engine, allow it to cool, and place the pan under the filter.
- Remove the old filter, noting its orientation. Inspect the gasket and housing for damage.
- Clean the mounting surface with a rag and solvent to remove old gasket residue.
- Install a new gasket and the new filter. Hand-tighten first, then apply the manufacturer’s torque specification if applicable.
- Refill with the correct amount of engine oil if necessary, start the engine, and check for leaks.
- Let the engine run and inspect for any drips from the filter area. Dispose of used oil responsibly.
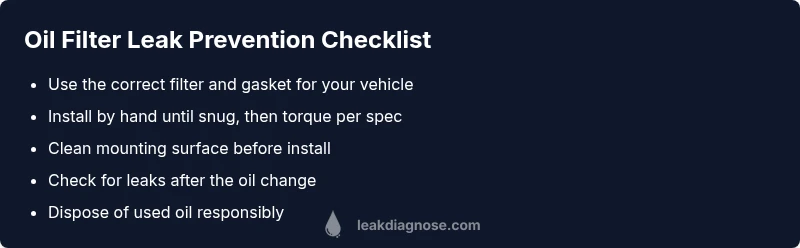
Prevention and routine maintenance to avoid future leaks
To prevent future leaks, always use the correct oil filter for your vehicle and replace the gasket at every oil change. Clean the mounting surface before installing a new filter to ensure a proper seal. Avoid over-tightening, which can crush the gasket or damage threads. During oil changes, inspect nearby hoses and fittings for signs of wear or looseness. Regularly check the filter area for leaks and promptly address any seepage to minimize damage.
What to do if you can't fix it yourself
If you cannot locate the source of the leak or the leak persists after replacing the filter and gasket, stop driving the vehicle and arrange for professional service. A persistent oil leak can lead to low oil levels and serious engine damage. In the meantime, regularly monitor the oil level with the dipstick and top up as needed, and avoid long trips until a mechanic confirms the repair.
Steps
Estimated time: 60-90 minutes
- 1
Prepare workspace and safety gear
Park on level ground, engage parking brake, and allow the engine to cool. Gather a drain pan, rags, gloves, and eye protection. This reduces spill risk and keeps the area clean.
Tip: Wear rubber gloves to protect skin from used oil. - 2
Locate the filter and assess the leak
Identify the oil filter and gasket seat. Look for fresh drips and clean the surrounding area to better see new leaks after a test run.
Tip: Take a photo of the filter and gasket orientation before removal. - 3
Remove and inspect the old filter
Carefully loosen and remove the old filter. Check the gasket for deformation or tearing and inspect the housing for damage or cross-threading.
Tip: Have the drain pan ready; oil will drip during removal. - 4
Install the new filter with gasket
Clean the mounting surface, install the new gasket, and thread the filter by hand until snug. If torque specs exist for your vehicle, apply them with a torque wrench.
Tip: Always lubricate a new gasket with a thin film of clean oil. - 5
Refill oil and inspect for leaks
If oil was drained, refill to the correct level. Start the engine and inspect around the filter area for any signs of leakage.
Tip: Use a clean white sheet of paper or cardboard under the area to detect leaks. - 6
Test drive and re-check
Take a short test drive and then re-check the filter area after parking. Look for fresh drips or seepage, and address any leaks immediately.
Tip: If leaks persist, do not drive; arrange professional service.
Diagnosis: Oil leak observed around engine oil filter area
Possible Causes
- highFilter not tightened properly
- highWorn or damaged gasket/O-ring
- mediumCross-threaded filter installation
- lowDamaged filter housing or mounting surface
Fixes
- easyTighten filter by hand to snug; if using a wrench, avoid overtightening and follow manufacturer torque specs
- easyReplace the filter and gasket; ensure the gasket seats cleanly on a flat surface
- mediumInspect housing and mounting surface for damage and clean seating surfaces
- mediumCheck nearby fittings and hoses for secondary leaks and reseat or replace as needed
Questions & Answers
What is the most common cause of an oil leak from the oil filter?
The most common cause is a loose filter or a worn gasket. Replacing the filter and gasket and ensuring proper seating usually resolves the leak.
The most common cause is a loose filter or worn gasket; replacing the filter and gasket and ensuring proper seating usually fixes it.
Can I drive with an oil leak from the filter?
No. Driving with an active oil leak can lead to low oil levels and serious engine damage. If you notice a leak, stop driving and address the issue.
No, driving with an oil leak can seriously damage the engine. Stop driving and fix the leak.
How do I know if the leak is from the filter or another part?
Clean the area and run the engine briefly while watching the filter area. If oil drips from the gasket area, it's likely the filter seal; otherwise inspect nearby hoses and seals.
Clean the area, run the engine briefly, and watch the filter area to confirm the source of the leak.
Should I use OEM or aftermarket filters for a leak fix?
Choose the filter type specified by your vehicle manufacturer. OEM parts typically ensure correct fit, sealing, and reliability, though reputable aftermarket options can also work when properly matched.
Stick with the manufacturer-recommended filter; OEM parts usually fit best, though good aftermarket options can work if they match specs.
What if the leak persists after replacing the filter?
If the leak continues after replacing the filter and gasket, inspect the filter housing and mounting surface for damage, and consider professional service to diagnose possible cracks or threads.
If it still leaks after replacing the filter, have a professional check the housing and mounting surfaces for damage.
Watch Video
Main Points
- Tighten or replace the filter seal to stop leaks.
- Inspect gasket seating and mating surfaces for damage.
- Avoid overtightening—follow manufacturer specs.
- Check for leaks after any oil change and test drive.