Leak after Oil Change: Troubleshooting Guide
Urgent troubleshooting guide to diagnose and fix a leak after an oil change. Step-by-step checks, diagnostic flow, and prevention tips for safer, leak-free engine maintenance.

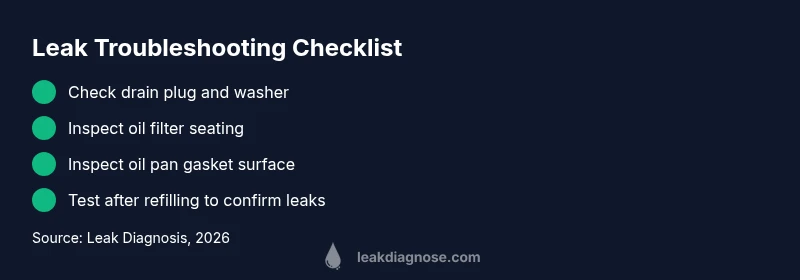
A leak after oil change is usually caused by a loose drain plug or a poorly seated oil filter. The quick fix is to re-tighten the drain plug to the manufacturer's specification and reseat the oil filter, then wipe the area clean and run the engine briefly to confirm the leak stops. If the leak persists, inspect the oil pan gasket and nearby seals and consider professional help.
Understanding the leak after oil change
A leak after oil change can be alarming, but most times it stems from something simple that happened during service. The phrase leak after oil change describes fresh drips appearing after you’ve completed an oil drain and fill. The most common culprits are a loose drain plug, a poorly seated or damaged oil filter, or a compromised oil pan gasket. While dramatic engine damage is unlikely from a brief drip, continuing leaks can lead to low oil levels, overheating, and long-term engine wear. For homeowners, the goal is to identify the source quickly, clean the area so you can observe new drips, and avoid causing a bigger mess. The key is safety and method: work on a cool engine, on a level surface, with the correct tools, and reference your vehicle’s service manual.
Immediate safety checks you can perform
Before you do any inspections, ensure the car is in a safe position: on a level surface, with the parking brake engaged, and the engine completely cool. Put on protective gloves and eye protection. Start with the simplest checks: clean the area around the drain plug and filter so fresh drips stand out, wipe away old oil, and note the exact drip pattern. If you see fresh oil pooling under the drain plug, the plug may be loose or the washer damaged. If the leak appears around the oil filter, the filter may not be seated correctly or the gasket surface may be damaged. Do not start the engine if you’re unsure about the leak source; instead, stop and reassess.
Common causes and how to identify them
In most cases, the top culprits are, in order of likelihood: (1) a loose drain plug, (2) a poorly seated or damaged oil filter, (3) a compromised oil pan gasket or worn washer, and (4) an overfilled oil level leading to pressure and seepage near seals. A quick test is to tighten the drain plug to the manufacturer’s specification and reseat the filter using a new gasket if needed. If oil continues to drip after these steps, inspect the oil pan gasket surface for nicks or warping. Keep in mind that valve cover gaskets or camshaft seals can also leak and may not be immediately obvious.
How to verify the source and plan repairs
After performing the initial checks, run the engine briefly on a level surface while watching the suspected areas from the top and bottom of the engine bay. Place a clean sheet of cardboard or a drip mat underneath to better visualize fresh leaks. If the leak persists at the drain plug, tighten further or replace the washer. If it’s at the oil filter, reseat with a new gasket and ensure the filter is the correct type for your vehicle. For suspected pan gasket leaks, you may need to remove components to access the gasket surface, clean it thoroughly, and replace the gasket. If you’re not fully confident, it’s wise to contact a professional to prevent under-oil conditions.
Preventive steps to avoid future leaks
Prevention matters as much as diagnosis. Always follow the vehicle’s service manual for drain plug torque and oil filter installation. Use the correct oil grade and amount, check the dipstick after filling, and dispose of used oil properly. After an oil change, run the engine for a minute or two and inspect for leaks while the oil circulates. Regularly inspect the drain plug washer and oil filter gasket during every oil change and replace worn parts. Keeping a clean engine bay helps you spot leaks early and avoid large spills.
Steps
Estimated time: 30-60 minutes
- 1
Park safely and cool down
Choose a level surface, engage the parking brake, and let the engine cool completely before touching any engine components. This prevents burns and reduces the risk of spilling hot oil.
Tip: Use a flashlight to inspect dark areas under the car. - 2
Inspect the drip area and clean surface
Wipe away old oil from around the drain plug and filter to clearly observe any fresh leaks. A clean surface makes it obvious where the leak originates.
Tip: Take a photo before cleaning to document the initial condition. - 3
Tighten or replace the drain plug washer
If the drain plug is loose, tighten it to the manufacturer’s spec. If the washer is damaged, replace it and re-torque the plug to secure seating.
Tip: Do not over-torque; overtightening can strip threads. - 4
Check the oil filter seating
Remove and re-install the oil filter with a new gasket if necessary. Ensure the filter is snug but not over-tightened; a mixed-up gasket can cause leaks.
Tip: Avoid using excessive force; hand-tight plus a quarter turn is usually enough. - 5
Inspect the oil pan gasket surface
Look for nicks, warping, or debris along the gasket seating surface. Clean thoroughly and reseal if you see damage.
Tip: If you must remove components, take photos to aid reassembly. - 6
Test run and re-check for leaks
Refill oil to the correct level and start the engine. Let it run a few minutes and inspect the suspected areas for fresh drips.
Tip: Place a sheet of cardboard under the areas to catch any new drips for easy detection.
Diagnosis: Oil leak after oil change
Possible Causes
- highLoose or over-tightened drain plug
- highPoorly seated or damaged oil filter
- mediumDamaged oil pan gasket or worn washer
- lowOverfilled oil causing seepage near seals
Fixes
- easyTighten drain plug to manufacturer specification using a torque wrench, and replace washer if needed
- easyInspect and reseat or replace the oil filter and gasket, ensuring a clean seating surface
- mediumInspect oil pan gasket and drain plug area for damage; replace gasket or washer if worn
- easyCheck oil level with the dipstick and drain/refill to correct level if overfilled
- hardIf the leak persists after these steps, consult a professional to check for engine damage and more complex seals
Questions & Answers
Why would I see a leak right after an oil change?
Leaks after an oil change are most often caused by a loose drain plug or a poorly seated oil filter. Other possibilities include a damaged oil pan gasket or an overfilled oil level. A quick diagnostic run can reveal the source, after which simple fixes or part replacements may solve the issue.
Leaks after an oil change are usually from a loose drain plug or poorly seated filter. Check those first, then inspect gaskets if the leak continues.
Can overfilling oil cause a leak?
Overfilling oil can cause pressure and seepage that appears as a leak near seals or gaskets. Always check the oil level with the dipstick after refilling and correct the level if needed.
Yes. Overfilling can push oil past seals, leading to leaks. Check the level after refilling.
Is a leaking oil filter always my fault?
Not always. A mis-seated filter or a damaged gasket can cause leaks even when the filter is new. Re-seat or replace the filter if you observe drips around the filter area.
Sometimes the filter isn’t seated properly or the gasket is damaged. Re-seat or replace as needed.
When should I call a mechanic?
If you cannot locate the source, if the leak persists after revising the drain plug and filter, or if you notice low oil levels or burning oil smells, seek professional help to prevent engine damage.
Call a mechanic if you can't find the source or the leak keeps happening.
How can I tell oil leaks from other fluids?
Oil is typically dark and viscous, with a distinct petroleum smell. Transmission fluid is usually red and thinner, while coolant is green or orange and often smells sweet. If in doubt, have a professional diagnose the fluid.
Oil smells distinct and is darker; other fluids have different colors and smells. When unsure, get a pro to check.
What maintenance reduces oil-leak risk after service?
Always use the correct oil type and quantity, tighten the drain plug properly, replace the filter gasket, and inspect the gasket surfaces during every oil change. Regular checks help prevent future leaks.
Stick to the manual: correct oil, proper torque, and gasket checks reduce leaks.
Watch Video
Main Points
- Tighten drain plug to spec and reseat filter first
- Clean area to accurately locate new leaks
- Inspect gasket surfaces for damage and replace as needed
- Call a professional if the leak persists after basic checks