Oil Engine Leak: Quick Diagnosis and Fixes
Urgent guide to diagnose and fix an oil engine leak safely. Learn common causes, DIY steps, safety tips, and prevention measures to protect your car and wallet.

An oil engine leak is most often caused by a loose drain plug or a worn oil filter seal. Start by tightening the plug to the manufacturer’s torque spec and inspecting the filter seal. If the drip continues, check the valve cover gasket and oil pan gasket, then inspect oil lines. Park on a flat, well-lit surface and avoid driving long distances until fixed.
Oil engine leaks: why they happen and why you should act now
Oil leaks in an engine are serious warning signs that can lead to low oil levels, overheating, and costly engine damage if neglected. For homeowners and DIY enthusiasts, understanding the most common sources helps you act quickly and safely. According to Leak Diagnosis, many leaks originate from simple, fixable issues such as a loose drain plug or a degraded oil filter seal. Early detection and timely repair protect engine life and preserve resale value. In addition to the mechanical risk, a leak can also pose slip hazards on the driveway and environmental concerns. The moment you notice oil spots, a rising oil level warning, or an acrid smell from the exhaust, you should treat it as urgent and begin a structured check.
Common causes of an oil engine leak and how to assess them
The most frequent culprits are the drain plug and the oil filter seal. A loosely seated drain plug allows oil to escape during idling or driving, while a mis-seated or aged oil filter seal can drip when the engine is hot. Other common sources include the oil pan gasket, valve cover gasket, or engine oil cooler lines. Less obvious but possible are cracks in the oil pan, worn crankshaft seals, or a damaged rear main seal. By identifying the exact source, you can determine whether a quick DIY fix is enough or if professional service is required. For safety and reliability, always confirm the source before proceeding with any repair.
Safety first: what to do before you start
Working around hot engine parts and flammable fluids requires precautions. Allow the engine to cool for at least 15-30 minutes, placed on a level surface. Wear gloves and eye protection, and use a high-quality catch pan to collect drips. If you notice a heavy oil leak, avoid driving the vehicle; instead, tow it to a repair location to prevent engine damage and environmental contamination. Keep a clean shop area: wipe up spills promptly to prevent slips and reduce the risk of fire.
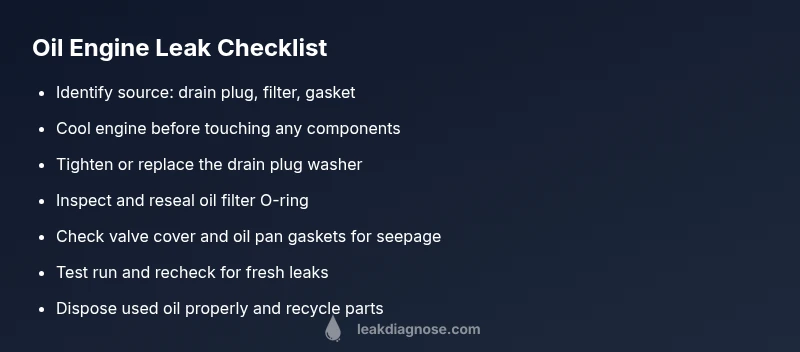
Quick checks you can perform under the hood
Begin with the simplest checks: inspect the drain plug for tightness and any signs of oil residue around the washer and threads. Move to the oil filter: remove, inspect O-ring condition, and reseat or replace as needed. Check visible gaskets, including the valve cover gasket and oil pan gasket, for seepage or cracks. Look for cracked hoses or loose clamps on oil lines. If a leak is detected at the rear of the engine, the source could be deeper and require a professional diagnosis. Always use a flashlight to illuminate tight seams and pay attention to fresh oil color, which indicates a more recent leak.
Diagnostic flow: symptom to diagnosis to fixes (overview)
When you observe dripping oil, start with the most accessible components. Trace the liquid’s path by placing a clean sheet of cardboard under the suspected area overnight, then inspect for fresh leaks in the morning. Correlate sightings with engine temperature: leaks at cooler areas may indicate gaskets; leaks near the crankshaft area could signify a seal. After identifying the source, assess whether the fix is a simple tightening, a gasket replacement, or a major seal service.
Prevention and maintenance to stop future leaks
Regular maintenance is your best defense. Schedule timely oil and filter changes, replace worn gasket seals during service, and inspect oil lines for wear or corrosion. Check for loose bolts around the oil pan and valve covers at every service interval. Maintain proper oil level and use the manufacturer-recommended viscosity. By staying proactive, you reduce the risk of leaks and extend engine life.
What to do if you need to call a professional
If you locate a leak from the rear main seal, oil cooler lines, or any sealed area that requires engine interior access, it’s time to seek professional help. A certified mechanic can perform a pressure test, dye test, or teardrop flow check to pinpoint a leak accurately. While DIY fixes work for minor issues like a loose drain plug, more complex leaks demand trained hands to avoid further damage and preserve warranty coverage.
Steps
Estimated time: 45-90 minutes
- 1
Prepare and secure the work area
Park on a level surface, engage parking brake, and place a sturdy catch pan. Allow the engine to cool to avoid burns, then gather rags, gloves, and basic tools. Having a clean workspace reduces the chance of missing signs.
Tip: Work in a well-ventilated area and keep kids/pets away from the workspace. - 2
Locate the leak source
Wipe suspected areas clean, then run the engine briefly and watch for fresh drips. Use a flashlight to trace the path of oil back to its origin as the engine runs.
Tip: A UV dye can help trace leaks more clearly if you can’t identify the source visually. - 3
Check the drain plug
Inspect the drain plug for tightness and signs of a damaged washer. If loose, tighten to the correct torque and replace the washer if needed. Clean up any oil around the drain area before rechecking.
Tip: Do not exceed torque specifications; overtightening can deform the pan or threads. - 4
Inspect the oil filter
Remove and inspect the oil filter O-ring; reseat or replace the filter if it shows wear or improper seating. Reinstall with clean hands and ensure no cross-threading occurs.
Tip: Always replace the filter O-ring when replacing the filter; reuse can cause leaks. - 5
Assess gaskets around the engine
Check the valve cover and oil pan gaskets for seepage. Tighten bolts if applicable and reseal according to manufacturer guidance. Look for oil traces along gasket seams.
Tip: If you see obvious gasket cracks or breaks, replace the gasket rather than attempting a patch. - 6
Test after a fix
Run the engine at idle for several minutes with the hood closed. Reinspect for leaks and verify that the oil level remains stable. If oil continues to drip, escalate to more advanced fixes or professional service.
Tip: Record the time and condition of the test to compare with future checks. - 7
Dispose of oil safely
Collect used oil in a designated container and take it to a proper recycling facility. Do not pour oil down the drain or onto soil.
Tip: Keep a spare container for future changes; never mix used oil with other chemicals. - 8
Evaluate necessity for professional help
If the leak source remains unresolved after basic fixes, or if you suspect rear main seal or deeper issues, contact a licensed mechanic. Complex leaks can cause major engine damage if ignored.
Tip: Professional evaluation can save money in the long run by preventing engine damage.
Diagnosis: Visible oil puddle under the vehicle or frequent oil spots on the ground; oil warnings or low oil level light may illuminate.
Possible Causes
- highloose or missing drain plug
- highdamaged oil filter seal or improper filter install
- mediumoil pan gasket leak
- lowvalve cover gasket leak
- lowrear main seal leak
Fixes
- easyTighten drain plug to manufacturer torque specifications and replace washer if present.
- easyInspect oil filter O-ring, reseal or replace filter if necessary, and ensure proper installation.
- mediumCheck oil pan bolts and gasket seating; reseal if oil pan gasket shows seepage.
- mediumReplace valve cover gasket if seepage around the valve cover is observed.
- hardFor rear main seal or severe gasket failures, schedule professional service.
Questions & Answers
What is the most common cause of an oil engine leak?
The most common causes are a loose drain plug and a worn oil filter seal. Start by tightening the plug and inspecting the filter seal, then inspect nearby gaskets if the leak persists.
The most common causes are a loose drain plug and worn oil filter seal. Start by tightening the plug and checking the filter seal.
Can I drive my car if I notice an oil leak?
If the leak is small, you may limit driving and monitor oil level carefully, but avoid long trips. If you see heavy dripping or the oil light comes on, stop and have the vehicle towed to a repair shop.
If you notice a serious leak or see the oil light, don’t drive it. Have it towed to a shop for inspection.
How do I know where the leak is coming from?
Place a clean sheet under the engine overnight and check for fresh drips. Then inspect common areas like the drain plug, oil filter, valve covers, and oil pan seams for seepage.
Put a white sheet under the engine to catch drips, then check plugs, filters, and gaskets for leaks.
When should I call a professional?
Call a professional if the leak is coming from deeper seals (rear main seal) or if multiple gaskets show seepage. Complex leaks require diagnostic equipment and expertise.
If you suspect rear main seal or multiple gaskets, it’s best to call a professional.
How can I prevent oil leaks in the future?
Follow a regular maintenance schedule, replace gaskets at signs of wear, check oil level monthly, and use the recommended oil type. Early detection and routine service are key.
Keep up with regular oil changes and gasket checks to prevent leaks.
Is an oil engine leak always caused by a faulty part?
Most leaks result from worn gaskets, seals, or improper installation, but a damaged oil pan or cracked component can also leak. Accurate diagnosis is essential.
Leaks usually come from gaskets or seals, but parts can crack and cause leaks too.
Watch Video
Main Points
- Identify leak source before repairs
- Tighten or replace simple parts first
- Avoid driving long distances with a leak
- Seek professional help for major seals