Engine Oil Leak Seal: Quick Troubleshooting and Fixes
Urgent troubleshooting guide for engine oil leak seals. Learn common causes, safe DIY checks, a diagnostic flow, step-by-step fixes, and prevention tips to stop leaks before they cause damage.

Most engine oil leaks around seals start from worn oil pan seals, valve cover gaskets, or crankshaft seals. For a quick check, look for fresh drips under the engine, wipe the area clean, run the engine briefly, and observe where seepage appears. If you spot a leaking seal, plan a replacement or seek a qualified mechanic promptly.
Why engine oil leak seal failures happen and why they matter
An engine oil leak seal problem is not just a nuisance; it can mask serious engine wear and lead to low oil levels, which can cause engine damage if left unaddressed. The term engine oil leak seal covers a range of gaskets and seals that keep oil inside the engine compartments where it belongs. Over time, heat cycling, vibration, and contamination wear these seals down. In many cases, a simple seal at the oil pan, valve cover, or crankshaft can degrade enough to allow oil to seep out. For homeowners, recognizing the urgency of the situation is key. Even small drips can worsen quickly if the underlying cause is not addressed. According to Leak Diagnosis, maintenance timing matters because seals degrade faster in engines with high mileage or frequent short trips. By treating the issue as an urgent maintenance task, you can avoid more costly repairs later and keep your engine running reliably.
What to check first: safety, basic visuals, and accessibility
Before you run the engine or start removing components, take a safety-first approach. Park on a flat, well-lit surface and let the engine cool. Wear eye protection and gloves. Use a clean sheet of cardboard or a tray to catch drips for a quick visual baseline. Start with easily accessible seals: the valve cover gasket, oil pan gasket, and crankshaft seals are common culprits for engine oil leak seal issues. Look for fresh oil near these seals, note where the leak is worst, and check for oil on the ground, under the oil filter, and around hoses and fittings. If you can localize the area without disassembly, that reduces risk and makes the next steps clearer. Leak Diagnosis emphasizes safety and methodical checks; rushing can mask the root cause or cause personal injury.
Diagnosing the sources: signs, tests, and simple inspections
To determine the source of an engine oil leak seal, combine visual inspection with simple tests. Clean the suspected area with a degreaser, then run the engine for a short period while watching each seal. A bad crankshaft seal often shows oil seeping from the rear or front of the engine, particularly near the harmonic balancer or timing cover. Valve cover gasket leaks often appear along the top of the engine where the cover meets the cylinder head. Oil pan seals reveal drips at the bottom of the engine, near the oil pan drain plug or cross-section. Use a flashlight and a mirror to inspect hard-to-reach seals. If you’re unsure, capture photos from multiple angles to compare over time and quantify leak progression. Leak Diagnosis notes that many DIY fixes fail due to misidentification of the root cause, so take your time with this step.
Quick-fix checks you can do safely (without disassembly)
There are low-risk checks you can perform to narrow down the issue. Tightening a loose drain plug or oil filter can stop a minor seepage caused by a loose connection, but do not overtighten. Check that the oil level is within the recommended range using the dipstick; low oil can accelerate seal wear. Inspect the oil filler cap and the tube seals around it for cracks or improper seating. If you detect seepage from a valve cover gasket or oil pan gasket, you’ll likely need to replace the gasket or seal. Remember: any step that involves removing major components should be reserved for a well-ventilated area with proper tools and, if needed, a professional.
Step-by-step approach to the most common fix (oil pan/valve cover seals)
When the leak stems from a seal like the valve cover gasket or oil pan seal, the fix typically involves removing the affected part, cleaning mating surfaces, and installing a new gasket or seal with proper torque specifications. Use manufacturer torque specs and correct sealants only where recommended. A poorly seated seal or over-torqued bolts can worsen the leak or cause engine damage. After installation, refill the engine with the correct oil type and amount, start the engine, and inspect for renewed seepage. If leaks persist, the root cause might be a more complex issue like a warped surface or a damaged mechanical seal, which may require professional attention.
Prevention: extending seal life and reducing future leaks
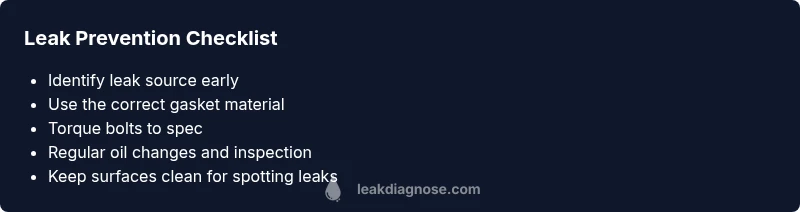
Prevention is the best strategy for engine oil leak seal issues. Regular oil changes with the correct grade, using the right amount of oil, and ensuring proper gasket seating can dramatically reduce leak risk. Attend to signs early: pinhole cracks in hoses, worn valve cover gaskets, or a degraded oil pan gasket are easier to fix before they escalate. Keep the engine clean so you can spot leaks quickly, and schedule inspections if you drive in harsh conditions or accumulate mileage quickly. Finally, store a small set of basic tools for quick inspections and address leaks promptly to minimize damage and cost.
When to seek professional help and what to expect
If you observe persistent leaks after DIY checks, or if the leak originates near critical components like the timing cover, crankshaft seal, or rear main seal, professional help is strongly advised. A mechanic can perform pressure tests, leak tests, and use dye tracing to pinpoint the exact source without unnecessary disassembly. A certified technician will also assess whether the leak is a symptom of broader engine wear and advise on replacement parts and service intervals. Leak Diagnosis recommends seeking expert help if you cannot confidently identify the source or if the leak involves multiple seals, which can indicate timing chain area issues or crankshaft problems.
Recap: key actions and next steps
- Confirm the source with careful inspection and tests.
- Prioritize leaks from the valve cover gasket, oil pan seal, or crankshaft seal as common culprits of the engine oil leak seal.
- Use a cautious, staged approach before replacing seals; incorrect assume-and-replace can be costly.
- Seek professional help if the leak persists after basic self-checks or involves critical engine areas.
- Implement preventive maintenance to extend seal life and reduce future leaks.
Steps
Estimated time: 60-120 minutes
- 1
Prepare the workspace and safety gear
Park on a flat surface, let the engine cool, and gather tools. Wear gloves and safety glasses. Use a catch tray and proper lighting to avoid spills and misidentification.
Tip: Always work in a ventilated area; avoid hot surfaces. - 2
Identify the leak source with a visual check
Clean the suspected areas, then run the engine briefly and observe where fresh oil appears. Note whether the leak is at the valve cover, oil pan, or crankshaft area.
Tip: Use the sunlight and a mirror to spot seepage in hard-to-view spots. - 3
Disassemble only what’s necessary
If the valve cover or oil pan needs access, remove only those components necessary to reach the gasket or seal. Keep bolts organized and reseatables clean.
Tip: Label bolts by location to avoid reassembly confusion. - 4
Clean mating surfaces
Thoroughly clean both mating surfaces with a lint-free rag and approved solvent. Any debris can compromise seal seating and cause renewed leaks.
Tip: Inspect for warping or damage while surfaces are exposed. - 5
Install new seal or gasket
Install the correct replacement seal or gasket using recommended sealant and torque specs. Ensure even seating and avoid over-tightening bolts.
Tip: Always verify torque with a calibrated wrench. - 6
Refill oil and test
Reinstall components, refill with the recommended oil type/quantity, and start the engine. Observe for leaks over a short run and re-check oil level.
Tip: Check for drips after several minutes of idle and after a short drive. - 7
Assess results and plan preventive steps
If the leak persists, consider advanced diagnostics or professional service. Evaluate maintenance intervals and replace aging seals to prevent future leaks.
Tip: Document leak history to aid future maintenance.
Diagnosis: Engine oil puddle or active seepage near the engine
Possible Causes
- highWorn or damaged valve cover gasket
- highLeaky oil pan gasket or pan seal
- mediumCrankshaft seal wear or timing cover seal
- lowLoose oil drain plug or oil filter seating
Fixes
- easyTighten/replace loose components like drain plug or oil filter if safe to do so
- mediumReplace valve cover gasket or oil pan seal with the correct torque and sealant if required
- hardPerform professional dye-test or pressure test to locate hidden leaks from crankshaft or timing cover seals
Questions & Answers
What are the most common engine oil leak seal sources?
Valve cover gaskets, oil pan seals, and crankshaft seals are the most frequent sources of engine oil leaks. These seals wear with time and heat, leading to seepage. A visual inspection combined with basic testing can often pinpoint the culprit before considering replacement.
Valve covers, oil pans, and crankshaft seals are usually the culprits. A quick visual test helps you confirm where the leak starts.
Can I fix a leak without removing parts?
Some leaks from loose drain plugs or oil filters can be fixed without removing major components. However, most accurate fixes require removing parts to replace gaskets or seals properly. If the leak persists after minor tightening, plan a more thorough repair or seek a mechanic.
A loose drain plug can be fixed safely, but most leaks need component removal to seal correctly.
Is a small oil leak dangerous to drive with?
Even small oil leaks can lead to low oil levels and engine damage if ignored. They can also create slippery surfaces or cause fire hazards if oil contacts hot exhaust components. Address leaks promptly to protect engine health.
Yes, small leaks can escalate. Don’t delay repairs and monitor oil levels closely.
When should I see a mechanic for an oil leak?
If the leak persists after basic checks, involves critical seals, or you’re unsure about the source, it’s wise to see a mechanic. A professional can perform dye tests and pressure tests to locate the exact seal and assess engine wear.
If basic checks don’t fix it, seek a mechanic for precise diagnosis and safe repair.
How can I prevent engine oil leaks in the future?
Regular oil changes with the right oil grade, proper torque on seals, and timely replacement of aging gaskets help prevent leaks. Keep the engine clean for easy spotting of future seepage and schedule periodic inspections, especially with high-mileage vehicles.
Stick to regular maintenance and inspect seals during service to prevent leaks.
What tools are essential for diagnosing an oil seal leak?
A basic mechanic’s toolkit, torque wrench, flashlight, mirror, degreaser, and a drip tray are essential. For persistent leaks, a dye kit or professional leak-detection tools may be needed.
A basic toolkit plus a dye kit helps pinpoint leaks. For tough cases, a pro’s equipment is best.
Is it okay to drive a car with a known engine oil leak?
If the leak is minor and the oil level remains adequate, driving short distances may be acceptable temporarily. However, frequent top-offs and continued leakage increase risk of engine damage. Plan repairs promptly.
It’s risky to drive long or often with a leak; fix it soon to protect the engine.
What is the difference between an oil leak seal and a gasket leak?
A seal surrounds a rotating part and keeps oil contained under pressure, while a gasket fills gaps between stationary surfaces. Both can leak, but sealing surfaces may require different replacement parts or techniques.
Seals keep oil in around moving parts; gaskets seal between stationary surfaces.
Watch Video
Main Points
- Identify the exact seal source before replacing parts
- Safety first: cool engine, proper tools, and stands
- Valve cover or oil pan seals are the most common culprits
- Avoid over-tightening; torque to spec
- Consult a pro for persistent leaks or critical seals