Engine Oil Leak Locations: Diagnose and Fix Fast
Identify the top engine oil leak locations, spot signs, and follow a safe, practical repair path. Learn DIY checks and when to call a pro with guidance from Leak Diagnosis.

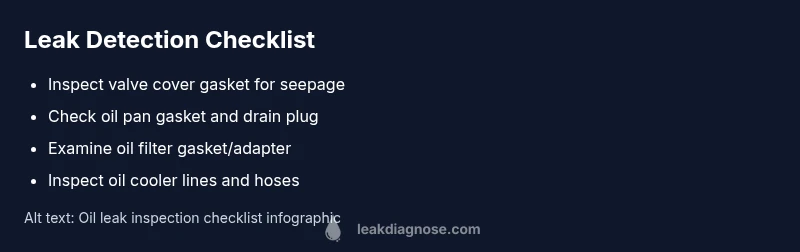
The most common engine oil leak locations are the valve cover gasket, oil pan gasket, crankshaft seal, and oil filter adapter. Start by cleaning the area and checking for fresh droplets while the engine is cool. Quick fixes include tightening loose filters, replacing worn gaskets, and inspecting seals—if the leak persists, seek a professional inspection.
Common Engine Oil Leak Locations
Engine oil leak locations commonly involve the valve cover gasket, the oil pan gasket, the rear main seal, the front crankshaft seal, and the oil filter adapter. As vehicles age, gasket material hardens and seals begin to fail, allowing oil to seep along seams and drip onto hot surfaces. According to Leak Diagnosis, these areas are responsible for the majority of leaks homeowners encounter during routine maintenance. In many cases, the telltale sign is a thin, dark trail that starts at a seam and runs downward toward the ground. The valve cover gasket leaks are often seen as a line along the sides of the valve cover, with oil that can contaminate spark plug wells or the exhaust manifold. Oil pan gasket leaks typically pool at the bottom and manifest as a slow drip from the pan area. Less frequent but possible sources include the rear main seal at the back of the engine and leak points around the oil filter adapter. Damaged hoses and faulty clamps related to oil lines can also contribute to oil seepage. Identifying the exact location requires careful observation, cleaning, and sometimes minor disassembly to confirm the source.
Visual Clues and Early Warning Signs
Oil leaks reveal themselves through several telltale cues. Look for fresh oil droplets on the ground or under the vehicle, increased oil consumption without obvious smoking, and dark stains on the engine blocks and undercarriage. A burning oil smell or blue-gray smoke from the exhaust can indicate oil contacting hot components, such as the exhaust manifold. Pay attention to oil levels; if the dipstick reading drops between routine checks, a leak is likely present. Leaks around the oil filter or its adapter may appear as a bright, localized spot near the filter, while pan gasket leaks tend to create wider stains along the oil pan perimeter. Remember that some leaks are slow and accumulate over time, so regular monitoring is essential. If you notice oil on driveways or garage floors after short trips, document the spot size and color, then inspect the engine bay for leaks. Leak Diagnosis emphasizes the importance of early detection to minimize engine damage and costly repairs.
External vs Internal Leaks: What’s Dripping Where
External leaks are those you can see on the ground or engine surfaces, typically from gaskets, seals, or oil lines. Internal leaks may not show up immediately but can degrade lubrication, leading to increased engine wear and warning lights. Oil entering the combustion chamber or exhaust is a sign of deeper issues like worn seals or cracked passages. differentiate by checking for oil residue at common exterior seams (valve covers, pan edges) and by performing a quick pressure or dye test to see how oil travels under operating conditions. If you observe smoke or oil pooling near the timing cover or under the crankshaft area, prepare for a more thorough inspection and possibly gasket replacement. Early stage leaks often originate at valve cover or oil pan gaskets, but never ignore a lingering odor of burning oil or unusually fast oil consumption.
How to Inspect the Engine Bay Safely
Before inspecting, park on a flat, well-lit surface and let the engine cool completely. Wear gloves and safety glasses, and use a flashlight to inspect hard-to-see areas. Wipe down suspected surfaces with a clean rag to remove old oil and reveal fresh seepage. Begin at the top of the engine and work downward along seams and gaskets: valve cover, cam seals, and timing cover. Check the oil filter and adapter for tightness and signs of seepage. Inspect the oil pan gasket from underneath with the vehicle raised on a safe jack stand. If you see fresh droplets on any gasket edge or along a seam, note the location and consider cleaning again after running the engine for a short period to observe active leaks. Record any patterns you notice, such as leaks that only appear after engine warm-up, which can indicate thermal expansion-related gasket failure. Safety note: never crawl under a hot engine with the car supported only by a jack. Use stands and chocks to prevent movement.
Drivetrain Seals and Additional Sources to Check
Beyond the engine bay, leaks can originate from seals that interact with the drivetrain. The rear main seal, front crankshaft seal, and cam seals are common culprits for oil migrating to the bell housing or undercarriage. Inspect the lower engine area for oil traces that travel from the rear of the engine toward the transmission. Also examine the oil cooler lines and their hoses for signs of seepage, cracking, or loose clamps. If a leak tracks along the oil drain plug threads, the seal or thread condition may be compromised. When you see seepage near the timing cover or around the valve train, assess the related gaskets and consider replacing aging seals. Document all findings and approach repairs incrementally to avoid introducing new leaks during disassembly.
Tools, Safety, and Preparation for Inspection
Prepare by gathering gloves, rags, a flashlight, a mirror, and a drainage pan. You may need basic tools to release components and access gasket edges. Ensure you have the vehicle supported securely on jack stands if you must slide under the car. Use a leak dye or UV tracer and a black light to pinpoint leaks more accurately, especially for stubborn seepage. When inspecting under pressure or after a test drive, watch for fresh oil tracks that appear indicating an active leak. Keep a log of the suspected components and their proximity to ground surfaces to help a mechanic later. If any signs of fuel or coolant mixing with oil appear, stop and seek professional help immediately, as this indicates a broader failure with multiple systems.
Step-by-Step Investigation and Repair Strategy
Plan the diagnosis around the most likely sources first—valve cover gasket and oil pan gasket—then move outward to seals and lines. Use a logical elimination approach: inspect top gaskets while engine is cool, clean, and dry, then run the engine and observe where new oil appears. If the leak is confirmed at a gasket, prepare for replacement using manufacturer-approved parts and torque specs. For oil pan gasket leaks, support the engine, drain the oil, remove the pan, and reseal with a high-quality gasket material. Refill oil to the correct specification and check for residual seepage after a test drive. If the source remains unclear after the initial checks, consult a qualified technician who can perform a pressure test or dye test to track the flow path. Always dispose of used oil properly and reset maintenance reminders after completing any repair.
Safety Warnings and Prevention Tips
Working around hot engines poses burn risks; never touch hot metal or moving parts. Work in a well-ventilated area and avoid open flames near spilled oil. When in doubt, postpone repairs and contact a professional to prevent further damage. After any repair, monitor oil levels and engine temperature closely, and reset the oil life monitor if equipped. Establish a routine to check for leaks during regular maintenance—catching leaks early saves time, money, and potential engine damage.
Steps
Estimated time: 60-120 minutes for basic checks; 2-6 hours for full gasket/seal replacement depending on access
- 1
Safety and prep
Park on a flat surface, cool engine, and disconnect the battery. Gather tools and safety gear before starting. This initial step reduces risk and helps you work more efficiently.
Tip: Always ensure the car is secure with wheel chocks on both sides. - 2
Identify the likely source
Start at the valve cover gasket and oil pan region. Look for fresh oil along seams and check for seepage at the filter and adapter. Clean suspected areas to reveal new leaks clearly.
Tip: Use a bright flashlight and mirror to inspect hard-to-see joints. - 3
Clean and observe after a test run
Wipe down suspected areas, run the engine for 5-10 minutes, and recheck for new drops. Note the location and pattern of any fresh oil seepage to confirm the source.
Tip: Take photos to compare before and after testing. - 4
Tighten or replace straightforward seals
If the leak is at the valve cover or filter, tighten or replace the associated gasket/adapter. Refill oil and check oil level after a short drive.
Tip: Don’t over-tighten; use manufacturer torque specs. - 5
Address major gasket or seal failures
For pan, rear main, or crankshaft seals, plan a more involved repair. This may require lifting the engine or removing components, so assess whether you can do it safely.
Tip: If you’re unsure, consult a professional to avoid misalignment. - 6
Post-repair verification
Recheck all suspected areas after a test drive, ensuring the leak has stopped or greatly reduced. Keep monitoring oil level and look for any secondary leaks.
Tip: Set a reminder to recheck daily for the first week after repair.
Diagnosis: Visible oil leak under vehicle or oil spots on driveway
Possible Causes
- highWorn or damaged valve cover gasket or gasket leak
- highLeaking oil pan gasket or pan drain plug
- mediumRear main seal or front crankshaft seal wear
- lowOil filter gasket or adapter leak
- lowOil cooler lines or hoses wear
Fixes
- easyTighten loose oil filter or drain plug, replace gasket if found worn
- mediumReplace valve cover gasket and reseal valve covers as needed
- hardReplace oil pan gasket or reseal without disturbing engine components
- hardReplace rear main seal or front crankshaft seal as required
- mediumInspect and replace faulty oil cooler lines or hoses
Questions & Answers
What are the most common signs of an engine oil leak?
Common signs include fresh oil spots under the car, a decreasing oil level, a burning oil smell, and smoke from the exhaust. Early detection helps prevent engine damage and costly repairs.
Look for oil spots under the car, a dropping oil level, or a burning oil smell, which can indicate a leak.
Can I drive my car if I see an oil leak?
Short trips with a small leak may be possible, but driving with an active leak risks engine damage and fire hazards. Address leaks promptly and avoid long drives until the source is identified.
If you see a leak, avoid long drives and get a quick diagnostic before continuing.
How long can I drive with a leaking valve cover gasket?
Valve cover gasket leaks vary; small leaks may not immediately damage the engine, but they can lead to increased oil loss and potential smoke. Monitor oil level and plan a gasket replacement.
A small valve cover leak should be monitored, but replace the gasket soon to prevent bigger issues.
Are there quick fixes I can do myself?
Basic fixes include tightening a loose drain plug or filter and resealing a valve cover gasket if it's simple. For major leaks, use professional help to avoid damaging engine seals.
Yes, some quick fixes are possible, but major leaks should be handled by a pro.
When should I seek professional help for oil leaks?
Seek professional help if the leak persists after basic tightening, involves the rear main seal or crankshaft seal, or if you see signs of coolant or fuel in the oil. A pro can perform dye tests and proper gasket replacement.
If the leak continues after basic checks or involves major seals, get a professional diagnosis.
Watch Video
Main Points
- Inspect valve covers and oil pan first when leaks appear
- Clean, test, and observe to locate the exact source
- Some leaks are simple to fix; others need gasket replacement
- Safety and proper disposal are essential throughout
- Call a professional for major gasket or seal failures