How to Stop a Radiator Leak: Step-by-Step Guide
Learn how to stop a radiator leak safely with DIY steps, product guidance, and maintenance tips. This educational guide covers stop-leak options, safety, and when to seek professional help.

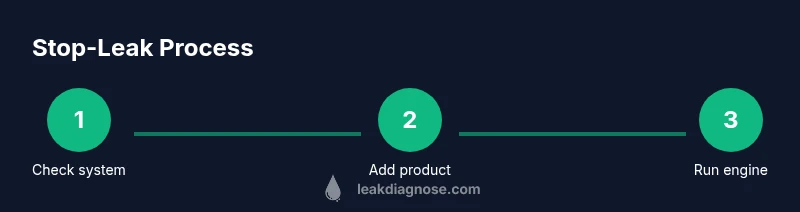
To stop a radiator leak, you can use a safe, manufacturer-approved stop-leak product or a temporary sealant, but the best approach is to locate the leak, assess damage, and plan a repair. This guide walks you through the standard method for adding a radiator stop-leak product to a vehicle's cooling system and verifying the fix.
Understanding why radiator leaks happen and why stop-leak products are used
Radiator leaks can occur from worn hoses, corroded metal, a stressed radiator core, or a damaged pressure cap. Even small seepage can lead to engine overheating if coolant levels drop, so homeowners and DIY enthusiasts often consider a temporary stop-leak additive as a stop-gap measure while planning a permanent repair. According to Leak Diagnosis, many drivers turn to stop-leak products when a leak is slow and the cooling system remains pressurized, but these products are not a substitute for a full mechanical fix in every case. The decision to use a sealant should factor in the leak source, coolant type, and the age of the vehicle. When you ask how do you put stop leak in the radiator, you are really asking whether a product can safely circulate through the system and form a barrier at the leak site without clogging passages or heater cores. The practical takeaway is: know the leak type, follow product instructions precisely, and monitor temperatures closely after application.
How do you put stop leak in the radiator
To use a radiator stop-leak product, you typically pour the product into the radiator neck or the coolant reservoir, depending on the product instructions. The coolant must be circulating for the agent to reach the leak site, so start the engine and allow it to reach normal operating temperature with the heater on. Do not mix different stop-leak products or use them in systems with incompatible coolants. After adding the product, replace the radiator cap, drive slowly for 10–15 minutes, and recheck the reservoir level. Always read the product label for specific dilution and compatibility details and avoid using it as a cure for large, active leaks or cracked radiators. This approach is a temporary measure and should be followed by a proper repair if the leak persists.
The guidance here aligns with common homeowner best practices and avoids overreliance on additives. If you notice rapid coolant loss, boiling over, or persistent leaks after application, discontinue use and seek professional assessment. This careful approach helps prevent further damage and keeps your engine safe while you plan a long-term solution.
Tools & Materials
- Radiator stop-leak product (liquid or pellet form)(Choose a product compatible with your coolant type; read label for engine type (gasoline, diesel) and clamp-free compatibility.)
- Coolant (pre-mixed or concentrate)(Keep the same coolant type you already use; mixing different types can cause precipitation.)
- Distilled water (if using concentrate)(Only if you need to top up after draining or after making adjustments.)
- Drain pan(Catch any leaking coolant safely to prevent spills.)
- Gloves(Chemical-resistant gloves to protect skin.)
- Safety glasses(Eye protection in case of splashes.)
- Funnel(Pour product and coolant without spills.)
- Rag or shop towel(Clean up spills and wipe fittings.)
- Basic socket/wrench set(Only if you need to loosen a hose clamp or drain plug.)
Steps
Estimated time: 60-75 minutes
- 1
Inspect the cooling system and safety gear
Begin by visually inspecting hoses, clamps, the radiator, and the reservoir for obvious signs of damage or wear. Check coolant color and level, and look for wet spots or crusty residue that indicates a leak. Put on gloves and safety glasses, ensure the engine is cool before touching any components, and disconnect the battery if you’ll be working near electrical components.
Tip: Working with the engine cool minimizes burns and prevents pressurized coolant from spraying. - 2
Prepare the vehicle and gather materials
Position a drain pan under the radiator drain or lower hose, loosen clamps only if needed, and organize your stop-leak product, coolant, funnel, and rags. Verify you have the correct coolant type and that you will not mix incompatible additives. If you must drain some coolant, do it slowly to avoid spills and reduce waste.
Tip: Label any drained coolant and dispose of it according to local regulations. - 3
Warm up the engine to operating temperature
Start the engine and let it run until it reaches the normal operating temperature, then turn on the heater to circulate coolant through the radiator. This ensures the stop-leak product reaches the leak site more effectively as the system pressurizes slightly and coolant moves through the core. Monitor the temperature gauge and watch for signs of overheating.
Tip: Opening the heater helps push coolant and sealant toward the leak site. - 4
Add the stop-leak product following the label
Shake the bottle if required and pour the product into the radiator neck or expansion tank as directed. Refrain from mixing with other additives. Replace the cap securely and allow the engine to run for about 10–15 minutes to circulate the product.
Tip: Use a funnel to reduce spills and ensure you pour the correct amount per the label. - 5
Check for leaks and coolant level after circulation
Turn off the engine, allow it to cool, and recheck for leaks around hoses, radiator seams, and the cap. Top up coolant if necessary using the same type you started with. If leaks persist or worsen, do not drive aggressively; plan a professional inspection.
Tip: If you can’t locate the leak or if it’s a large crack, seek immediate professional service. - 6
Decide on a long-term repair plan
A stop-leak product is often a temporary measure. Schedule a professional assessment to determine if you need hose replacements, a radiator repair, or a core replacement. Keep monitoring temperature and coolant level until the repair is completed.
Tip: Do not rely on stop-leak products for severe leaks or high-heat conditions over long periods. - 7
Document and maintain the cooling system
Record the product used, the date, and observations from the test drive. Plan regular coolant flushes and level checks to extend the life of the cooling system. If you notice recurring leaks after a repair, revisit the diagnosis with a professional.
Tip: Create a maintenance schedule to prevent future leaks.
Questions & Answers
Is radiator stop-leak safe for all engines?
No. Some engines and cooling systems are not compatible with stop-leak additives. Always consult your vehicle manual and product instructions before use. If in doubt, seek professional advice.
Not all engines are compatible with stop-leak products; check your manual and the product instructions first.
Will stop-leak fix a cracked radiator?
Stop-leak may seal small cracks temporarily, but it is not a reliable fix for a cracked radiator. A cracked radiator typically requires repair or replacement by a professional.
It might seal small cracks briefly, but a cracked radiator usually needs a proper repair or replacement.
Can I drive after adding stop-leak?
Only drive cautiously and for short distances if you must. Monitor temperature closely and check for renewed leaks. If overheating occurs, stop and seek professional help.
Drive slowly for a short distance and watch the temperature; seek professional help if it overheats.
Should I flush coolant after using stop-leak?
Some manufacturers recommend a coolant flush after using stop-leak, especially if you notice sludge or reduced flow. Always follow the product’s instructions and consult a pro if unsure.
Flushing may be recommended in some cases; follow the product instructions and consult a mechanic if unsure.
What are signs that stop-leak isn’t working?
Continued coolant loss, visible leaks, rising temperature gauge, or overheating indicate the fix isn’t effective. In such cases, stop driving and get a professional diagnosis.
If leaks continue or the engine overheats, stop and have it checked by a pro.
What maintenance can prevent future radiator leaks?
Regular coolant changes, inspect hoses and clamps, and keep the radiator cap in good condition. Use the recommended coolant type and follow maintenance schedules to minimize leaks.
Keep up with coolant changes and hose inspections to prevent leaks.
When is professional repair unavoidable?
If the leak is large, if the radiator core is damaged, or if you’re unsure about the source of the leak, seek professional service immediately. DIY additive fixes can delay proper repair and worsen damage.
Go professional when the leak is big or you’re unsure about the source.
Watch Video
Main Points
- Identify leak sources before choosing a fix
- Follow product instructions precisely
- A stop-leak product is often temporary, not a permanent repair
- Plan a professional repair if leaks persist or coolant loss is rapid