Gasket Valve Cover Leak: Diagnose, Fix, and Prevent
Learn how to spot a gasket valve cover leak, diagnose the cause, and safely fix it with step-by-step guidance. Practical tips, a diagnostic flow, and prevention strategies from the Leak Diagnosis team.

Most gasket valve cover leaks come from a worn or loose valve cover gasket. Start by inspecting for oil pooling and tighten or replace the gasket. If the valve cover is cracked or oil has spread to hot surfaces, seek professional help.
What is a gasket valve cover leak and why it matters
According to Leak Diagnosis, gasket valve cover leaks are a common early warning sign of engine oil leakage that can degrade lubrication and lead to more serious engine problems if ignored. The valve cover seals the top of the engine and keeps oil contained while allowing needed ventilation. When the gasket or the surrounding bolts wear or loosen, oil can seep along the seam and drip onto hot exhaust components, producing smoke, a burning oil odor, and a visible oil smear on the engine bay. Addressing the issue quickly reduces oil loss, protects engine performance, and minimizes the risk of expensive repairs down the line. This article helps homeowners and DIY enthusiasts identify the telltale signs, evaluate urgency, and perform safe fixes that restore sealing integrity without compromising safety or warranty.
Common causes and symptoms
A gasket valve cover leak can stem from several culprits. The most frequent are a worn-out valve cover gasket, loose or over-torqued valve cover bolts, a cracked or warped valve cover, and a PCV system fault that pressurizes the engine crankcase. Oil may also leak if the engine was recently serviced and the gasket was not seated correctly. Common symptoms include oil pooling on the engine’s upper surface, a visible oil smear along the valve cover, oil on spark plug wells or ignition coils, a burning oil smell after startup, and occasional exhaust or blue-gray smoke when the engine is hot. If you notice any of these signs, assume a gasket valve cover leak until proven otherwise and inspect methodically. The Leak Diagnosis team also notes that addressing leaks early reduces risk and cost over time.
Safety and initial checks you can do now
Safety first: never dive into a live engine. If the engine is hot, let it cool for at least 30 minutes and wear eye protection and gloves. Start with simple checks you can perform without removing the valve cover. Check the oil level and top off if needed, then look for fresh oil streaks around the valve cover bolts, gasket seam, and PCV valve. Ensure the engine bay is clean so you can see new leaks clearly. If the vehicle is under warranty or you’re not comfortable with basic tools, pause and seek professional help. Remember, a small leak today can become a bigger issue tomorrow, and Leak Diagnosis analysis shows that timely, careful checks are worth the effort for long-term reliability.
Diagnostic flow: determine if it is the gasket valve cover leak
This flow helps you confirm a leak and avoid unnecessary parts replacement. Start with a visual inspection of the valve cover and gasket seam for fresh oil. Then check the bolts: are they loose or unevenly tight? If you find oil near the bolts or seepage along the gasket, the gasket is a likely culprit. A faulty PCV valve or hose can pressurize the crankcase and push oil toward the seal, so inspect that pathway as well. If visible signs are inconclusive, perform a quick compression or pressure test on the valve cover area as guided by your vehicle’s service manual. Throughout, document any findings and avoid guessing; precise diagnosis saves time and money, a principle echoed by Leak Diagnosis analyses.
Repair options and when to replace
Repair choices depend on the severity and the condition of the parts involved. If bolts are simply loose, tightening to the specified torque (in a cross pattern) may solve the leak. If the gasket is hardened, cracked, or squeezed out of position, replace the gasket and reseal the joint. If the valve cover itself is warped or cracked, replacing the cover may be necessary. In many cases, you can perform a gasket replacement with basic hand tools, but extensive damage or a stubborn leak may require professional service. Always follow torque specs and manufacturer guidelines to avoid over-tightening or damaging metal components. The Leak Diagnosis team emphasizes careful inspection and proper seating to prevent future leaks.
Prevention and maintenance to avoid future leaks
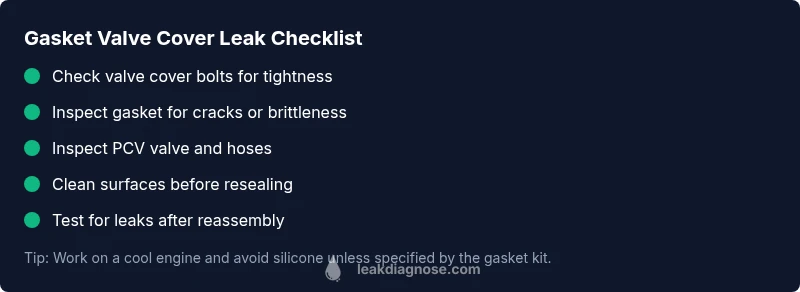
Preventive steps save time and money. During routine maintenance, inspect the valve cover area for oil seepage and replace gaskets proactively every few years, or when you notice signs of wear. Use a torque wrench to tighten bolts to the correct specification in a star pattern, and review PCV valve operation to ensure proper crankcase ventilation. Clean surfaces before reinstalling and avoid using silicone sealants on gaskets unless specified by the manufacturer. Regular oil changes and keeping the engine bay clean can help you spot issues early. The Leak Diagnosis team also recommends scheduling a quick annual check during oil changes to catch wear before it escalates.
Quick troubleshooting recap (why this approach works)
- Start with visual inspection, then tighten or replace as needed.
- Differentiate gasket leaks from PCV or bolt issues.
- Use manufacturer torque specs and proper sealing techniques.
- When in doubt, consult a professional to avoid engine damage.
- Regular maintenance reduces recurrence risk and extends engine life, a key insight from Leak Diagnosis’s ongoing observations.
Steps
Estimated time: 1-2 hours
- 1
Prepare and safety check
Park on a level surface, disconnect the battery, and allow the engine to cool. Gather the tools you’ll need: socket set, torque wrench, screwdrivers, gasket scraper, new valve cover gasket kit, and potentially a new valve cover.
Tip: Safety first: never work on a live or hot engine. - 2
Inspect the leak site visually
Wipe away oil around the valve cover seam to clearly see new seepage. Check for loose bolts or damaged gasket material. Photograph or sketch the leak location for reference.
Tip: A clean surface helps identify fresh leaks quickly. - 3
Decide whether to reseal or replace
If bolts are loose, first re-torque to spec. If the gasket is brittle or the cover shows wear, plan for a gasket replacement. If the cover is cracked, replacement may be required.
Tip: Always use the exact gasket kit and torque specs from the manufacturer. - 4
Remove the valve cover (if replacing)
Carefully detach components that block access to the valve cover. Detach electrical connections only if necessary, noting where each part goes. Remove the cover with care to avoid bending metal.
Tip: Keep track of bolts and gaskets; a single misplaced fastener can cause leaks later. - 5
Replace gasket and reseal surfaces
Clean both mating surfaces thoroughly with a gasket scraper and solvent. Install the new gasket, apply any sealant only if recommended by the gasket kit, and reattach the valve cover using a crisscross tightening pattern to the proper torque.
Tip: Do not over-tighten; it can crush the gasket or warp the cover. - 6
Reassemble and test for leaks
Reconnect any removed components, reconnect the battery, and start the engine. Look for signs of fresh oil around the seal and any unusual noise. If leaks persist, recheck torque and gasket seating or consider professional service.
Tip: Run the engine at idle and then at higher RPMs to verify sealing under load. - 7
Document results and plan follow-up
Note the replacement parts used, torque specs, and leak status. If the leak returns within a short period, revisit the gasket choice or cover integrity and consider a professional evaluation.
Tip: Set a reminder to check the area after 100-200 miles.
Diagnosis: Oil leaking from valve cover area or oil pooling on top of engine
Possible Causes
- highLoose or uneven valve cover bolts
- highWorn or damaged valve cover gasket
- lowCracked or warped valve cover
- mediumPCV system fault causing excess crankcase pressure
- lowOil overfill/overflow during recent service
Fixes
- easyTighten bolts to the manufacturer's torque specification in a crisscross pattern
- mediumReplace the valve cover gasket with the correct part and reseal
- hardReplace warped/cracked valve cover if inspection shows damage
- easyRepair or replace PCV valve/hose if restricted or stuck
- easyClean area and recheck after service to confirm leak is resolved
Questions & Answers
What causes a gasket valve cover leak?
Leaks commonly arise from a worn gasket, loose or over-tightened bolts, a cracked valve cover, or a dysfunctional PCV system. Regular inspection helps catch wear before it becomes expensive damage.
Leaks come from a worn gasket, loose bolts, a damaged valve cover, or a PCV issue. Inspect early to prevent big problems.
Is a gasket valve cover leak serious for my engine?
Yes. Oil loss can reduce lubrication, raise engine temperatures, and potentially damage seals or wiring. Addressing leaks promptly protects performance and longevity.
Yes, it can affect lubrication and safety. Fix it promptly to protect your engine.
Can I drive a car with a leaking valve cover gasket?
If the leak is minor and not near critical components, a short postponement may be acceptable. For larger leaks or oil on hot parts, avoid driving and seek professional help to prevent damage or fire risk.
A small leak may be manageable short-term, but avoid driving if oil is on hot parts or there’s significant seepage.
What tools do I need to fix a gasket valve cover leak?
You’ll typically need a socket set, torque wrench, gasket scraper, ratchet, screwdrivers, new valve cover gasket kit, and possibly a new valve cover. Always refer to your vehicle’s service manual for exact specs.
A socket set, torque wrench, gasket kit, and basic hand tools are usually enough.
Should I replace the valve cover or just the gasket?
Start with the gasket if the cover is intact and undamaged. If the cover is cracked, warped, or the gasket seat is compromised, replacing the cover may be required to resolve the leak reliably.
If the cover is fine, replace the gasket; if the cover is damaged, replace the cover too.
How can I prevent gasket valve cover leaks in the future?
Regular maintenance, proper torque on bolts, and timely PCV valve checks help prevent leaks. Use manufacturer-approved parts and avoid oil overfill. Clean engine surfaces during service to monitor future seepage.
Keep up with maintenance, torque specs, and PCV checks to prevent leaks from returning.
When should I call a professional for a valve cover leak?
If you see oil pooling near difficult-to-reach areas, notice coolant contamination, or the leak persists after gasket replacement, seek professional help to avoid engine damage or safety risks.
Call a pro if the leak persists after a gasket change or if you see coolant contamination.
Watch Video
Main Points
- Identify the leak source before replacing parts
- Tighten bolts to spec and inspect gasket integrity
- Replace gasket for brittle or damaged seals
- Check PCV system as a possible contributing factor
- Plan for a safe, test-driven follow-up to confirm success