Car Oil Stop Leak Guide: DIY Fixes for Leaks in Most Cars
Learn how to use car oil stop leak safely, when it's appropriate, and avoid common pitfalls. Leak Diagnosis provides practical, DIY-friendly guidance for car owners.

You can safely address minor oil leaks with car oil stop leak products when the leak is small, the engine is not overheating, and the oil level is adequate. This guide explains when to use them, how to choose a product, and how to apply it correctly. According to Leak Diagnosis, avoid relying on stop-leak for major gasket failures and consult a mechanic if unsure.
What is car oil stop leak and when to use it
Engine oil stop-leak products are formulations designed to slow seepage from small oil leaks by conditioning seals or slightly swelling gasket materials. They are not a substitute for a failed gasket or cracked oil pan, but they can buy time for a DIYer to arrange proper repairs. According to Leak Diagnosis, these products work best on minor seepage and should be used as a temporary measure while planning the repair. Use with caution and monitor oil levels closely, especially in hot engines. This topic is especially relevant to car owners who regularly perform basic DIY maintenance and want a pragmatic stopgap while scheduling a professional inspection if the leak persists. Remember: a small leak today can become a bigger leak tomorrow if ignored, so set a plan to verify the leak after a few days of driving and check oil level daily during the initial period.
How car oil stop leak works
Oil stop-leak products come in several chemistries, including polymer-based sealants, swelling agents, and conditioners. When added to the engine oil, these formulations travel with the oil to affected seals and gaskets. They can swell or coat surfaces to reduce seepage and, in some cases, condition rubber seals to improve elasticity. The effectiveness depends on the leak size, oil type (synthetic vs conventional), and engine heat. For small seepage around valve covers or oil pans, a compatible product can temporarily slow or stop the leak. For larger or actively dripping leaks, stop-leak is unlikely to provide a permanent fix and may mask symptoms while the underlying issue worsens. Always verify product compatibility with your engine and oil type before use.
Choosing the right product and safety considerations
Selecting a compatible car oil stop leak product requires reading the label for your oil type (synthetic vs conventional), vehicle make/model, and the leak location. Avoid products not approved for your engine or oil specification, as mismatches can cause sludge or clog seals. Safety comes first: wear gloves and eye protection, work in a well-ventilated area, and never mix different stop-leak products. Check the product’s compatibility with turbocharged engines or high-mileage engines, as some formulations may be more suitable for older seals than newer ones. If the leak is near critical systems (such as near the oil filter or crankshaft seal), consider postponing the use and seeking professional advice. This reduces risk and improves outcomes over a trial-and-error approach.
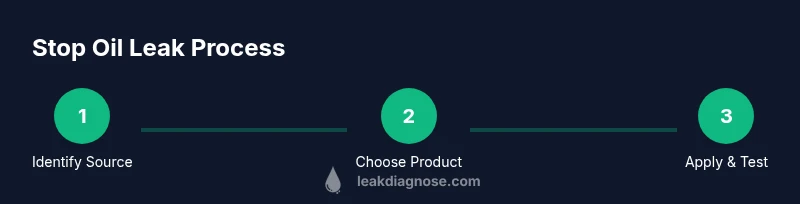
Step-by-step usage overview (summary)
This section provides a high-level view of the steps you’ll follow in the dedicated step-by-step guide below. It covers preparation, measurement, pouring technique, and immediate post-application checks. Use the step-by-step guide in conjunction with this overview to ensure you don’t overfill the oil, which can cause engine damage. Always confirm your results by rechecking the oil level and observing for any residual seepage after driving a short distance.
Monitoring after treatment and when to seek help
After applying a stop-leak product, monitor the engine oil level daily for the first few days and inspect the engine bay for fresh seepage. If the leak reappears or worsens, or if you notice a drop in oil pressure, stop driving the vehicle and seek professional service promptly. Remember that stop-leak is a temporary measure and not a substitute for a proper gasket or seal replacement. Continuous leaks or new symptoms like smoke, poor oil pressure, or unusual noises require a professional inspection to avoid engine damage.
Common myths and limitations
Many DIY enthusiasts hope stop-leak will fix all oil leaks, but that isn’t realistic. Minor seepage around gaskets may respond, but a major gasket failure, cracked oil pan, or a worn crankshaft seal typically requires mechanical repair. Some products can contaminate oil if overused or if the engine is old or high-mileage, potentially accelerating wear. Always treat stop-leak as a temporary measure and plan a follow-up repair with a trusted mechanic.
Long-term maintenance and alternatives
For long-term reliability, prioritize regular oil changes with the correct weight and viscosity recommended by the manufacturer. Inspect gaskets, seals, and Oil pans during routine maintenance, especially if you notice recurring leaks. As an alternative to stop-leak, consider gasket or seal replacement if the leak is persistent, and explore more definitive repair options. Practicing proactive maintenance reduces the likelihood of leaks and helps maintain engine health.
Tools & Materials
- Engine oil stop leak product(Choose a product compatible with your oil type (synthetic or conventional) and engine model)
- Oil drain pan(Place under the engine to catch drips during the procedure)
- Funnel(Keeps the product from spilling and helps precise pouring)
- Gloves(Protect hands from hot oil and chemicals)
- Safety glasses(Eye protection in case of splashes)
- Rags or towels(Clean spills and wipe leaks for accurate observation)
- Owner’s manual(Check any cautions about oil additives)
- Optional: replacement engine oil(Top-up or partial drain may be needed if oil level drops)
Steps
Estimated time: 30-60 minutes
- 1
Identify leak source and assess severity
Turn off the engine and let it cool completely. Inspect the engine bay to locate the exact source and determine if the leak is a small seepage or a larger drip. Take photos or mark the area to help with follow-up decisions. Why: knowing the leak helps decide if stop-leak is appropriate.
Tip: Document the leak area before adding any product to avoid misinterpretation later. - 2
Check oil type and current oil level
Check the dipstick to confirm oil type (synthetic vs conventional) and ensure oil level is within the normal range. If the oil is low, top up before applying stop-leak, as an overworked engine can worsen leaks. Why: correct oil level ensures the product travels properly and avoids over-concentration.
Tip: If you’re unsure about oil type, refer to the owner's manual or the oil cap label. - 3
Choose and read the product label
Select a product that explicitly lists compatibility with your engine and oil type. Read warnings about potential sludge or interactions with other additives. Why: using an incompatible product can cause engine harm and void warranties.
Tip: Verify the product is designed for high-mileage engines if yours has many miles. - 4
Prepare the area and pour the product
Place the oil drain pan under the engine. Use a funnel to pour the recommended amount of stop-leak into the engine oil as directed on the label. Why: accurate dosing reduces the risk of over-treatment and improper distribution.
Tip: Pour slowly and stop if you notice a strong foaming or unusual oil color. - 5
Run the engine briefly and observe
Start the engine and let it idle for 5–10 minutes, then inspect the leak area again. Look for reduced seepage and ensure no new leaks appear. Why: the product needs heat and oil flow to circulate and seal the area.
Tip: Do not drive long distances before checking for leaks; a stop-leak may take a few minutes to work. - 6
Check oil level again and plan follow-up
Turn off the engine and recheck the dipstick. If the level is low, top up to the recommended mark. If leaks persist, schedule a professional inspection rather than relying on stop-leak as a long-term fix. Why: ongoing leaks indicate underlying issues needing repair.
Tip: Schedule a follow-up appointment within 1–2 weeks if leaks continue.
Questions & Answers
Is car oil stop leak safe for all engines?
Most products are safe when used as directed for typical engines. However, some high-performance or turbocharged engines may have specific cautions. Always check the label and consult your mechanic if in doubt.
Most products are safe when used as directed, but check the label or ask a mechanic if your engine is special or turbocharged.
Will stop-leak seal a large oil leak?
No. Stop-leak is typically a temporary measure for minor seepage. A persistent or large leak requires professional diagnosis and repair.
Stop-leak is usually for small leaks and not a substitute for professional repair if the leak is large.
How long does stop-leak take to work?
Results vary, but some leaks slow within minutes of driving, while others may take longer. If seepage continues after a short drive, discontinue use and seek service.
It can vary; some leaks slow quickly, others may take longer. If it continues, get it checked.
Can using stop-leak cause damage or sludge?
In rare cases, improper use or incompatible products can cause sludge or clogging. Always follow the label, and avoid mixing products or exceeding the recommended dose.
Rarely, if used improperly or with the wrong product, it can cause sludge. Follow the label exactly.
What should I do after applying stop-leak?
Check the oil level, inspect for fresh leaks, and monitor engine temperature. If leaks reappear, stop driving and arrange a professional inspection.
Check oil level again and watch for leaks. If it returns, seek professional help.
Watch Video
Main Points
- Identify leak sources before using products.
- Choose a product compatible with your oil type.
- Follow the label and avoid overuse.
- Stop-leak is a temporary measure, not a permanent fix.
- Regular maintenance prevents future leaks.