Brake Line Leak Fix: A Practical DIY Guide
Learn to identify, repair, and prevent brake line leaks with a practical, step-by-step DIY guide for homeowners. Safety, tools, steps, testing, and maintenance to prevent future leaks.

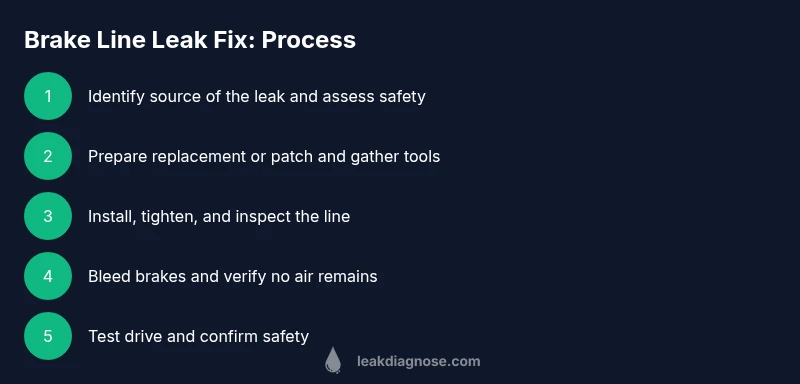
In this guide you’ll safely diagnose a brake line leak, secure the work area, choose a repair method, and verify the brake system is functioning before you drive. The plan covers PPE, tool prep, a clear sequence for the brake line leak fix, and a final safety check to ensure reliable braking.
Why brake line leaks happen
Brake systems rely on sealed lines and hydraulic pressure to deliver stopping power. A brake line leak fix begins with understanding how leaks occur. Common causes include corrosion at fittings, physical damage from road debris, improper routing that rubs against undercarriage, and worn or crushed lines where they bend. For homeowners tackling brake line leak fix, early detection matters. According to Leak Diagnosis, most leaks originate near rusty connections or where lines flex over the frame. Watch for wet patches under the vehicle, a soft or sinking brake pedal, or a distinct brake fluid smell. While some leaks are slow and can be repaired with careful tightening or a patch, more serious breaches require a full replacement of the affected run. Safety and time constraints mean you should assess whether you can perform a repair safely in your driveway or if professional help is warranted.
This section sets the stage for a practical, methodical repair. If you approach the task with patience and respect for the system’s hydraulics, you’ll reduce risk and improve outcomes. Remember, brake lines carry high pressure even when the engine is off, so never rush through the process. A careful, deliberate brake line leak fix is safer and more effective in the long run.
Safety first: PPE and environment
Before you touch any hydraulic lines, assemble PPE: safety glasses, gloves rated for chemical resistance, and long sleeves. Work in a well-ventilated area away from heat sources, and use a sturdy work surface. Brake fluid is a skin irritant and a potent solvent—avoid skin contact and clean any spills immediately with absorbent rags. Place wheel chocks, engage the parking brake, and ensure the car cannot roll. If you must lift the vehicle, use properly rated jack stands and never rely on the jack alone. Also, set aside a dedicated container for used brake fluid and dispose of it according to local regulations. These precautions reduce risk and create a safer environment for a brake line leak fix.
Safety isn’t optional here. Treat all brake fluid as hazardous waste and keep children and pets away from the workspace. Proper PPE and organization help prevent accidents and ensure you can focus on the repair.
Tools and materials for brake line leak fix
Have these essentials ready before you start a brake line leak fix:
- flare-nut wrenches (line wrenches) in the correct sizes for your brake lines
- a complete line replacement kit or copper-nickel brake line (depending on your vehicle)
- brake fluid (DOT 3 or DOT 4 as specified by your vehicle)
- brake cleaner and clean rags
- penetrating oil for stubborn fittings
- new fittings or clamps, as recommended by the kit
- brake line cutters and bending tool
- a bench vise or locking pliers for maintaining line shape
- protective gloves, safety glasses, and a painter’s mask
- a catch bottle for old fluid and a tray for spills
- a torque wrench for final fittings
Note: Only essential items are listed first; optional tools can speed up the job but are not strictly necessary for a basic repair. If you have a home garage with a hydraulic bleed kit, include it; otherwise, plan to borrow or rent specialized gear.
Diagnosing the leak: where and why
To perform a brake line leak fix, you must locate the exact source first. Look for visible corrosion, cracked lines, or leaks at fittings and joints. Gently wipe the line to reveal fresh fluid, then spot the exact location with a flashlight and UV dye if available. Leak Diagnosis analysis shows that corrosion at the fittings or near bends is a common cause of brake line leaks in older vehicles, so pay special attention to those areas. Once located, assess whether the line can be repaired with a patch or requires a full replacement. If the leak is at a welded joint or buried under components, consider professional service. This step informs your approach and prevents unnecessary work that could compromise safety.
Step-by-step repair procedure: preparing the system
Park on level ground and set the parking brake. If needed, loosen lug nuts slightly to allow wheel removal later. Lift the vehicle safely with a jack and support on jack stands. Remove any components obstructing access to the leak site and clean the surrounding area with brake cleaner. Inspect the line for corrosion and measure the damaged section if replacement is necessary. Prepare a straight, clean piece of replacement tubing or a patch kit, and ensure all fittings are clean and free of threads debris. The goal is to create a reliable, leak-free connection with minimal stress on the line.
Step-by-step repair procedure: replacing or patching
Disconnect the damaged section by loosening the flare-nut fittings with the correct line wrenches. Remove the compromised line segment carefully, avoiding bending the remaining sections. Install the replacement tubing or apply the patch kit according to the manufacturer’s instructions, ensuring clean threads and proper alignment. Tighten fittings gradually and verify that the line sits correctly without kinks or contact with moving components. This step is critical; a misaligned line or cross-threaded fitting can lead to new leaks or air ingress. Use a torque wrench to reach the recommended spec.
Bleeding the brake system after repair
Bleed the brake system to remove any air that entered during the repair, following your vehicle’s prescribed sequence. Maintain the master cylinder reservoir level to prevent air from re-entering the system. Use fresh brake fluid and dispose of any old fluid properly. If you’re bleeding in a driveway, have a helper press the brake pedal smoothly while you open and close the bleed screws in the correct order. Ensure the pedal feels firm before moving on to testing. Improper bleeding can leave air pockets that impair braking effectiveness.
Testing and road-worthiness
With the system bled and fluid topped up, start the engine and press the brake pedal to confirm a firm, consistent feel. Check for leaks at every joint and along the entire length of the repaired line after a few minutes of idling. Conduct a careful, slow road test in a safe area to confirm braking performance under light loads. If you notice any sponginess, vibrations, or continued leaks, stop and re-evaluate the repair. Thorough testing confirms the brake line leak fix and reduces the risk of a brake failure on the road.
Prevention and maintenance tips
Regular inspections are the best defense against brake line leaks. Look for signs of corrosion, fluid leaks, and worn clips or clamps during routine service. Replace aging lines before they fail and protect vulnerable sections with protective coverings where applicable. Keep brake fluid clean and at the recommended level to maintain hydraulic performance. When in doubt, consult your vehicle’s service manual or a certified mechanic. Authority sources provide further guidance and best practices for brake maintenance:
- Authority Sources:
- https://www.nhtsa.gov
- https://www.nist.gov
- https://nap.edu
The Leak Diagnosis team recommends using these practices to ensure a safe, durable brake line leak fix and ongoing brake-system reliability.
Tools & Materials
- flare-nut wrenches (line wrenches)(Sizes matched to your brake lines)
- replacement brake line or copper-nickel tubing(Length based on the damaged run)
- DOT 3 or DOT 4 brake fluid(As specified by your vehicle)
- brake cleaner(For degreasing and inspection)
- penetrating oil(Loosen stubborn fittings)
- replacement fittings or clamps(New hardware as needed)
- brake line cutters and bending tool(Optional but speeds up work)
- bench vise or locking pliers(Maintain line shape)
- protective gloves and safety glasses(Personal protection)
- catch bottle and tray(Collect old fluid)
- torque wrench(Torque to spec if available)
- jack and jack stands(Safe lifting and support)
Steps
Estimated time: 2-4 hours
- 1
Park and secure vehicle
Park on level ground and engage the parking brake. Use wheel chocks if you have them to prevent any movement while you work.
Tip: Double-check that all wheels are blocked before lifting. - 2
Wear PPE
Put on safety glasses and chemical-resistant gloves before handling brake fluid. Protect skin and eyes from splashes and fumes.
Tip: Brake fluid is corrosive; prioritize eye protection. - 3
Identify leak source
Inspect suspected lines with a flashlight, wipe area clean, and look for dampness or staining indicating the leak.
Tip: Use UV dye if available to pinpoint the leak. - 4
Prepare replacement material
If replacing, measure the damaged segment and cut the new tubing to fit, keeping bends smooth to avoid kinks.
Tip: Leave a little extra length for alignment adjustments. - 5
Disconnect damaged section
Loosen and remove the problematic section using flare-nut wrenches, supporting the line so it does not twist.
Tip: Support nearby lines to prevent accidental damage. - 6
Install replacement or patch
Fit the new tubing or patch kit, tighten fittings to spec, and confirm alignment away from hot components.
Tip: Check threads for debris before tightening. - 7
Bleed brakes
Bleed air from the system in the proper order, keeping the reservoir topped up to prevent air intake.
Tip: Use a helper to press the pedal smoothly. - 8
Test and tighten
With engine off, test pedal firmness and inspect for leaks; tighten any loose fittings if needed.
Tip: If pedal feels spongy, bleed again. - 9
Road test and finalize
Perform a slow, controlled test drive in a safe area to ensure braking performance is normal.
Tip: If you notice any issues, stop and reassess.
Questions & Answers
Can I fix a brake line leak myself?
Yes, for minor leaks with accessible lines and the right tools. More complex leaks near the engine bay or welded sections may require professional service. Always prioritize safety and avoid driving if you’re unsure.
Yes, you can fix some leaks yourself if the line is accessible and you have the right tools. If you’re unsure, seek professional help.
What tools do I need for a brake line leak fix?
A basic flare-nut wrench set, replacement line or patch kit, brake fluid, brake cleaner, and safety gear are essential. Depending on your vehicle, you may also need a tubing cutter and bending tool.
You’ll need flare-nut wrenches, replacement tubing or patch kit, brake fluid, and safety gear.
Is it safe to drive with a brake line leak?
No. A brake line leak is a serious safety risk and should not be driven on. If you suspect a leak, address it immediately or arrange for towing.
No, it's not safe to drive with a brake line leak. Get it fixed or towed.
How do I know the leak is fixed after repair?
Recheck for leaks after repair, bleed the system, and perform a controlled road test in a safe area. If any dampness returns, reassess the nearby joints and fittings.
Check for leaks again and test the brakes in a safe area.
Should I replace the entire brake line or patch?
If the line is severely corroded or cracked, replacing the section is recommended. Patching is generally only for small, localized damage and temporary fixes.
Replace the line if corrosion is extensive; patches are for small issues.
What maintenance can prevent brake line leaks?
Regular visual inspections, addressing rust early, and using protective coatings or routing to avoid road debris can help prevent leaks.
Inspect for rust, keep lines routed away from sharp edges, and address wear early.
Watch Video
Main Points
- Identify leak sources accurately before disassembly
- Use proper tools and PPE to maintain safety
- Bleed the system thoroughly to remove air
- Test the system carefully after repair
- Prevent future leaks with proactive maintenance