Automotive Leak Repair: A Homeowner’s DIY Guide
Learn how to diagnose and safely fix common automotive leaks at home. This step-by-step guide covers tools, safety, and when to call a pro for engine oil, coolant, transmission, and fuel leaks.

Your goal is automotive leak repair: identify the leak source, assess safety, and complete a safe, basic fix or arrange professional service for tougher problems. Start by inspecting the engine bay, coolant reservoir, transmission pan, and fuel lines for fresh liquid, staining, or unusual odors. This article guides you through a practical diagnostic workflow and when to DIY versus call a mechanic.
Why automotive leak repair matters
Leaks in a vehicle are more than a mess under the car; they signal systems under strain and can escalate quickly. Left unaddressed, coolant leaks can lead to overheating, oil leaks can degrade gaskets and seals, and fuel leaks pose serious fire hazards. Fluid loss also harms fuel economy and can cause environmental damage. For homeowners and DIY enthusiasts, addressing leaks promptly saves money and protects the engine.
According to Leak Diagnosis, addressing leaks early protects your engine and wallet. Regular inspections during routine maintenance catch minor seepage before it becomes a larger problem. This article provides practical, safety-first steps you can take at home, with clear signs that indicate when professional service is required. By understanding sources, you prioritize fixes, manage costs, and extend component life.
Common types of automotive leaks and how to identify them
Vehicles can leak from many places, and identifying the source is the first step in automotive leak repair. Oil leaks often trace to valve covers, oil pans, or gaskets; coolant leaks come from hoses, radiators, or the reservoir; transmission fluid leaks may originate from seals or pans; fuel leaks signal a risk and require immediate attention.
Oil leaks typically appear as dark, viscous stains under the engine or along engine components. Coolant leaks look like bright-green or orange fluids that leave a slime trail or puddle. Transmission fluid leaks are usually red or amber and can show near the transmission pan or cooler lines. Fuel leaks have a distinct gasoline odor and may pool around fuel lines or the tank. Power steering and brake fluid leaks have their own color signatures and locations—watch for soft, damp spots near hoses and fittings. When you notice any of these signs, slow down driving, park safely, and begin a careful inspection.
Leak sources can be persistent or intermittent. Small leaks from hose clamps or fittings are often manageable at home with proper tools, while larger leaks from gaskets, lines, or the fuel system typically require professional attention. Always assess risk: fuel, oil, and coolant leaks can create safety hazards, so prioritize shutdown, cooling down, and ventilation before continuing.
Safety first: hazards and precautions
Before touching any vehicle, prioritize your safety. Always work on a cold engine and in a well-ventilated area. Wear gloves and eye protection, and keep a dry, clean workspace to avoid slips. If you detect a fuel leak, avoid any ignition sources and consider moving the vehicle to a safe area away from buildings and vehicles. Never open the radiator cap or coolant reservoir while the engine is hot, as pressurized coolant can cause severe burns. Disconnect the battery if you are working near electrical components and consider using a portable, non-sparking light when inspecting in tight spaces. Dispose of any contaminated rags properly and keep fluids in appropriate containers to prevent environmental damage.
For the homeowner, it’s essential to know your own limits. If you are unsure about the leak type or the risk involved, or if the leak involves fuel or the cooling system, seek professional help. The Leak Diagnosis team emphasizes safety as the top priority in any automotive leak repair project.
Tools and materials you’ll need
Successful automotive leak repair starts with the right tools and a plan. Gather your materials before you begin to avoid mid-task trips to the hardware store. A well-prepared workshop will help you identify and address leaks more efficiently.
- Drain pan or basin: to catch leaking fluid without creating a mess
- Flashlight or portable work light: to clearly view hard-to-see engine areas
- Wrench set (metric and SAE): for clamps and bolts
- Screwdrivers (flathead and Phillips): for hose clamps and covers
- Pliers and adjustable wrench: to loosen and tighten fittings; keep pliers handy for hose removal
- Rags or shop towels: for quick cleanups and wipe-downs
- Catch tray and absorbent pads: for undercarriage work and spill containment
- Safety gear: gloves, eye protection, and a mask if fumes are present
- Optional: UV dye kit and UV flashlight: to trace leaks more clearly
- Stop-leak products (caution): use only as a temporary measure and follow manufacturer warnings
Diagnostic workflow: locating leaks
A systematic approach helps you pinpoint the leak without unnecessary disassembly. Start with the most common sources based on the vehicle’s symptoms and fluid color. Inspect the engine bay for fresh oil around the valve covers, oil pan, and gaskets. Check the radiator, hoses, water pump, and coolant reservoir for bright fluid traces. Look under the vehicle at the transmission pan, lines, and seals for reddish fluid. If you suspect the fuel system, inspect fuel lines, injectors, and the tank area for dampness or a strong odor. For power steering or brake fluid leaks, examine the appropriate reservoir and lines.
Create a tight inspection routine: work from the top of the engine down, scan the undercarriage for drips, and note any wet spots or crusty residues. Document the color and location of any fluid you find. If you identify the source as a hose or clamp, you can often address the leak directly. For suspected gasket or internal seal failures, or for any fuel-related leak, plan a professional assessment to prevent fire risk or catastrophic engine damage.
Safety smart fixes: temporary and permanent options
Some automotive leaks can be addressed with practical, safe DIY fixes. Tightening a loose hose clamp, replacing a damaged hose, or resealing a small gasket can stop minor leaks. However, avoid attempting major disassembly or repairs beyond your competence level. For coolant leaks, ensure you mix the correct coolant type and avoid introducing contaminants into the cooling system. If you discover an active fuel, oil, or coolant leak, or if the leak persists after a simple fix, reduce driving and arrange professional service promptly to avoid engine damage or safety hazards.
DIY fixes: when to proceed and when to pause
If you are confident in your repair skills, start with noninvasive fixes like tightening clamps and replacing damaged hoses. Always use manufacturer-approved parts and torque specifications. After completing any repair, clean the area, start the engine, and monitor for new leaks. If new leaks appear or if the repair does not hold, stop driving and seek professional inspection. Keep detailed notes and photos of the area before and after the repair to assist a technician. Remember: a temporary fix is not a replacement for a proper repair performed by a qualified technician.
Do-it-now maintenance: prevent leaks from forming again
Preventive maintenance reduces the likelihood of leaks returning. Regularly inspect hoses, clamps, and gaskets; replace aging hoses before failure; use the proper coolant type and maintain proper coolant levels; check for cracks around the radiator and reservoir caps. Schedule routine oil changes and transmission service according to the manufacturer’s guidelines. Keeping the engine clean helps you spot early signs of leaks, and maintaining clean, secure connections makes future diagnostics faster and cheaper.
When to call a professional: signs you need expert help
Some leaks demand professional attention. If you notice fuel or coolant smells, a persistent leak despite a DIY fix, or signs of engine overheating, contact a mechanic promptly. Transmission fluid leaks or suspicious noise from the area around the engine indicate potential internal issues that require a trained technician and specialized tools. The Leak Diagnosis team recommends seeking professional help when the risk to safety or engine integrity is uncertain, or when the repair involves critical systems.
Maintenance plan: creating a leak-preventive routine
Develop a simple maintenance plan focused on systems most prone to leaks. Schedule annual checks of hoses, seals, and gaskets; replace worn clamps; monitor oil and coolant levels weekly for a month after any repair; keep a fluid-top-off schedule and verify the transmission and power steering fluids are at the correct levels. This proactive approach helps catch leaks early and minimizes costly downtime.
Tools & Materials
- Drain pan(Plastic or metal; 12x18 inches minimum)
- Flashlight(LED with good battery life)
- Wrench set(Metric and SAE; include 6-13 mm range)
- Screwdrivers(Flathead and Phillips)
- Pliers(Needle-nose and slip-jjoint; keep spare pads handy)
- Rags or towels(Absorbent, lint-free if possible)
- Catch tray/absorbent pads(For undercarriage work and spills)
- Safety gear(Gloves, safety glasses; mask if fumes present)
- UV dye kit (optional)(For tracing leaks with UV light)
- Stop-leak products (optional)(Only as temporary measure per manufacturer)
Steps
Estimated time: 2-3 hours
- 1
Prepare safely
Power down the engine and let it cool. Put on gloves and eye protection, secure the vehicle, and open a well-lit workspace. This step reduces burn risk and makes inspection easier.
Tip: Never inspect a hot engine or pressurized cooling system without allowing it to cool. - 2
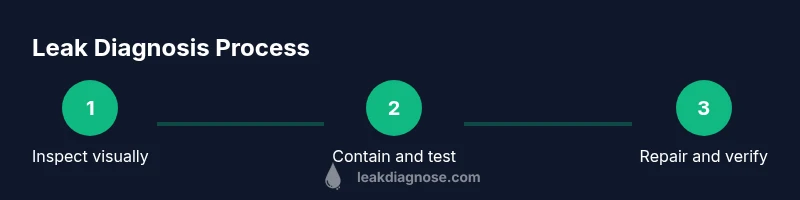
Inspect for obvious signs
With the engine off, visually inspect the engine bay and undercarriage. Look for fresh fluid on hoses, seals, the oil pan, radiator, and transmission area. Note color, location, and odor to guide the next steps.
Tip: Take photos from multiple angles to document the leak prior to any repair. - 3
Contain and prepare to test
Place a drain pan or absorbent pads under suspected areas. If the car must be moved, secure it and avoid running the engine until you confirm the source and compatibility of any tools or parts.
Tip: Containment prevents additional spills and makes leak tracing cleaner. - 4
Perform a targeted test
Revisit the suspect area and, if safe, run the engine briefly or perform a coolant pressure check to observe whether the leak reappears. Use a UV dye to help locate seepage if the source isn’t obvious.
Tip: Do not run an engine without cap, hoses, or necessary safety precautions. - 5
Apply a temporary fix if feasible
For minor hose or clamp leaks, tighten or replace the clamp, reseat the hose, and clean the area. Avoid extensive repairs unless you have the correct parts and torque specs.
Tip: A temporary fix is not a substitute for a proper repair. - 6
Verify fix and plan next steps
Run the engine again and monitor for a sustained leak. If the leak persists or affects critical systems (fuel, coolant, oil), schedule professional service promptly.
Tip: Record the residual issue with notes for your technician.
Questions & Answers
What should I do first if I notice a leak under my car?
Pull over safely, turn off the engine, and inspect the leak from a distance. Note color, location, and odor, and avoid driving if fuel or coolant leaks are suspected.
Safely pull over and turn off the engine. Check the color and location of the leak, and avoid driving if fuel or coolant leaks are suspected.
Can I fix leaks myself, and when should I call a pro?
Small hose or clamp leaks are often doable at home if you have the right tools and parts. Major gasket failures, fuel or coolant system leaks, or leaks near critical components should be handled by a professional.
You can handle minor hose leaks at home, but for fuel or coolant leaks or major failures, call a mechanic.
Are stop-leak products safe for DIY repairs?
Stop-leak products may provide a temporary patch but are not a long-term fix and can clog passages or damage components. Use them only as a short-term measure and follow manufacturer guidance.
Stop-leak products are usually temporary and can cause other problems, so use them cautiously and not as a lasting fix.
How long does a typical leak repair take?
Time varies by leak type and parts required. Simple hose clamp fixes can be done in under an hour, while deeper gasket or line work may take several hours or require shop service.
Repair time depends on the leak; quick hose fixes can be fast, but major repairs take longer and might need a shop.
What maintenance helps prevent leaks?
Regular hose and seal inspections, timely coolant changes, oil changes per schedule, and keeping lines clean and secure are key to preventing leaks.
Regular inspections and scheduled maintenance help keep leaks from forming.
Should I drive my car if I suspect a leak?
If you suspect a fuel or coolant leak, avoid driving; pull over safely and have the vehicle towed or serviced. Oil leaks may allow continued driving but monitor levels closely and seek repair soon.
Don't drive if you suspect a fuel or coolant leak; oil leaks may be drivable briefly, but get it checked soon.
Watch Video
Main Points
- Identify leaks early to prevent engine damage.
- Different fluids signal different leak sources; oils, coolants, and fuels require distinct fixes.
- Prioritize safety; fuel leaks demand immediate professional attention.
- A DIY fix is feasible for minor hose/clamp leaks; major gasket or line failures typically require a pro.